The Complete Guide to Modern, Eco-friendly Kitchen Extensions

This guide will take you through the complete process of planning and implementing a kitchen extension project, with the added advantage of making your home more sustainable.

Section 1: The Need for Kitchen Extensions in Modern Lifestyles

Our fast-paced modern lifestyles necessitate homes that mirror this dynamism and provide spaces that are comfortable, efficient, and well-integrated. Traditional housing often doesn’t offer these attributes – specifically in the kitchen area – leading many homeowners to consider the prospect of kitchen extensions. Given the kitchen’s central role in a home, improving it can enhance your entire living space’s overall appeal and functionality.

A rear return kitchen extension in Kensal Rise by RISE Design Studio
A rear kitchen extension in Kensal Rise by RISE Design Studio

Section 2: Common Kitchen Extension Options

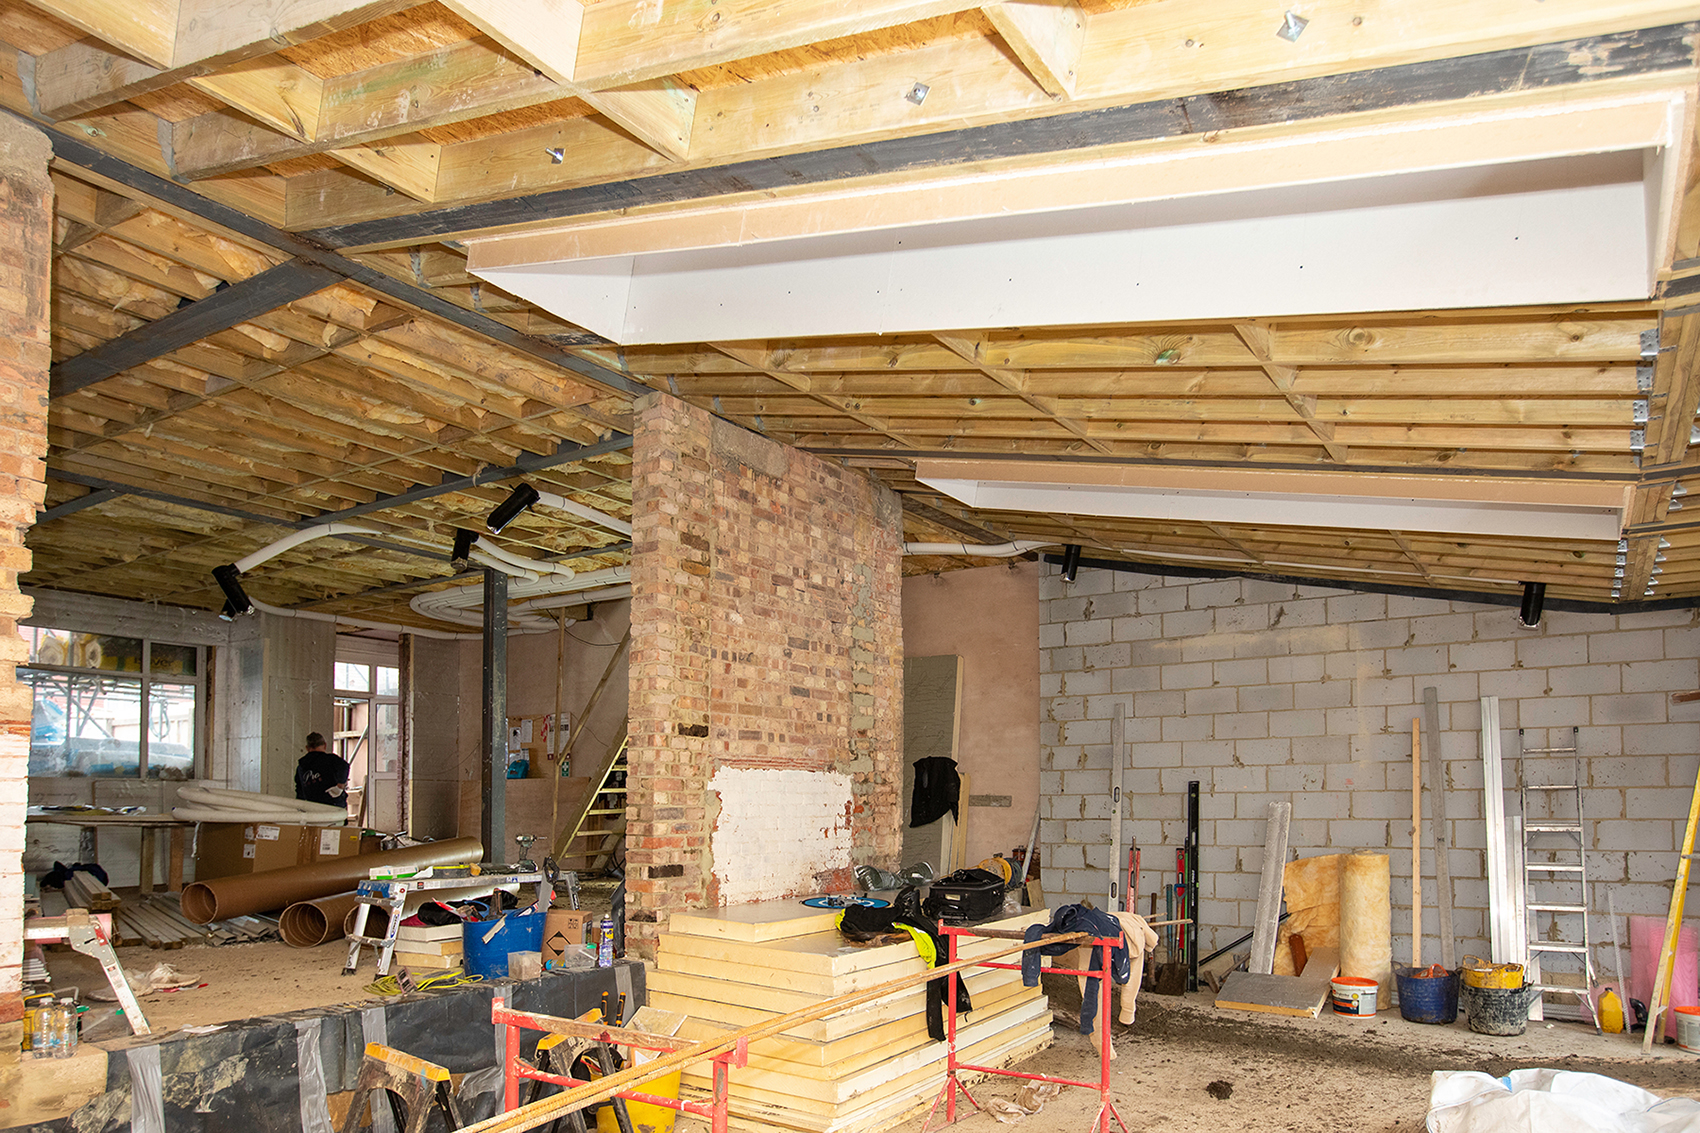
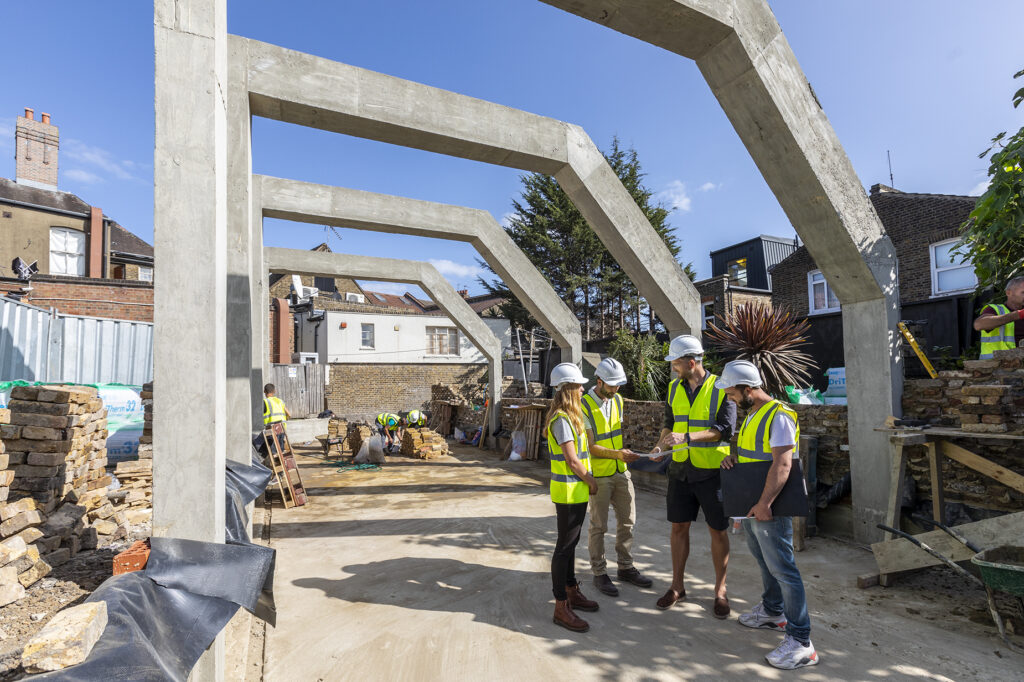
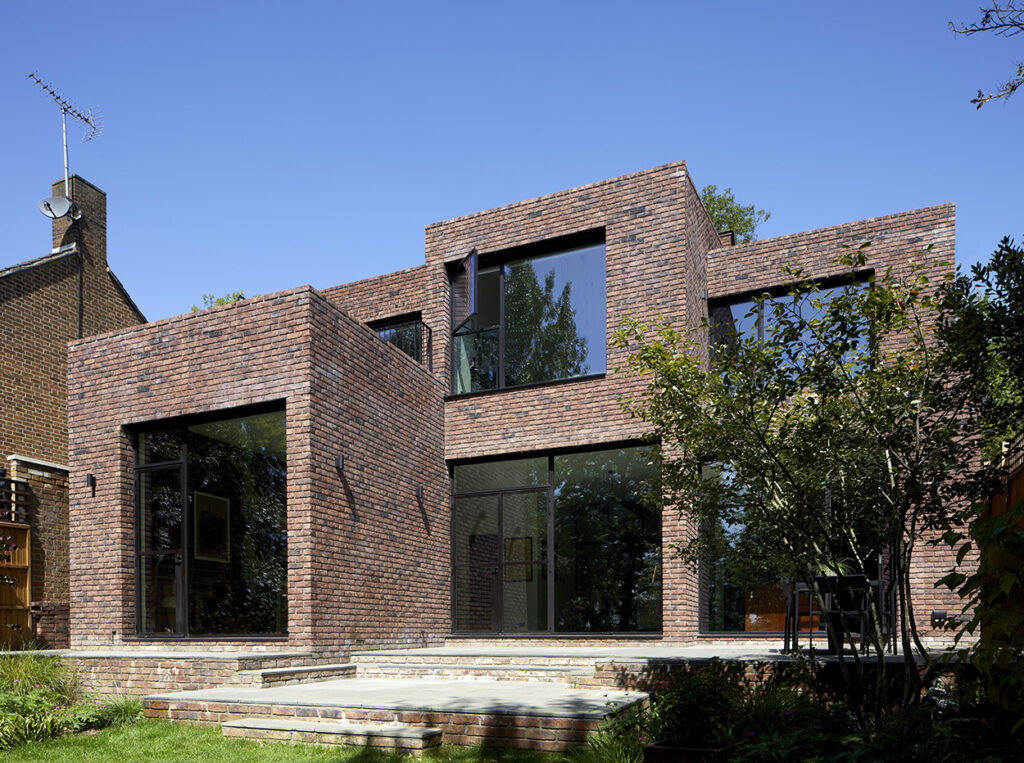
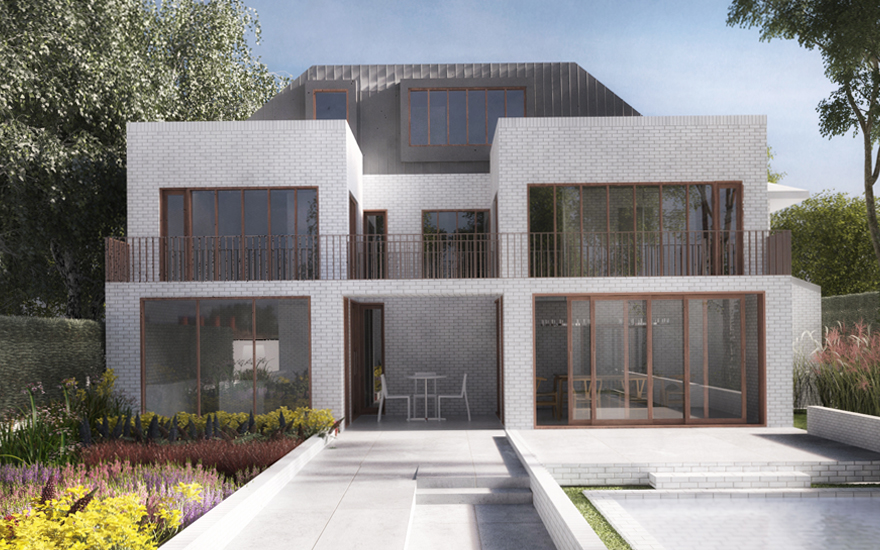
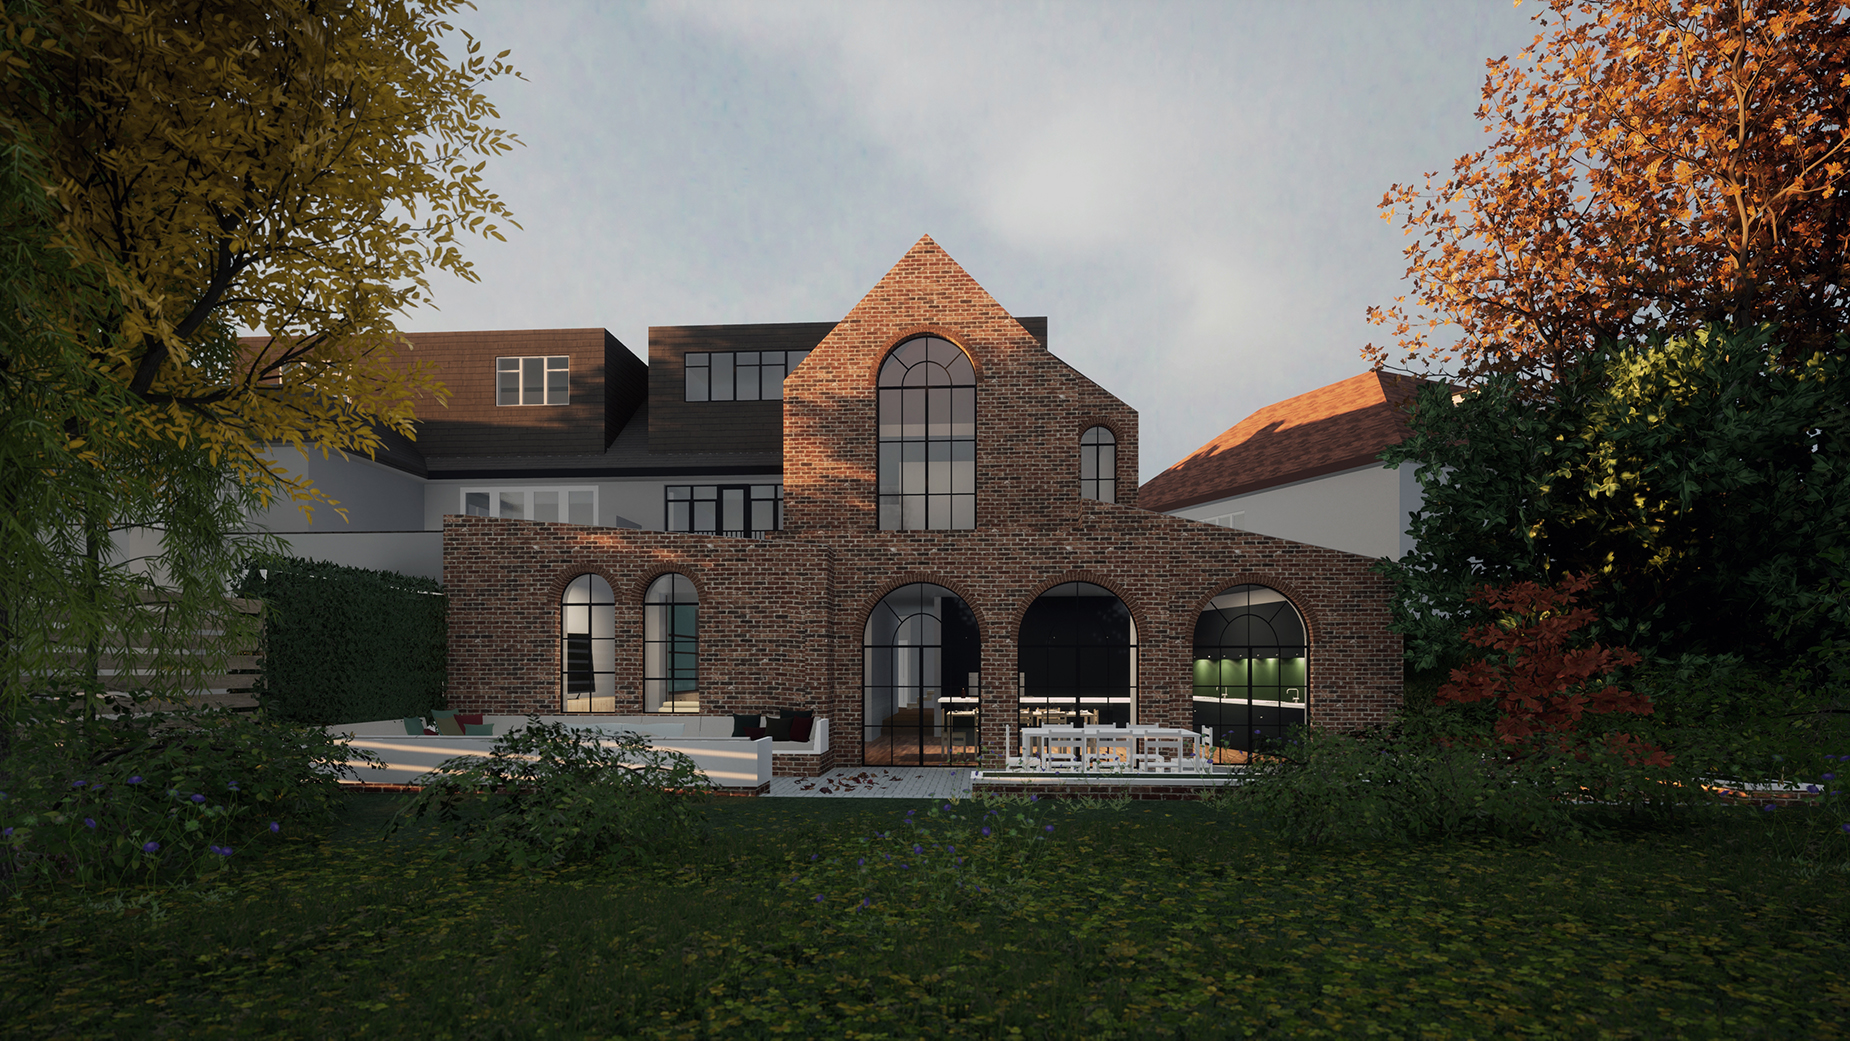
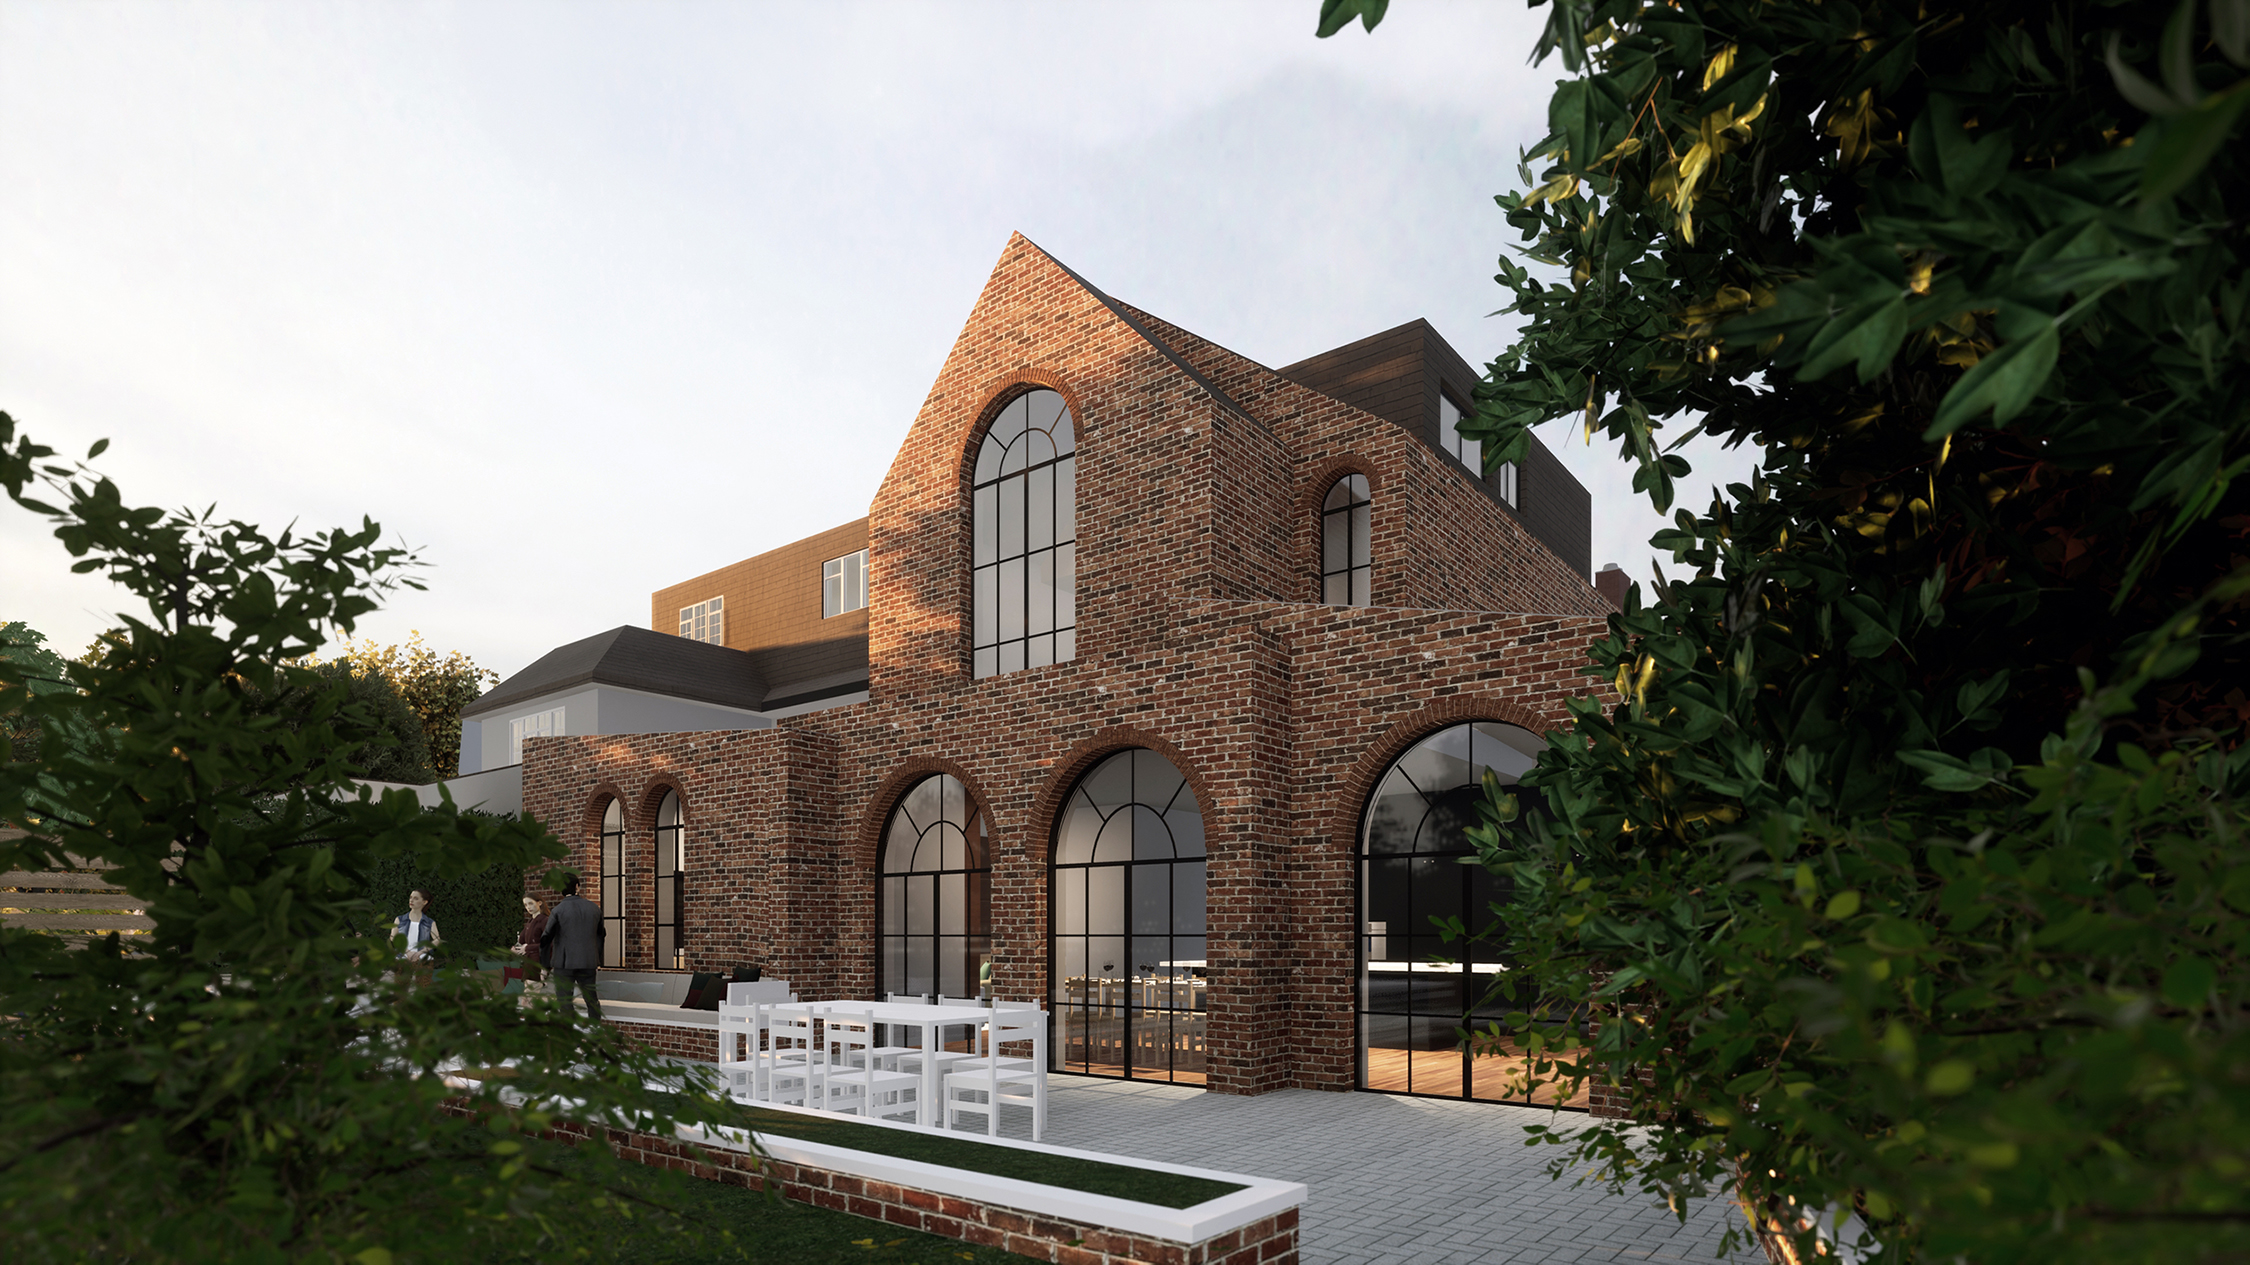
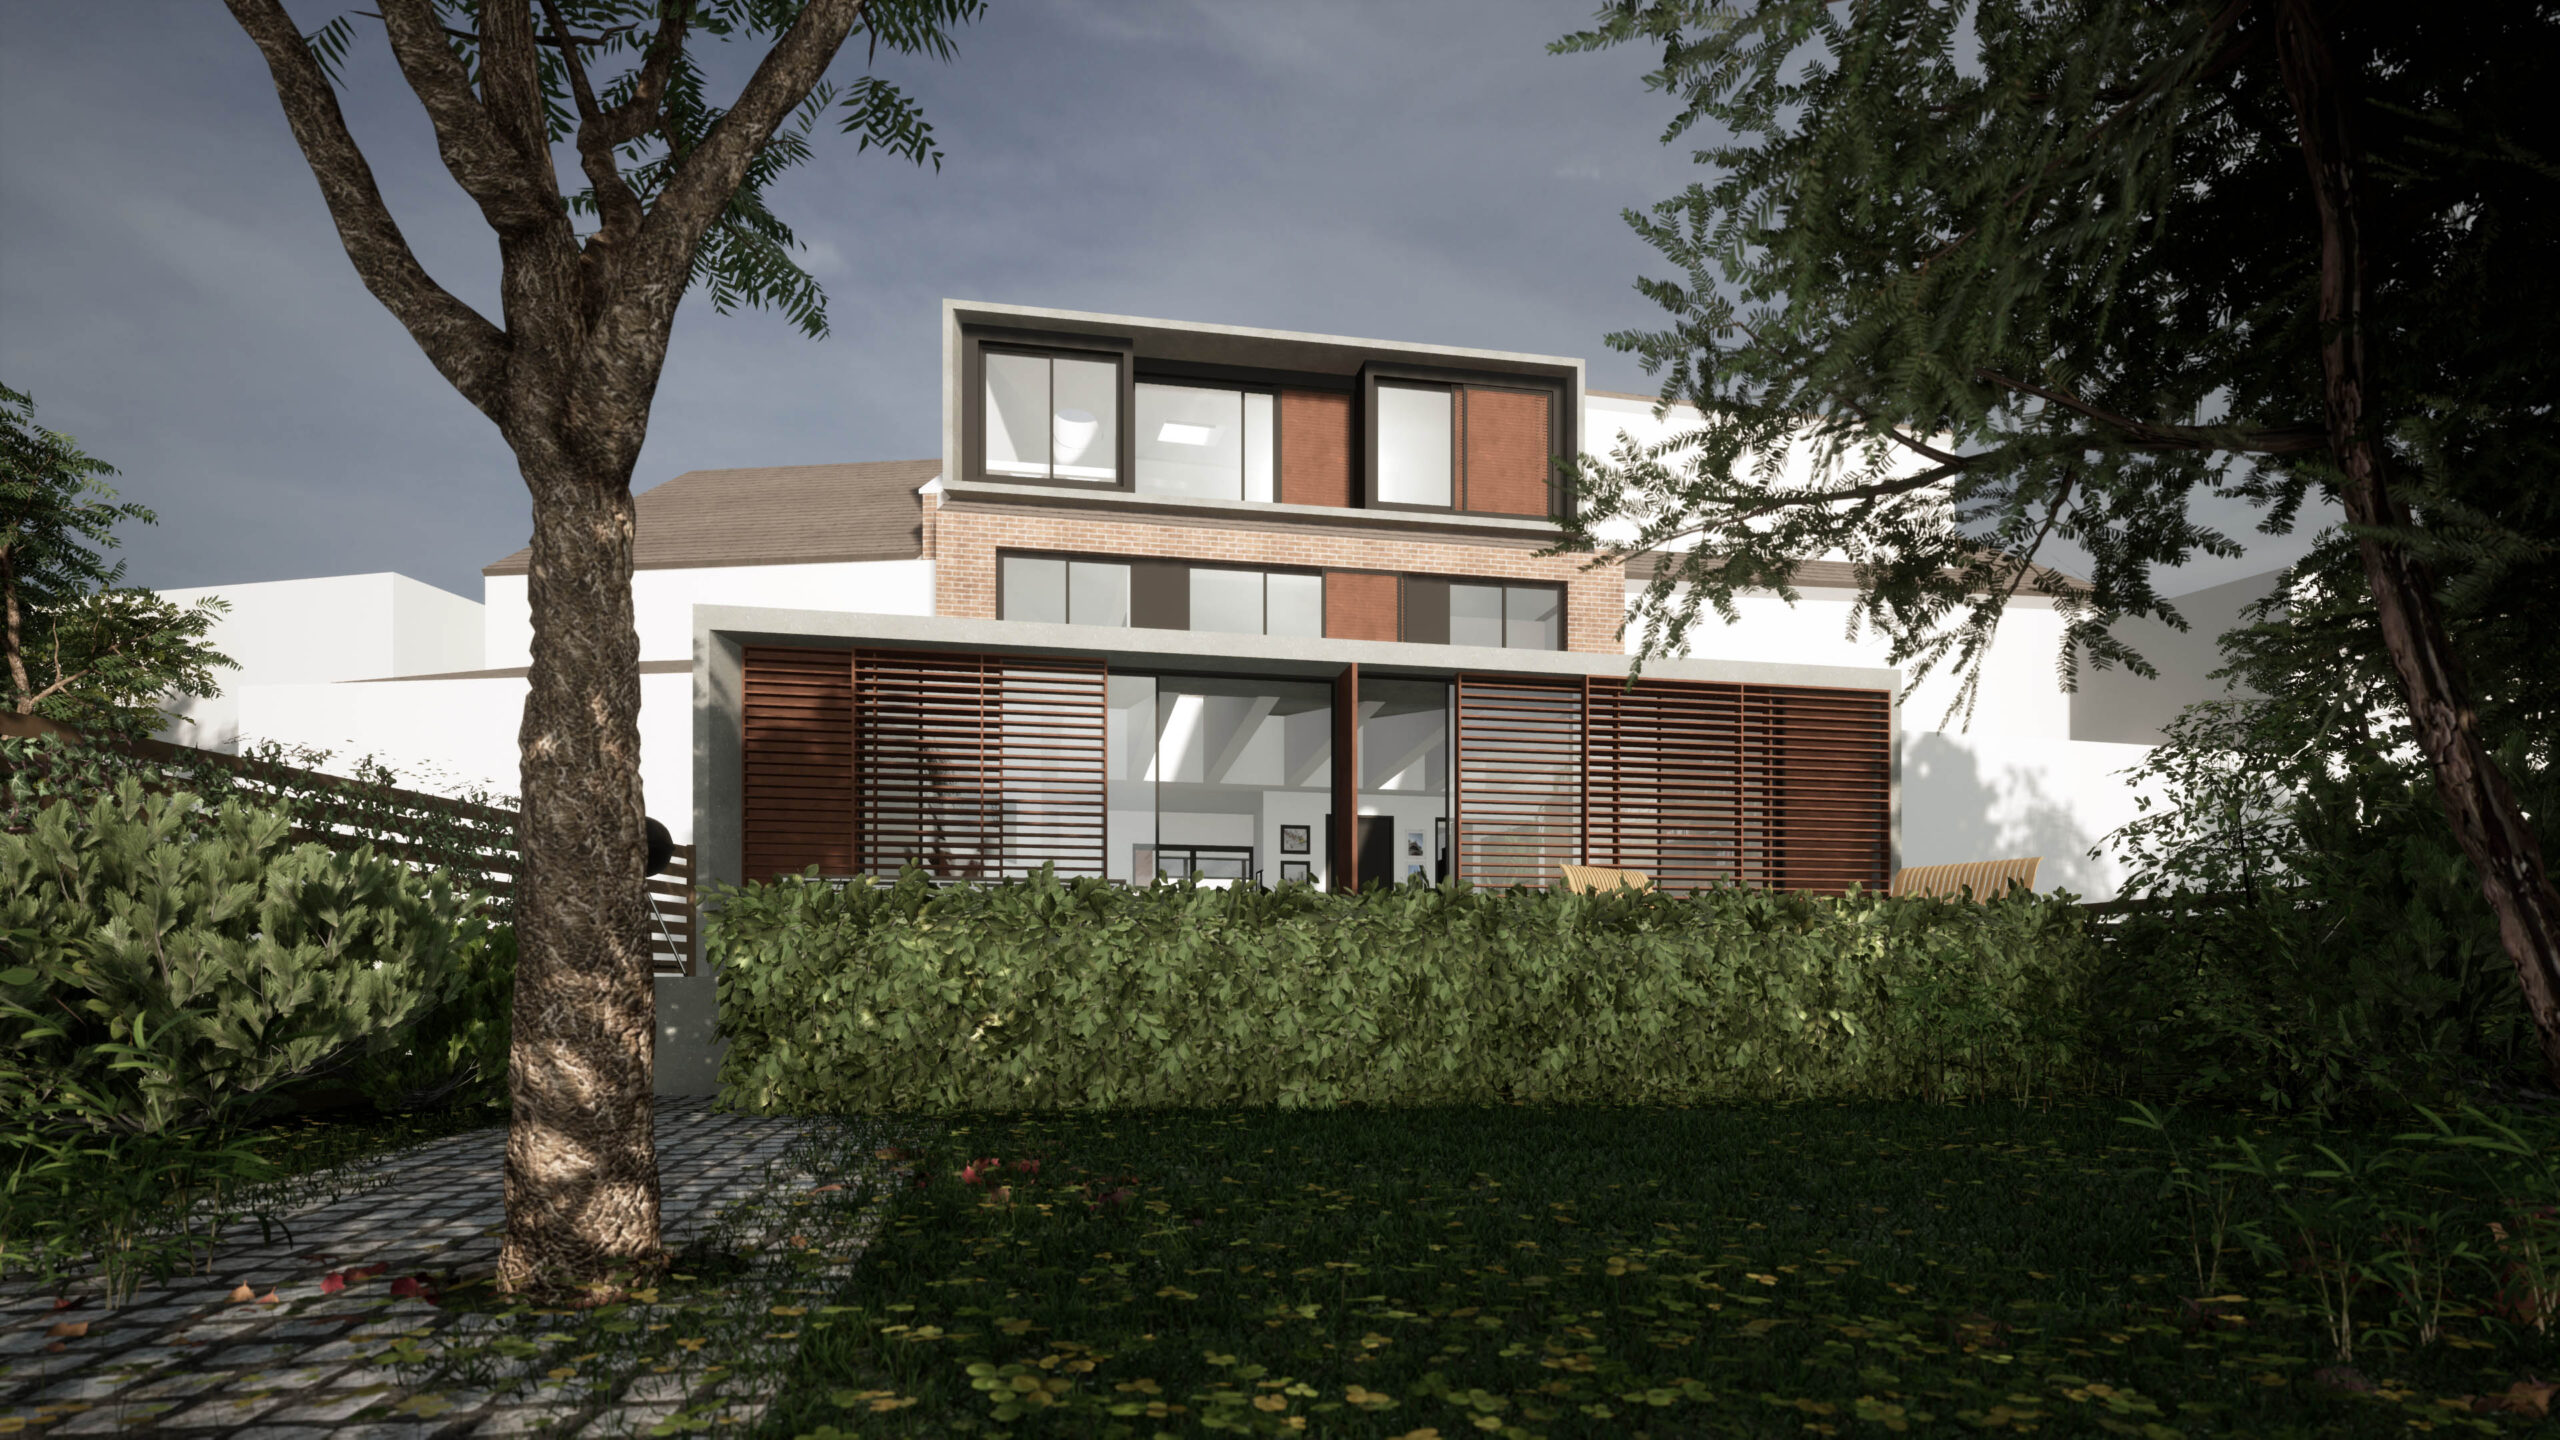
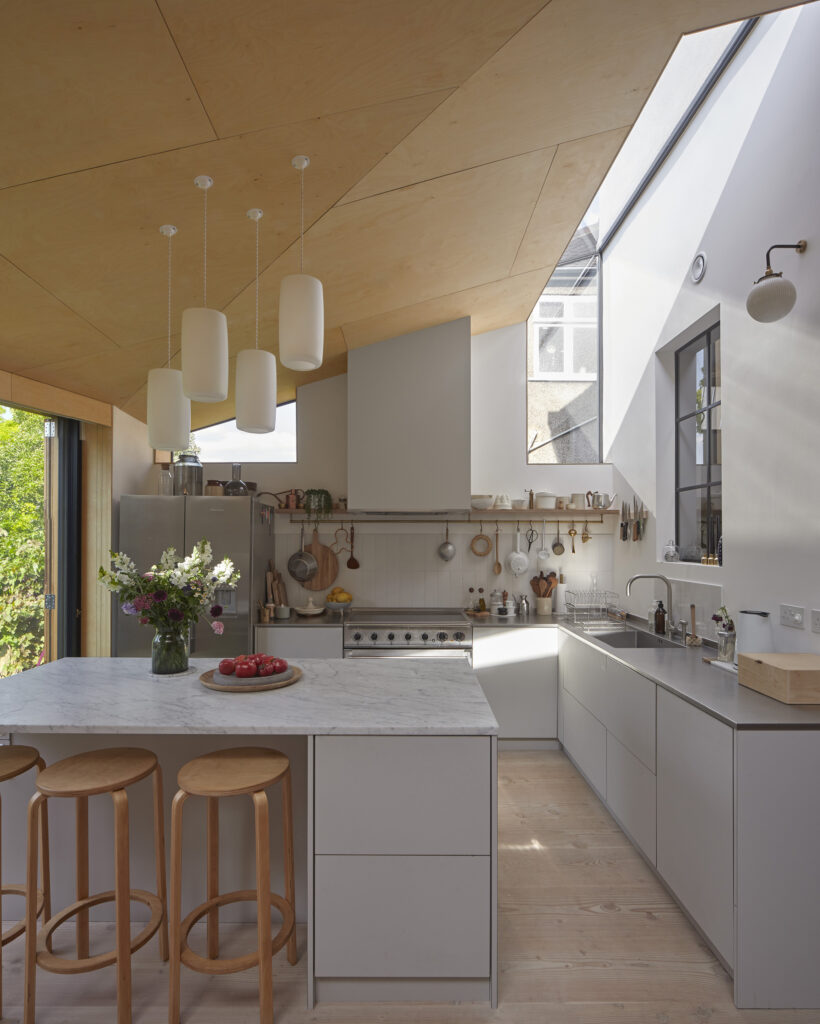
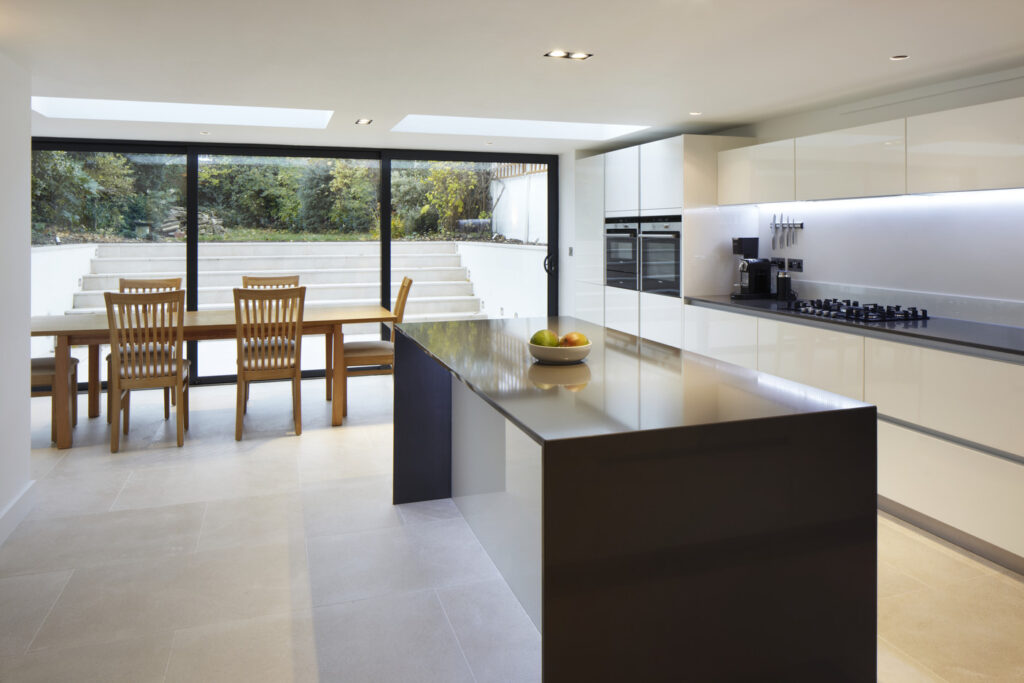
There are several ways to expand a kitchen based on the existing layout and structure of your home. Some popular methods include creating an open-plan kitchen by removing internal walls, extending into the side return, extending to the rear, or creating a double-height space.

For homes with Victorian or Georgian architecture featuring a lower ground and raised ground floor layout, consider the practicality and accessibility of your kitchen. For instance, you might choose to locate the kitchen on the raised ground floor for better street access at the front or on the lower ground floor for easy access to the garden at the rear.

A side and rear return contemporary kitchen extension in Kensal Green by RISE Design Studio

Section 3: The Financial Implications of Kitchen Extensions

Kitchen extensions, particularly in London and the South East, typically cost between £2,200-3,100 per square metre, but prices can fluctuate depending on the complexity and quality of the kitchen fit-out. You can expect a simple kitchen fit-out, including appliances and services, to start at around £17,000, with premium options costing upwards of £65,000.

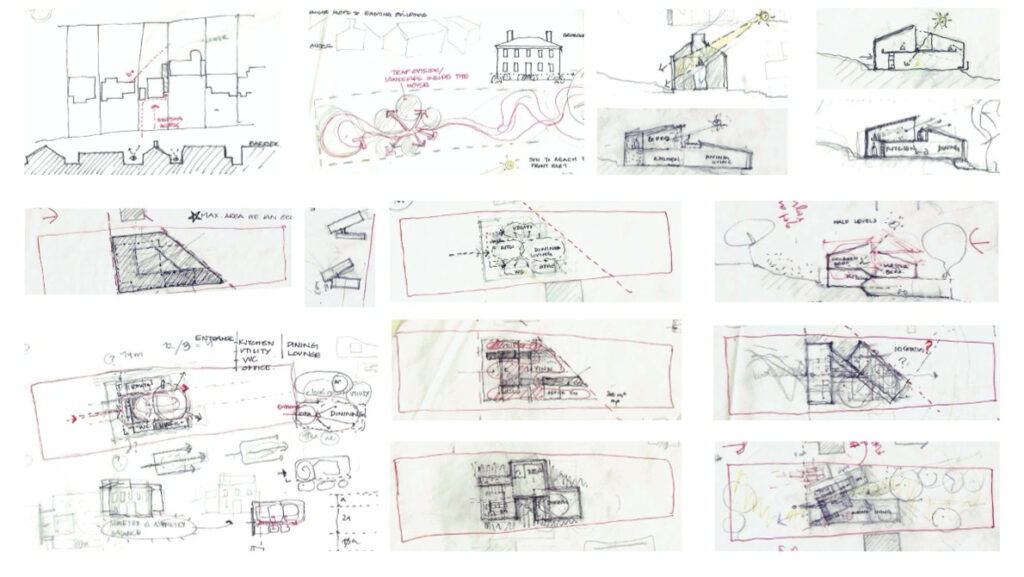
Section 4: Outline Design Considerations for Your Kitchen Extension

Before embarking on your kitchen extension, it’s essential to plan. Think about what works well in your current kitchen and what doesn’t, and consider how you and your family move within this space.

Will a single bank of units be sufficient, or would a galley kitchen be more practical? How many people typically use the kitchen at once? Would a peninsula or island work well in your new space? These are all important factors to ponder when conceptualising your new kitchen design.

A contemporary kitchen in a new build house in Mill Hill by RISE Design Studio
A contemporary kitchen for a new build house in Mill Hill by RISE Design Studio

Section 5: Detailed Design Considerations

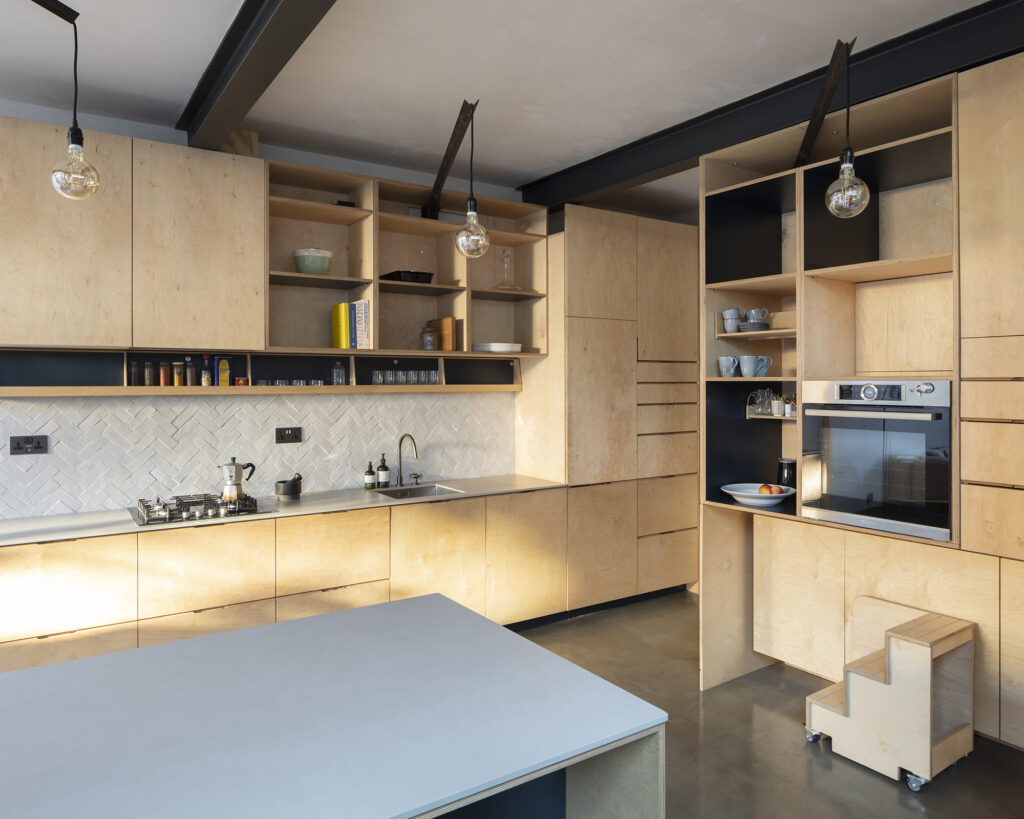
On top of the primary outline design considerations, there are finer details to take into account as well. These involve storage solutions, appliance placement, and the overall aesthetics of your new kitchen.

You might consider electrical sockets in a cupboard to hide appliances or integrating storage devices to make awkward corner cupboards easier to use. Perhaps you require built-in wine storage or charging points for electronics. Tailoring these details to your specific needs and preferences can greatly enhance the functionality and enjoyment of your new kitchen.

A rear lower ground floor kitchen extension in Stockwell by RISE Design Studio

Section 6: Choosing the Right Installer for Your Kitchen Extension

There are numerous options when it comes to installing your kitchen extension. From off-the-shelf options like B&Q, Wickes, Howdens, IKEA, and online companies such as diy-kitchens.com to specialist kitchen companies like deVol and Bulthaup, there’s a choice for every budget and requirement.

If you’re seeking a truly unique kitchen design, a bespoke solution from a skilled joiner might be the best route. They can work to your exact requirements, ensuring your new kitchen fits seamlessly with the rest of your home.

A double-height rear kitchen extension in Willesden by RISE Design Studio

Section 7: Deciding on Appliances

Appliances play a crucial role in the functionality and efficiency of your kitchen. Whether you’re reusing existing appliances or purchasing new ones, it’s vital to choose options that align with your lifestyle, space, and energy consumption goals.

From ovens to hobs, fridges to freezers, and even boiling water taps or drawer-type dishwashers, appliances come in all shapes and sizes. Always consider the energy rating of your chosen appliances as this can significantly affect your running costs and overall home’s energy efficiency.

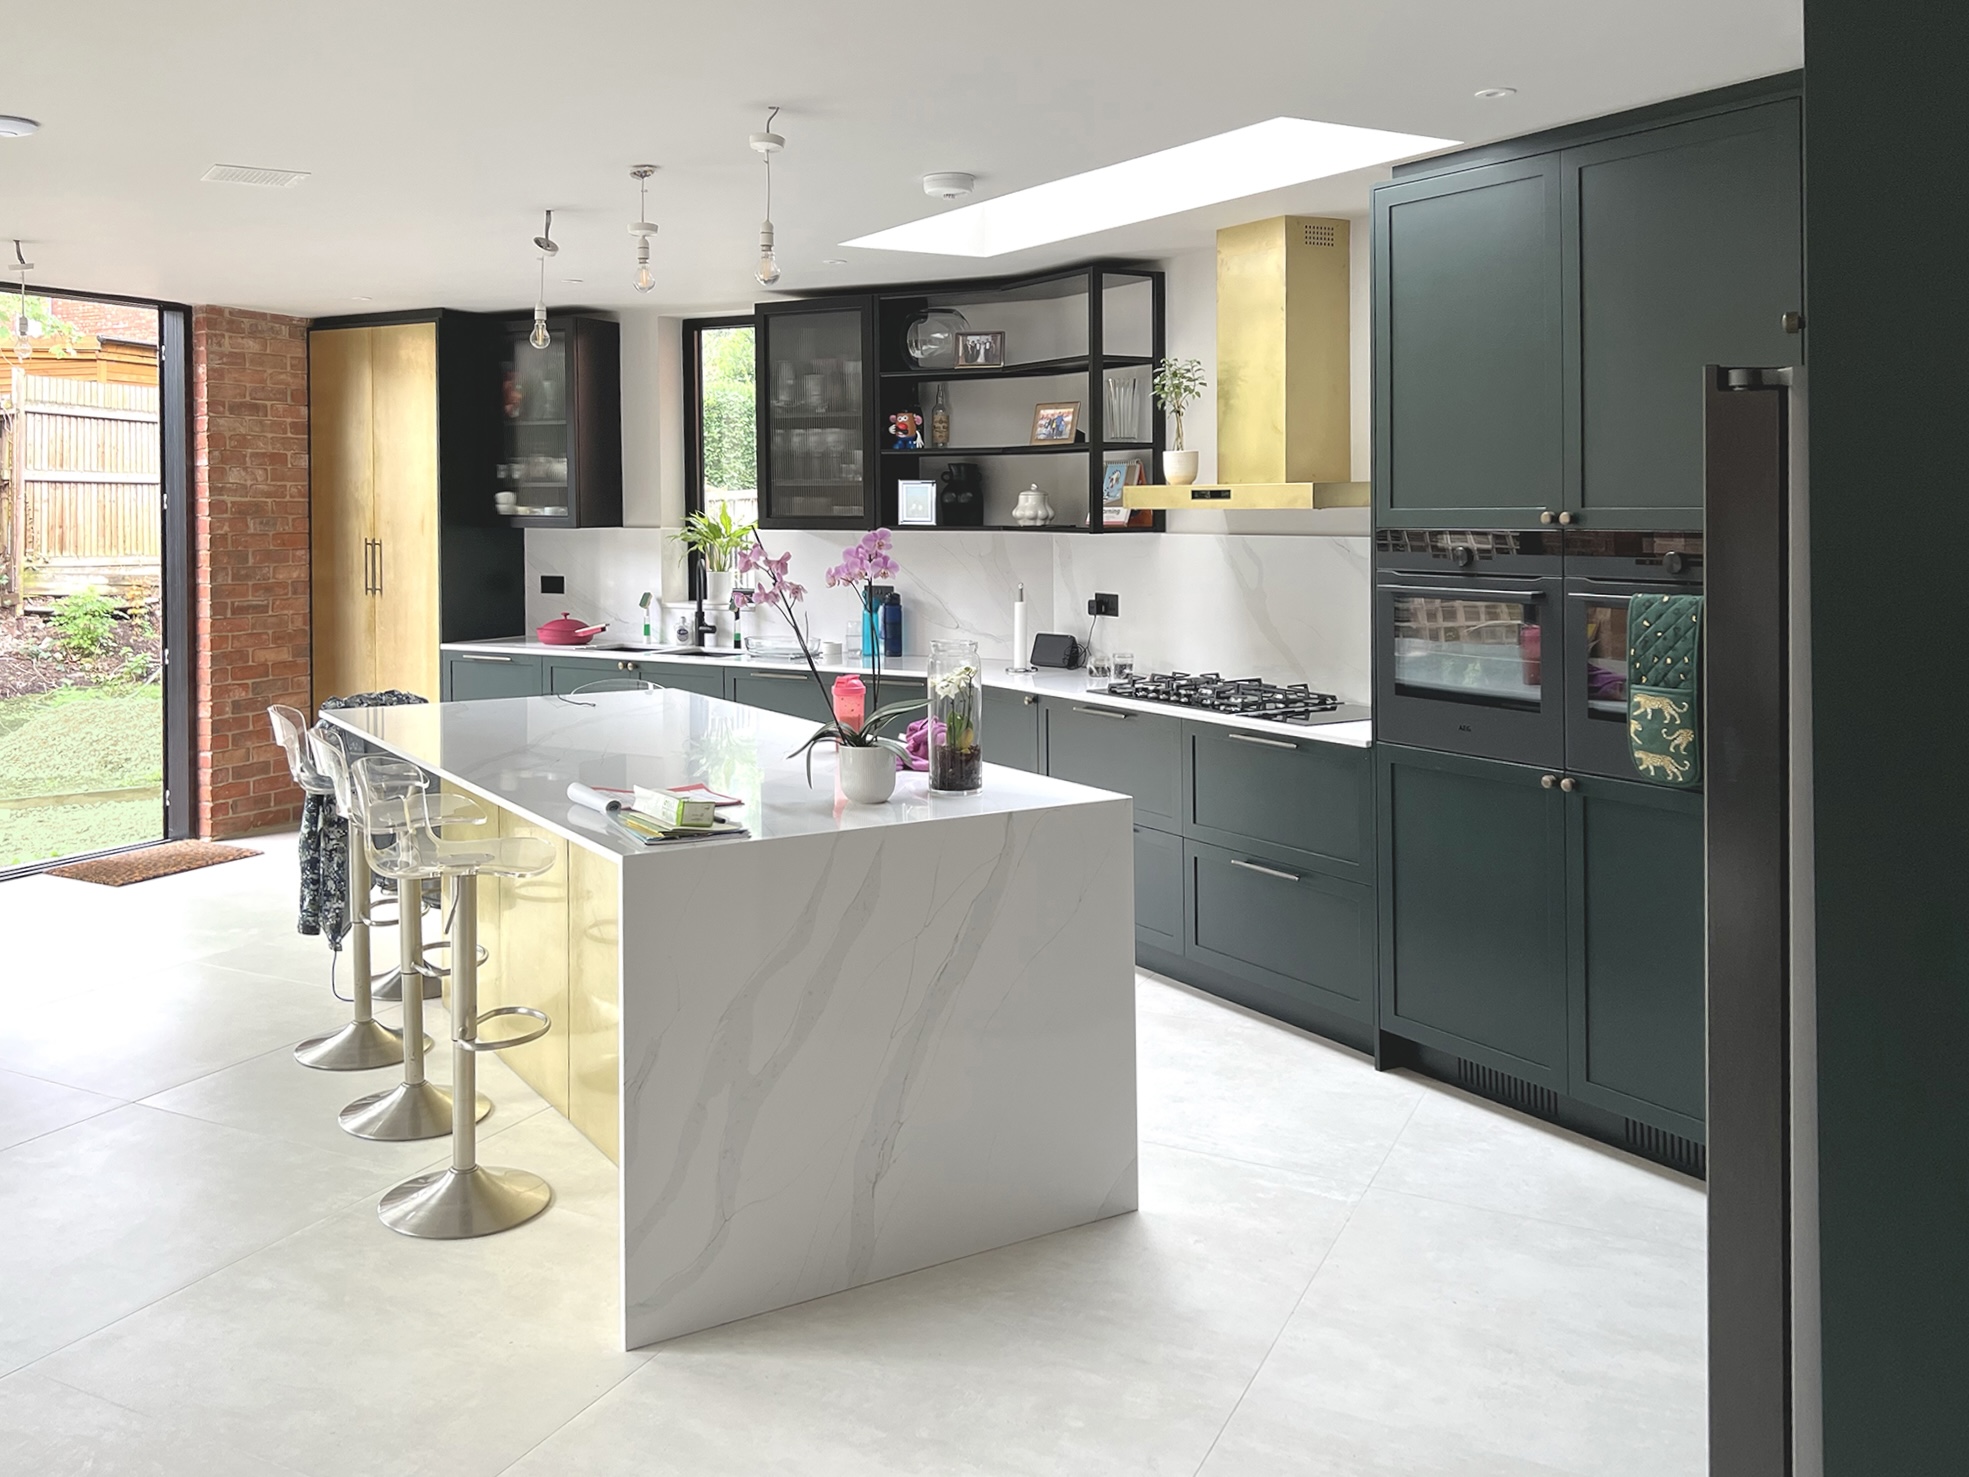
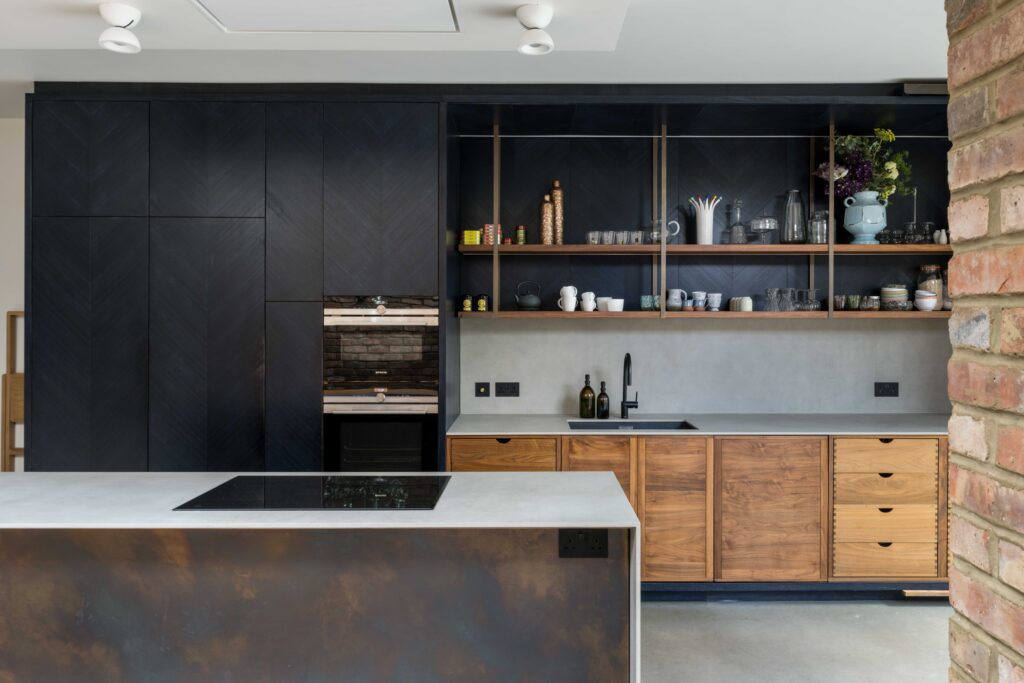
Section 8: Worktops, Splashbacks and Cupboard Finishes

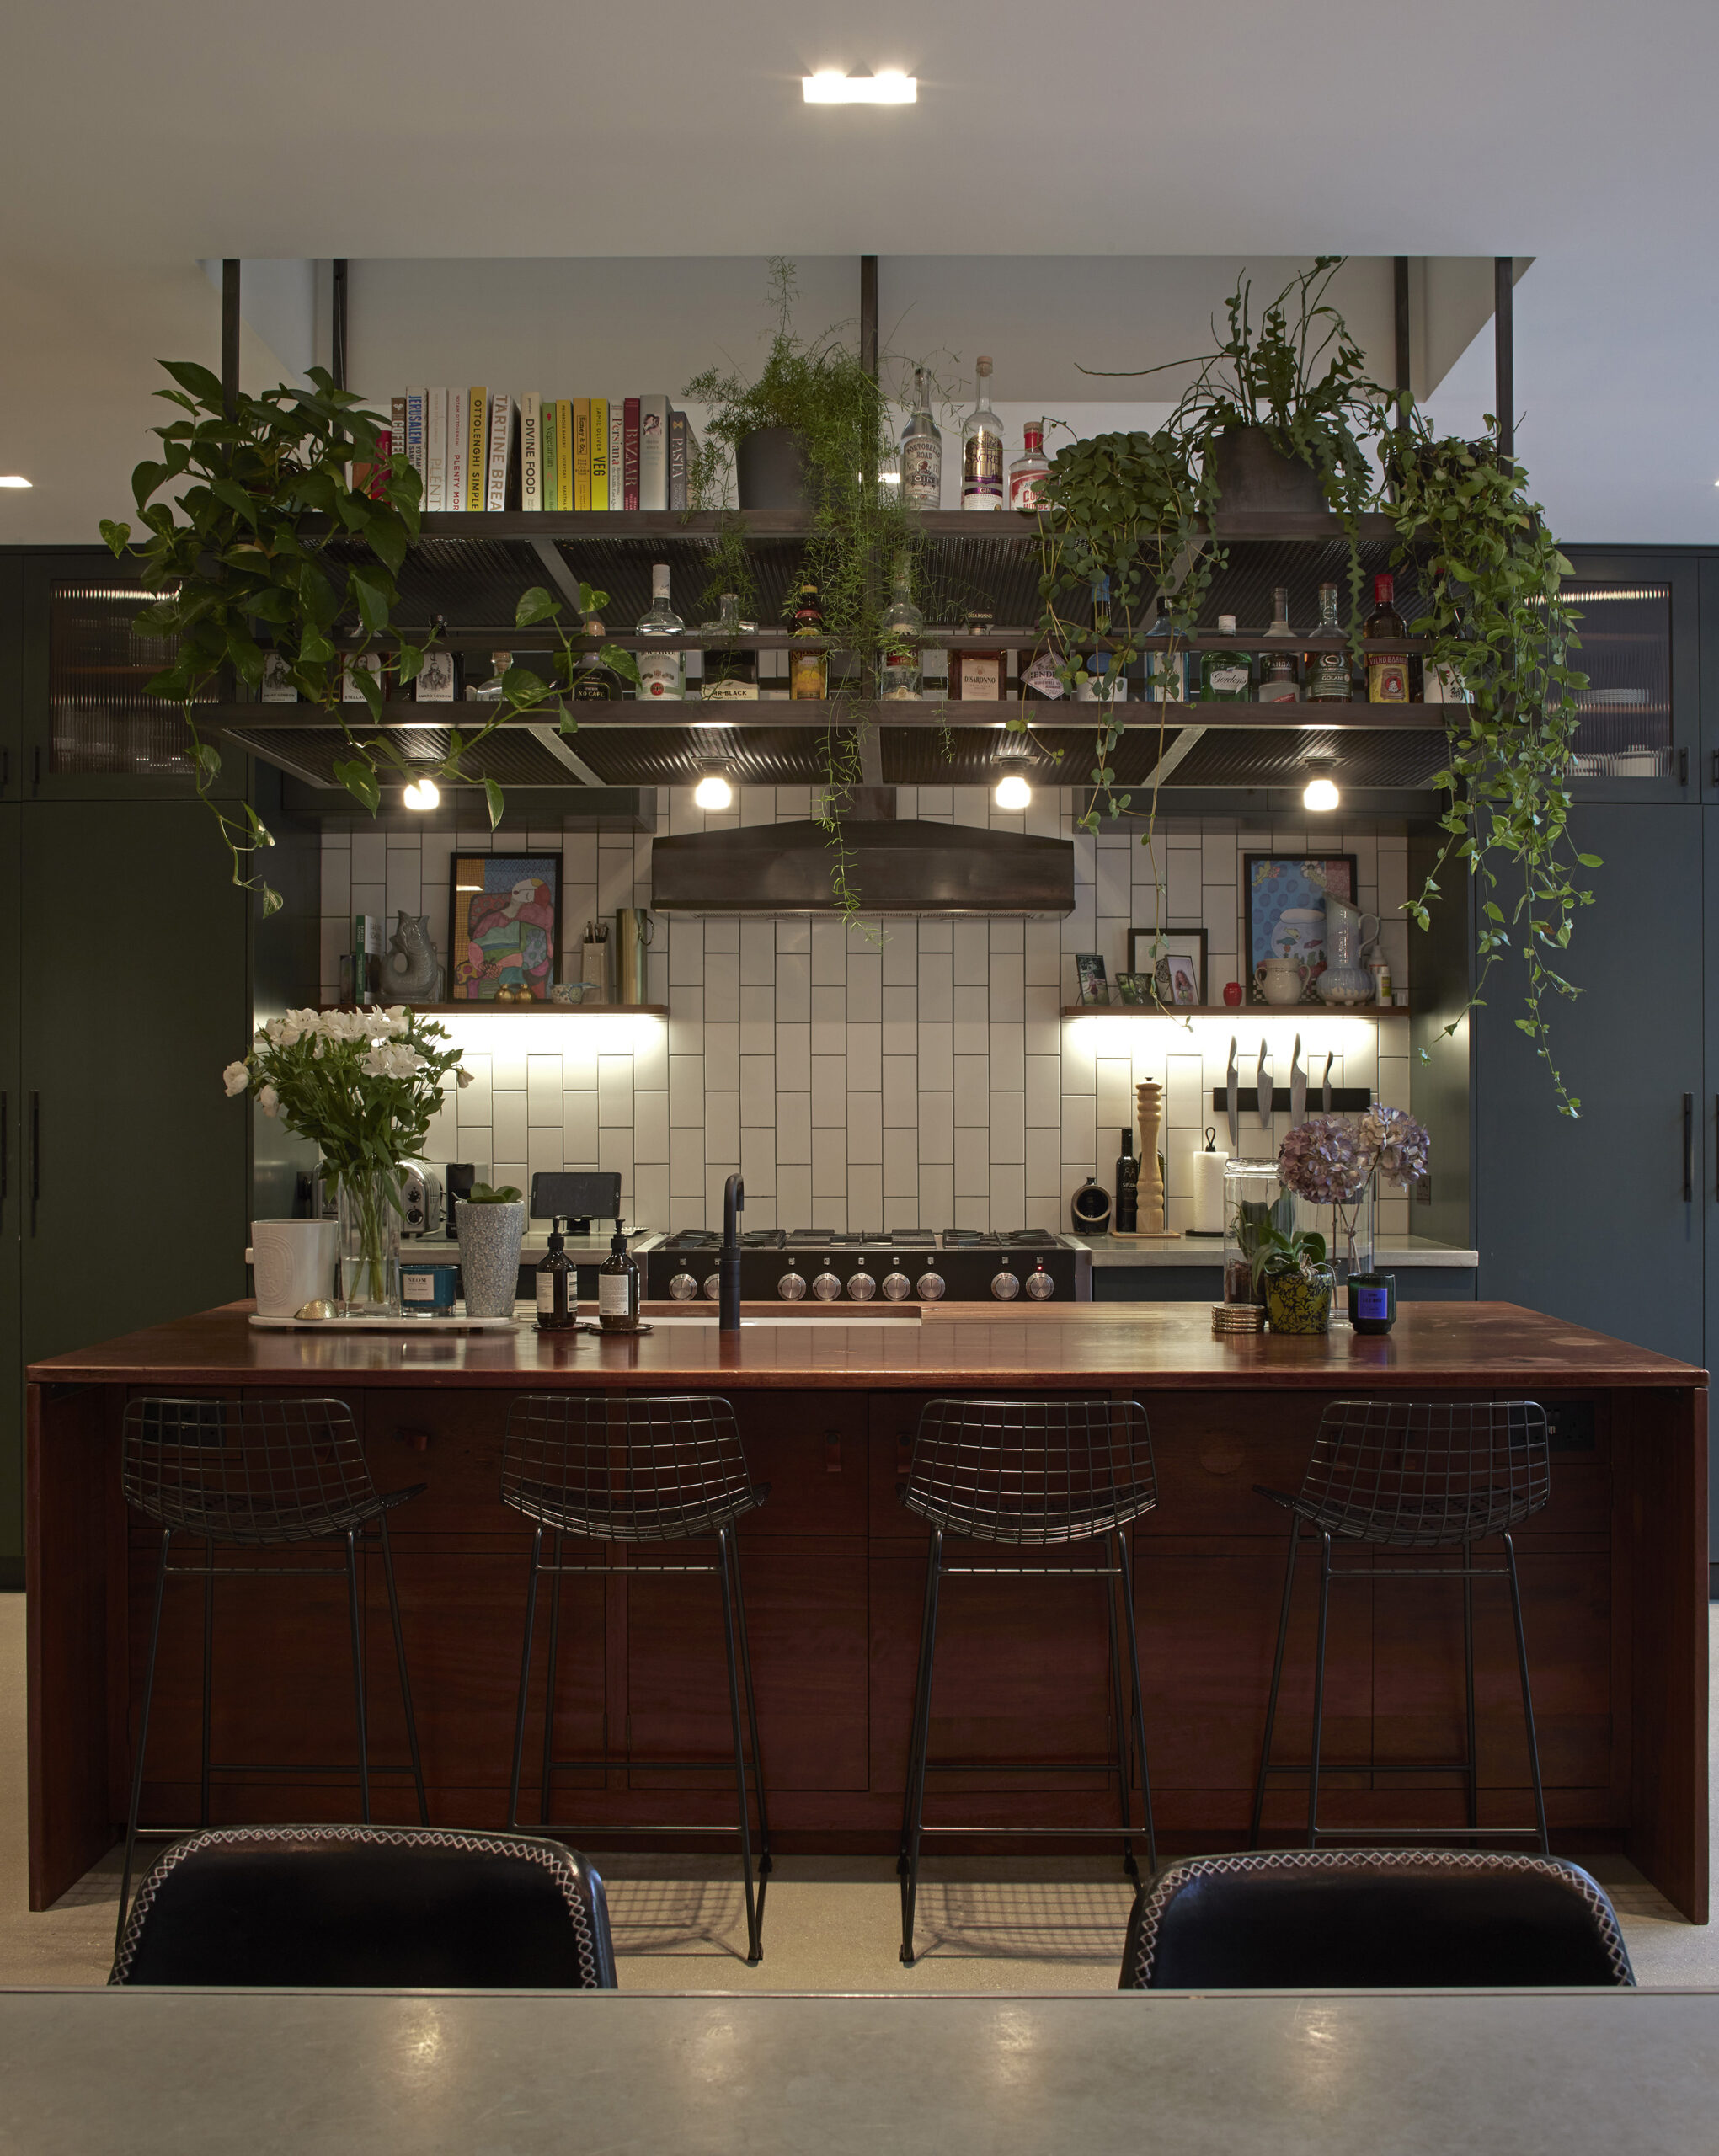
When it comes to worktops, splashbacks and cupboard finishes, you’re spoiled for choice. There are various materials available in a wide range of colours, textures, and prices. From laminates to solid woods, composite materials, and even concrete or terrazzo, the right choice will hinge on your aesthetic preferences, practical needs, and budget.

Cupboard finishes also offer a wide array of options, including laminated plywood, veneered plywood, or a sprayed lacquered finish. The colours, materials, and even the handles you choose for your cupboards can dramatically impact the overall look and feel of your new kitchen.

A rear and side ground floor kitchen extension in Queen's Park by RISE Design Studio
A rear and side ground floor kitchen extension in Queen’s Park by RISE Design Studio

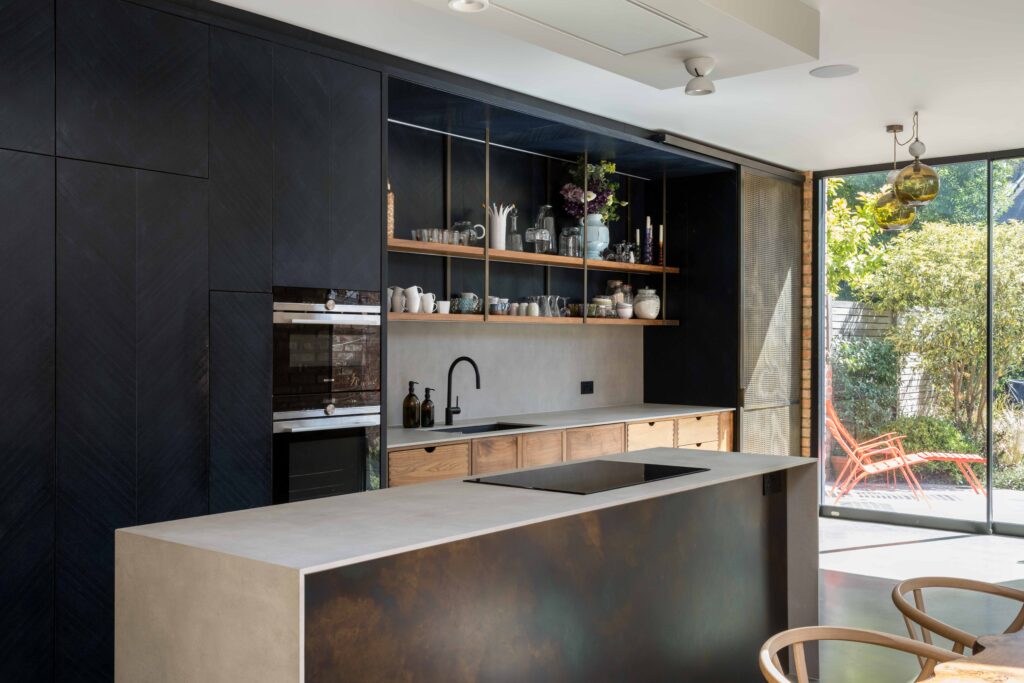
Section 9: Floor Finishes and Other Considerations

The floor finish is an important aspect of any kitchen design. It should be durable, resistant to stains, and ideally extend throughout the kitchen, dining, and living areas for a unified look. Options range from timber and tiles to stone to polished concrete and natural linoleum.

Additional elements to consider include lighting, ventilation, heating, and furniture. You might wish to include dimmable mood lighting, ensure adequate ventilation, opt for underfloor heating, and select furniture that complements your new kitchen.

A rear and side ground floor kitchen extension in Queen's Park by RISE Design Studio
A rear and side ground floor kitchen extension in Queen’s Park by RISE Design Studio

Section 10: Final Thoughts

Kitchen extensions are an invaluable way to improve your home, not only for your enjoyment but also for its potential resale value in the future. As an experienced architect from a design-led architecture studio focused on low energy and low embodied carbon designs, we believe such projects can significantly contribute to creating sustainable, energy-efficient homes.

Remember, careful planning, diligent execution, and a clear vision can transform your kitchen into a space that is both beautiful and practical, making it the heart of your home.

Frequently Asked Questions

Q1: Why are kitchen extensions significant in modern living?

A: Given the fast-paced nature of modern lifestyles, homes need to provide spaces that are comfortable, efficient, and well-integrated. Traditional housing often lacks these attributes in the kitchen area, leading many homeowners to consider kitchen extensions to enhance the overall appeal and functionality of their homes.

Q2: What are some common kitchen extension options?

A: Kitchen extensions can be achieved by creating an open-plan kitchen through the removal of internal walls, extending into the side return, extending to the rear, or creating a double-height space. The optimal method depends on the existing layout and structure of your home.

Q3: How much does a kitchen extension typically cost?

A: In London and the South East, kitchen extensions typically cost between £2,200-3,100 per square meter. The overall cost can vary based on the complexity and quality of the kitchen fit-out. A simple kitchen fit-out, including appliances and services, can start at around £17,000, with premium options costing upwards of £65,000.

Q4: What factors should be considered when planning a kitchen extension?

A: It’s important to consider the functionality of your current kitchen and how the space is utilised. Questions such as how many people typically use the kitchen at once and whether a single bank of units or a galley kitchen would be more practical should be considered. Other elements like the potential for a peninsula or island should also be contemplated.

Q5: What detailed design considerations are involved in a kitchen extension?

A: Beyond basic design, detailed considerations include storage solutions, appliance placement, and the overall aesthetics of your new kitchen. Tailoring these details to your specific needs and preferences can significantly enhance the functionality and enjoyment of your new kitchen.

Q6: How do I choose the right installer for my kitchen extension?

A: Numerous options exist for kitchen extension installation, from off-the-shelf options like B&Q, Wickes, Howdens, IKEA, John Lewis, Magnet, Charlie Kingham and online companies such as diy-kitchens.com, to specialist kitchen companies like Artichoke, deVOL, Boffi, Lundhs, Plain English, Harvey Jones, Humphrey Munson, Poggenpohl, Roundhouse, Siematic, Smallbone of Devizes, Woodstock Kitchens and Bulthaup. If you’re seeking a unique design, a bespoke solution from a skilled joiner might be the best route.

Q7: How important are appliances in a kitchen extension?

A: Appliances play a crucial role in the functionality and efficiency of your kitchen. It’s vital to choose options that align with your lifestyle, space, and energy consumption goals. The energy rating of your chosen appliances can significantly affect your running costs and overall home’s energy efficiency.

Q8: What options are available for worktops, splashbacks and cupboard finishes?

A: There’s a vast array of options for worktops, splashbacks, and cupboard finishes, with a variety of materials available in a wide range of colours, textures, and prices. From laminates to solid woods, composite materials, and even concrete or terrazzo, the right choice will depend on your aesthetic preferences, practical needs, and budget.

Q9: What considerations should be taken into account for floor finishes?

A: The floor finish should be durable, resistant to stains, and ideally extend throughout the kitchen, dining, and living areas for a unified look. Options range from timber and tiles to stone and natural linoleum to polished concrete. Additional elements to consider include lighting, ventilation, heating, and furniture.

Q10: How can a kitchen extension improve my home?

A: Kitchen extensions can significantly improve your home, enhancing your enjoyment and potential resale value. With careful planning, diligent execution, and a clear vision, a kitchen extension can transform your kitchen into a beautiful, practical space that forms the heart of your home.

If you would like to talk through your kitchen project with the team, please do get in touch at mail@risedesignstudio.co.uk or give us a call on 020 3290 1003

RISE Design Studio Architects company reg no: 08129708 VAT no: GB158316403 © RISE Design Studio. Trading since 2011.

What is First Fix and Second Fix?

Building Construction Through the Lens of Sustainable Architecture

As a design-led architect studio with over 30 years of combined experience, we’ve dedicated our careers to integrating sustainable practices into every building we create. Low energy consumption and low embodied carbon are not just buzzwords, they are principles that guide our designs. Below, we will delve into the building construction process, highlighting the critical stages of First Fix and Second Fix, while threading in the significance of sustainable practices in modern UK construction.

Unveiling the Jargon: First Fix and Second Fix

In the UK and Ireland’s construction industry, ‘First Fix’ and ‘Second Fix’ are terms that simplify the stages of building construction. Although used widely, these terms may appear abstract to those unfamiliar with the construction process.

First Fix: Laying the Foundations

The ‘First Fix’ (sometimes described as shell and first fix) is the initial phase of construction, extending from laying the foundation to the application of plaster on the internal walls. This phase is essentially the construction of the skeleton of the building, including walls, floors, ceilings, as well as the installation of cables for electrical supply and pipes for water supply.

To shed more light, the elements involved in the First Fix include but are not limited to: drainage systems, soil and copper pipes, mechanical ventilation systems, electrical back boxes, cable runs for electricity, telephone, data and audiovisual services, door frames, stair wells, sound insulation and plasterboarding.

During this stage, our studio ensures the incorporation of low energy and low embodied carbon design principles. For example, by choosing responsibly sourced materials for structural elements (low embodied carbon) and promoting energy-efficient solutions like Mechanical Ventilation Heat Recovery systems (MVHR), Airtightness, Air Source Heat Pumps (ASHPs) and Solar Photovoltaics (Solar PV) panels, we minimise the carbon footprint and enhance the future building’s efficiency.

Herbert Paradise, Kensal Rise, North West London. Photo showing pre first fix
Herbert Paradise, Kensal Rise, North West London. Photo showing the construction approaching first fix – note the ducting for the MVHR in the ceiling

Second Fix: Breathing Life into the Skeleton

Upon completion of the First Fix, we move on to the ‘Second Fix’, which entails all the work post-plastering. It includes connecting electrical fixtures to cables, attaching sinks and baths to pipes, and fitting doors into doorframes. It’s during this stage that the building begins to take shape aesthetically, transforming from a mere skeleton into a ready-to-use structure.

Sustainability continues to be a critical consideration at this stage. We adopt low-VOC paints and finishes to enhance indoor air quality, install energy-efficient appliances, and utilise sustainably sourced fixtures, thereby promoting a healthier, more comfortable and eco-friendly living environment.

The Lexi Cinema & Hub, Kensal Rise, North West London. First Fix having been carried out

The Construction Process: A Synchronized Ballet

The clear division between First Fix and Second Fix is more than just a convenient description; it’s a strategic approach that enables efficient project management. Different trades, including electricians, plumbers, and carpenters, usually have to make two separate visits to a building under construction. By using this terminology, project managers can effectively communicate the project’s progress, making it easier for everyone involved to understand.

In this context, it’s not uncommon to hear phrases such as “first fix complete” or “second fix 50% done”. While some construction companies may specialise in either first or second fix work, most, including ours, navigate both phases seamlessly.

The Analogous Phases in North America

In North America, the stages of First and Second Fix are often referred to as ‘roughing in’ and ‘finishing’, or ‘rough-in’ and ‘finish work’. The concept is similar, with roughing in equating to the more structural, raw tasks of the First Fix, and finishing involving the polished, final tasks associated with the Second Fix.

The Third Fix: Hosting Technology

Modern society’s reliance on technology has necessitated a further division in electrical installations, introducing a ‘Third Fix’. This stage includes positioning and securing accessory boxes (First Fix), preparing and positioning cables (Second Fix), and the termination of conductors to accessories and protective devices (Third Fix).

The Third Fix plays a pivotal role in hosting sensitive electronic equipment, requiring dust-controlled conditions for installation. This is particularly relevant for spaces like server rooms, which require a virtually dust-free environment akin to medical or scientific research laboratories and cleanrooms in the semiconductor production industry.

In line with the UK national building specifications, British Standard 5295:1989, the Third Fix stage must maintain stringent environmental standards to control particulate contamination, temperature, and humidity. It is only when these conditions are met that the build-out of clean room spaces can commence.

In Conclusion

Navigating the building construction process, particularly the stages of First Fix and Second Fix, is akin to choreographing a well-orchestrated ballet. As architects, we are not mere bystanders, but conductors, ensuring each movement aligns with the symphony of sustainability. By integrating low energy and low embodied carbon principles, we not only construct buildings but shape healthier, eco-conscious living environments.

How do I chose an Architect?

Selecting an architect is a critical decision that can greatly impact the success and satisfaction of your architectural project. It goes beyond examining an architect’s track record and past projects, although those aspects certainly hold value. 

Shared Aspirations and Values:

Finding an architect who shares your aspirations and values is paramount. While reviewing an architect’s portfolio is essential to assess their capabilities, it is equally important to delve deeper into their mission and philosophy. At RISE Design Studio, our approach centres around creating sustainable designs that not only enhance the built environment but also align with our clients’ values. By prioritising low energy and low embodied carbon designs, we aim to minimise the environmental impact of our projects. Ensure that the architect you choose resonates with your vision for a sustainable and socially responsible architectural project.

Light House, North Clapham, London

Initiating the Conversation:

Once you have identified potential architects who align with your aspirations, it is time to initiate a conversation. This initial interaction is pivotal in assessing the architect’s suitability for your project. Consider whether you genuinely want to work with them. Do they actively listen to your ideas and concerns? Are they invested in understanding your unique requirements? A good architect will ask thoughtful questions, provide reassurance, and demonstrate their ability to comprehend and address your worries. It is crucial that they explain their work process clearly, avoiding unnecessary jargon and ensuring you have a comprehensive understanding of what to expect. If you anticipate working with other members of their team, it is worth exploring the possibility of connecting with them as well.

Building a Strong Rapport:

Given the collaborative nature of architectural projects, building a strong rapport with your architect is essential. Throughout the process, you will be working closely together, sharing ideas, and making decisions that shape the final outcome. Consequently, it is important to enjoy the company of your architect and promote a good working relationship. Trust and open communication are the cornerstones of a successful collaboration. Listen to your instincts and assess whether you feel comfortable, understood, and inspired by the architect’s approach. Ultimately, your heart, rather than your head, will guide you towards the architect who feels like the perfect fit.

The Lexi Cinema & Hub, Kensal Rise, London

Client Testimonials – A Glimpse into Architectural Excellence:

Client testimonials provide valuable insights into an architect’s capabilities, professionalism, and dedication to client satisfaction. Reading testimonials from previous clients can offer a glimpse into their experiences and help you gauge the architect’s ability to deliver exceptional results. At RISE Design Studio, we take pride in the positive feedback we have received from our clients, as it reflects our commitment to excellence and client-centric approach. Testimonials serve as a testament to the collaborative and inspiring journey we embark upon with our clients. Prior to be engaged we will connect you with previous Clients for you to have a candid discussion on how it was for them to work with us at RISE Design Studio. 


Carousel restaurant, Fitzrovia, London

Conclusion:

Choosing the perfect architect is a critical step towards turning your architectural vision into a tangible reality. While an architect’s track record and past projects are important factors to consider, finding an architect who shares your aspirations, values, and commitment to sustainability is paramount. Initiate conversations with potential architects, paying attention to their ability to listen, ask insightful questions, and provide reassurance. Build a strong rapport with your architect, ensuring compatibility, trust, and effective communication. Finally it’s important to take into account the reviews of previous clients to gain a deeper understanding of an architect’s capabilities and client satisfaction. By carefully selecting an architect who aligns with your vision and values, you will set the stage for a transformative architectural journey that will exceed your expectations.

Why use a London Architecture Practice?

London’s vibrant and diverse built environment presents unique challenges for buying a property, obtaining planning permission, and building your dream home. In this article, we will explore the numerous benefits of engaging with London architecture practices and highlight the significance of local experience when selecting architects. As an architect with over 20 years of experience in a small contemporary design-led architecture studio, our focus on low energy and low embodied carbon designs enables us to provide valuable insights into the pitfalls of not utilising an architect’s expertise. Let’s delve into the reasons why partnering with a London architecture practice is vital for a successful outcome.

Understanding the London Landscape:

A London architecture firm possesses a deep understanding of the intricacies and nuances of the city’s architectural landscape. By comprehending the specific location of a property, an architect can distill the various policies, opportunities, and constraints of each borough, achieving the desired size and design of extensions or refurbishment. The local architect’s expertise maximises the value of every square meter, optimising the potential of your project.

Navigating Planning Challenges:

Obtaining planning consent and successfully building in London’s 32 boroughs demand the right experience and knowledge. By engaging a local architecture firm in London, you benefit from their extensive experience in obtaining planning consent across various boroughs. This knowledge proves invaluable at every stage of the process, enabling effective decision-making. A local architect can provide insights on scaling, massing, external materials, conservation area limitations, Article 4 Directions, basement policies, and listed building issues specific to each borough. Understanding the intricacies of each borough’s planning process ensures a smoother journey towards obtaining the necessary approvals.

The Value of Local Research:

During the early stages of a project, your architect conducts in-depth research on the specific site planning history and immediate context. This research helps determine what is permissible and informs the subsequent design process. By tapping into their local knowledge and experience, architects can navigate potential hurdles and create designs that align with the local environment and regulations. Local research further ensures that your project is sensitively integrated into the existing fabric of the city.

The Hunt for Local Talent:

Identifying leading London architecture firms whose aspirations align with your own can be facilitated through regional design awards. These accolades highlight firms that have excelled in delivering outstanding architectural solutions. Additionally, keep an eye out for local signboards displayed on properties similar to yours, as they often indicate the involvement of architects with relevant experience and expertise.

Screen 2 at the Lexi Cinema during Construction, Kensal Rise, London

The Power of Collaboration:

While architects play a crucial role as the lead consultant, successful projects require a team of specialists with diverse design and construction skills. A reputable London architecture practice will have a network of local consultants, fabricators, sub-contractors and craftspeople who possess the necessary experience and expertise to deliver high-quality projects within time and budget constraints. Collaborating with these professionals ensures seamless coordination and a holistic approach to design and construction.

Understanding Key Consultants:

In addition to the architect, several key consultants contribute to the success of a project. These include the structural engineer, quantity surveyor (cost consultant), and approved inspector.

  • Structural Engineer: The structural engineer ensures the proposed design can withstand various loads and provides crucial services such as site appraisal, structural design, and on-site inspections. They play a vital role in ensuring the safety and stability of the structure.
  • Quantity Surveyor (Cost Consultant): The quantity surveyor provides estimates and advice regarding the cost of construction works. They help develop the project budget, prepare cost plans, assess tender returns, and compile the final account.
  • Party Wall Surveyor: The role of a Party Wall Surveyor in architecture is to provide expertise and guidance in matters related to party wall disputes and the Party Wall Act. When undertaking construction or renovation projects that involve shared walls or structures with neighboring properties, a Party Wall Surveyor acts as an impartial third party to ensure that all parties’ rights and responsibilities are protected. They assess the potential impact of the proposed work on adjoining properties, help draft party wall agreements, resolve disputes, and ensure compliance with legal requirements. The Party Wall Surveyor plays a vital role in facilitating communication and resolving conflicts between property owners, safeguarding the interests of all parties involved in the construction process.
  • Approved Inspector: An approved inspector ensures compliance with building regulations. Their expertise includes assessing initial design proposals, conducting site visits during construction, and issuing the final certificate.
Herbert Paradise, Kensal Rise, during construction

Conclusion:

Undertaking a building project in London without the guidance of a local architecture firm can lead to numerous pitfalls and challenges. The city’s intricate planning regulations, conservation area constraints, and heritage considerations necessitate the expertise of architects who possess a deep understanding of the local landscape. By partnering with a London architecture firm, you gain access to invaluable experience, knowledge of borough-specific planning requirements, and a network of skilled consultants. This collaboration enhances your project’s chances of success, allowing you to create sustainable, low energy, and low embodied carbon designs that harmoniously blend with the city’s rich architectural tapestry. Don’t miss out on the opportunity to bring your architectural vision to life while navigating London’s intricate built environment with the guidance of experienced professionals.

RIBA Plan of Work 2020: A Comprehensive Guide

Architects like most professions welcome industry led guidelines and approaches to inform and improve their work both for their clients, collaborators, and their own progression.

The RIBA Plan of Work 2020 is a guidance document set out by the Royal Institute of British Architects (RIBA) and is seen as the definitive design and process management tool for the UK construction industry.

First established in 1963 to provide a framework for architects to use on client projects to bring greater clarity to each stage of the process, it has evolved over the years to become an industry wide tool.

To reflect the changing approaches to building design, construction and use, and the associated advances in digital technology, increased ethics awareness, and the prioritisation of sustainable outcomes in line with the RIBA 2030 Climate Challenge, it received its biggest overhaul in 2020.

In this article we examine the eight stages of the RIBA Plan of Work 2020. We look at how this formal roadmap, whilst not a contractual document provides vital guidance and helps to deliver successful outcomes for stakeholders by informing the briefing, design, construction, handover, and use of a building.

Each of the eight key stages has an expected outcome; core tasks; core statutory processes in relation to planning and building processes; and crucial information exchanges, all of which impact the success of the next stage.

Stage Zero – Strategic Definition

‘What do you want to achieve from your building project, and what are your best options?’

This stage is not about design or practical details, but rather a chance for us to get to know the client, developing their requirements and helping shape the business case to achieve them.

At this stage all those involved in the client team, alongside ourselves and any other professional advisors must consider that the proposed building project is the appropriate means to meet the client’s stated objectives, and then determine the best way forward.

For example, perhaps a new building is not the answer, and the solution could be refurbishment or an extension.

To come to a decision, information is gathered for each option. This involves examining previous similar projects, the current building if applicable, analysis of project risk (where appropriate site appraisals and surveys carried out), and consideration of project budgets.

We will look at the size, location, scope, and special considerations around the clients’ needs to further refine the vision.

From this exercise a recommendation is made on the best option, and a business case is completed.

Stage One – Preparation and Briefing

‘Developing the initial project brief and setting out the timescales – the official start of the project’

Once it has been determined that the chosen project and site is the best way forward, stage one, is the process of preparing a comprehensive project brief and choosing the collaborative project team, allocating specific roles and responsibilities.

The project team will include:

– Design team – headed up by Lead Designer and overseeing the design programme
 Client team – headed up by Project Manager and overseeing the project programme
 Construction team – headed up by Project Director and overseeing the construction programme

Feasibility studies and site surveys may be required at this stage to test the brief against the chosen site and budget i.e. are there any access issues? Is it a sloping site? What is the spatial overview and relationships with neighbouring buildings?

This is often the time for us to discuss options regarding the site with the local planning authority and make sure there are no constraints. We like to establish clear and positive communication with these departments from the outset.

Discussions around building regulations and other legal requirements should happen at this stage including whether the site is within a listed buildings or conservation area

It is at this point that objectives are finalised and recorded under:

– Project Outcomes
– Sustainability Outcomes
– Quality Aspirations
– Spatial Requirements

Working with the client, we will at the end of this stage, produce a timescale for the project as well as a project execution plan setting out delivery.

Stage Two – Concept Design

‘The design stages begin and the architectural concept is defined ‘

Stage two begins the core design process which culminates at stage four.

We work closely at this stage with the client to produce visualisations, 3D models, and drawings of the architectural concept, ensuring it meets their needs and is aligned to the project brief and cost plan.

As well as a visual representation of the building with sections and elevations and how it sits within the surrounding environment, these will often include:

– Interior and exterior renders
– Landscaping
– Specific requests
– Strategic engineering requirements

There is as the RIBA states ‘no right or wrong approach’ at this point, it is our initial design response to the brief and will involve regular meetings, discussions and reviews with the client and specialist stakeholders including planners and those across structural and civil engineering, to shape and define it.

The robust architectural concept along with the project brief and cost plan are signed off at the end of this stage.

Herbert Paradise, Kensal Rise, North West London


Stage Three – Spatial Co-ordination

‘The co-ordinated design takes form.’

Formerly the developed design stage, here our team draw up the client approved design in CAD or ever increasingly with BIM, and develop and test it alongside detailed structural design, outline specifications, building services and cost analysis to ensure its viability.

Our design will incorporate the practical elements relating to:

– Window, door, stairway, and fire exit locations
– Fixtures, fittings
– Proposed materials
– Load bearing mechanical information
– Mechanical, plumbing, and electrical considerations
– Tech and security
– Green, eco and solar

During this stage, or certainly at the end the design is finalised into a single model, not prone to change, and planning applications are ready for submission incorporating all our detailed drawings and reports.

Arches House – Technical Design Package for Tender Issue

Stage Four – Technical Design

‘Final design stage before construction begins’

We make further refinements of the existing design at this stage, incorporating where relevant detail from specialist sub-contractors such as lighting specialists, kitchen designers or glazing companies.

From this our Lead Architect prepares comprehensive drawings, specifications, and documents for tender.

The level of detail will depend on the size and scope of the project but by the end of this stage all elements will be prescriptive rather than descriptive for the project to be manufactured and built, i.e., they set out detailed descriptions around the following:

– Requirements relating to regulations and standards
– The specific types of products and materials required
– The methods of delivery and installation
– The building systems in place i.e., flooring, partitions, mechanical and structural

At the end of this stage all information required to construct the project is completed and we send out the tender to 3-4 contractors we have worked with before. Of course, should the client want to add to the list we will do so.

Stage Five – Manufacturing and Construction

‘All systems go…construction begins’

The design process is now complete and the appointed contractor takes possession of the site to carry out works as per the schedule of works and building contract. This includes manufacturing off-site and construction on-site.

Stage four and stage five can overlap or run concurrently dependent on the size and scope of the project, or when the contractor was appointed.

The client can choose to appoint us as the contract administrator at this point should they wish. In this role we act as the middle ground between the client and the contractor to ensure that all works are being done in accordance with finalised drawings and specifications. This can entail:

– Chairing construction progress meetings
– Preparing and issuing construction progress reports
– Co-ordinating site inspections
– Dealing with site queries
– Agree reporting procedures for defects
– Issuing project documentation to the client
– Issuing certificates of completion

If appointed, we like to meet weekly with the client and the relevant parties to ensure that everything is running smoothly.

The appointment of Building control by the client should take place, to oversee the project and ensure that all is in order in relation to the necessary construction standards.

Health and Safety inspectors will review and observe the site at this stage, so it is worth considering an independent consultant to ensure that all the correct procedures are followed.

Stage Six – Handover

‘The completed building is finished and handed over’

After practical completion, the building is ready for hand over to the client, and the building contract concludes.

Feedback and building aftercare exercises take place during this stage to act as future learnings for ourselves, the client, contractor, and consultants, and to address any issues relating to the integrity of the building.

These involve light touch post occupancy evaluation and snagging processes, whereby the client compiles a list of defects or incomplete works, overseen by us as the contracts administrator and presented to the contractor to rectify.

They then have an agreed Defect Liability Period, usually six to twelve months to address these, after which if all has been made good, building control will sign off the construction and we will sign off the project as a whole.

We then issue a final certificate, and this stage is complete.

Light House, North Clapham, London

Stage Seven – Use

‘The vision for the building is realised and it is now in use’

This stage starts concurrently with stage six.

The building is now occupied and in use. On most projects, our design team will have no duties to fulfil here.

However, the incorporation of this stage into the RIBA Plan of Work 2020 gives the client the opportunity to get in touch with us if they require general advice relating to maintenance, energy consumption or management of the facilities.

We welcome this communication as we love to hear how the client is finding their new building, and it also allows for effective aftercare, valuable feedback, and building monitoring especially around energy consumption, and is therefore key to the sustainability strategy.

The addition of this feedback stage has made the Plan of Work cyclical as it unites the entire process into one, allowing for proper use of the building and then when demands change, and the building reaches an end of life where refurbishment or a new building may be needed, stage zero starts again.

Embarking on a design and build project can often be a complex one for all involved, for a client it can be daunting.

The RIBA Plan of Work 2020 offers all stakeholders a clear approach to map out the journey collaboratively from vision, through to design, construction and eventual use.

At RISE Design Studios, we find that this straightforward process with realistic and measurable targets, the ability to review progress and a provision for valuable learnings allows for enhanced clarity, greater realisation of vision, and successful outcomes no matter the diversity of projects.

For more information on the RIBA Plan of Work 2020 visit RIBA Plan of Work (architecture.com)

If you would like to talk through your project with the team, please do get in touch at mail@risedesignstudio.co.uk or give us a call on 020 3290 1003

RISE Design Studio Architects company reg no: 08129708 VAT no: GB158316403 © RISE Design Studio. Trading since 2011.

Understanding Embodied Energy

According to the World Green Building Council, the built environment is currently responsible for 39% of global energy related carbon emissions, split between operational (28%) and materials and construction (11%).

In Europe, the construction sector accounts for 40% of the continents energy and CO2 emissions, more than aviation and shipping combined.

As we reported in our previous blog on Eco Homes, emissions have hit a new high in the sector, and it is the largest single contributor to greenhouse gases with the gap growing between its current standing and the decarbonisation targets of 2050.

With projections that the world’s population will reach 10billion by the middle of the century, leading scientists have stated we can only support 0.5 to 1 billion in terms of resources and emissions if drastic change does not occur.

Whilst many of us think of emissions resulting from the operational use of a building, the heating, lighting, cooling etc it is the upfront carbon emissions or embodied energy and its reduction that is critical as we look to achieve net zero.

In this article we examine this very topical and critical issue in the fight against climate change. As architects, how can we reduce the embodied energy of a building at the design stage, ensure sustainable development, and create buildings which are truly low carbon?

What is embodied energy?

When looking at the total whole life energy of a building and the resultant emissions, it comprises operational energy and embodied energy.

Operational energy is that used through the consumption of heating, lighting, cooling, electricity etc.

To date Government legislation and the general focus has been on reducing the operational energy of buildings, through using renewables such as solar, heat pumps, triple glazing etc and a shift away from fossil fuels.

As we strive to meet net zero targets by 2050 and aim to achieve a 68% reduction in carbon emissions by 2030 the spotlight is now on embodied energy.

When it comes to a definition it is best described in the Climate Emergency Design Guide published by the London Energy Transformation Initiative 2020 as ‘the carbon emissions associated with the extraction and processing of materials, the energy and water consumption used by the factory in producing products, transporting materials to site and constructing the building.’

More simplistically, once a building is complete it embodies all the non-renewable energy and ‘upfront’ emissions associated with its build, from the extraction, processing, manufacture, and transportation of materials through to its eventual maintenance (in-use stage) and demolition/disposal (end-of-life).

It is for this reason that it is sometimes referred to as an invisible threat or even by some as ‘the dark side of the construction industry’ as unlike pollution coming from factories, cars, and homes you cannot see it, and that is what makes it so dangerous to the future of the planet as our population expands.

Even the most efficient of buildings can see 95% of their life-cycle carbon expenditures occur during initial construction.

It can be defined in two separate ways dependent on how you are assessing it:

  • Cradle-to-site this approach looks at the processing and manufacturing of all individual building elements up to transportation to and assembly on site.
  • Cradle-to grave – the energy consumed by a building throughout its life. This approach can be broken down to the initial energy required to produce a building; that needed to refurbish and maintain the building, and that required when it is demolished. This does not include operational energy.

How do you measure embodied energy?

The more highly processed a product the greater its embodied energy whereas a sustainable material or product has low levels. Cement production for example counts for 5% to 7% of global emissions with one ton releasing 900kg of carbon into the atmosphere whereas.

The UK construction industry is the largest consumer of resources, consuming more than 400million tonnes of material a year with this accounting for around 10% of UK carbon emissions.

As buildings and other projects in the built environment are made up of diverse types of materials utilising various construction systems there are varying levels of embodied energy which makes calculation complex.

Even if you use the same product, the efficiency of the production processes, the sources of energy and how the materials are transported can differ greatly. In addition, varied materials and products have different capacities when it comes to reuse and recycling.

As you would expect International Standards have been developed for reaching a calculation these include ISO 14067:2018 Greenhouse gases – Carbon footprint of products – Requirements and guidelines for quantification.

Any calculation tends to be performed as a subset of a Lifecycle Assessment Framework (LCA). This widely used tool assesses the environmental impacts of processing systems and decisions related to the life cycle of a product or service (cradle-to-grave) by:

  • Assessing and compiling an inventory of energy, waste, and material inputs and environmental releases related to a particular product or service this will range from the extraction of raw materials, refinement, manufacturing, and transportation to site
  • Evaluating the potential environmental impact of these inputs e.g., global warming and emissions
  • Interpreting the results to help shape and inform any design and planning decisions

There are also a range of databases available which provide information on the embodied energy of a wide variety of materials used in construction, such as the Environmental Performance in Construction (EPC) Database produced by the University of Melbourne.

As an approximation and according to the Climate Emergency Design Guide per average building, 64% of the embodied energy comes from the product and materials used, 25% from maintenance and replacements, and 8% from transport.

How can architects help to reduce embodied energy?

With greenhouse gases emitted at every stage of the construction cycle and an increasing sense of urgency, the UK design and build community has stepped up to the challenge of combating embodied energy, re-thinking design, and making a positive impact on the world around us.

As a RIBA Chartered Practice we follow the RIBA plan of work which has embedded sustainability outcomes across all eight stages, we are also committed to the RIBA 2030 Climate Challenge and Architects Declare both of which are placing the climate emergency front and centre.

Alongside this we have formed a close working relationship with expert sustainable design and construction consultants Eight Versa who specialise in building performance analysis, ecology appraisal and enhancement, and environmental assessment.

These activities and our continued professional development in the field will help us to ensure we continue to design with a climate conscious and forward-thinking mindset, creating efficient, attractive, and effective buildings which in their selection of materials and processes help to reduce embodied energy and our carbon footprint.

With sustainable building beginning long before construction, the initial design stages have a major part to play, and we look to incorporate the following where appropriate:

  • Utilising alternative materials such as timber, hempcrete and rammed earth which all have low embodied energy content
  • Limiting carbon-intensive materials such as aluminium and plastics
  • Sourcing materials close to site to reduce transportation
  • Considering the reuse, recycling, and salvaging of materials from other projects where applicable such as brick, metals, concrete, and wood
  • Striving for maximum structural and space efficiency thereby limiting the quantity of materials needed for construction without of course reducing the end quality
  • Designing for the reuse and recovery of the building, when you destroy a building the total of its embodied energy is wasted to then start all over
  • Designing for future use, thinking about the ways a building can be adapted throughout its lifespan to reduce retrofit
  • Looking to limit materials used in finishes i.e., rather than carpeting, polished concrete flooring utilises the existing structure as does unfinished ceilings
  • Reducing waste with approaches such as off-site construction

It is important to achieve a balance however when designing buildings which use materials with low embodied energy as they may require higher operational energy in terms of heating and cooling and vice-versa.

For example, using substantial amounts of thermal mass such as concrete which as we have seen in high in embodied energy can reduce operational heating and cooling needs in homes that are well-designed and insulated, and which incorporate passive design principles.

As the global population increases, reducing the amount of embodied energy in buildings is critical to our future.

Whilst those within the built environment have embraced the move towards lowering operational energy related emissions, combatting climate change means we must now do the same at every life-cycle stage of a building.

Radical and co-ordinated thinking is required if we are going to tackle this emergency as an industry.

Please contact us at mail@risedesignstudio.co.uk to discover more about the steps we are taking and how they can benefit your project.

If you would like to talk through your project with the team, please do get in touch at mail@risedesignstudio.co.uk or give us a call on 020 3290 1003

RISE Design Studio Architects company reg no: 08129708 VAT no: GB158316403 © RISE Design Studio. Trading since 2011.

Unveiling the Larger Home Extension Scheme: A Comprehensive Guide

As an architect with over two decades of experience in creating thoughtful, sustainable designs, I’ve encountered countless homeowners who dream of extending their homes. Perhaps you’ve often wondered about the possibilities a large extension could bring to your living space? Many share this dream – a chance to transform their home into an expansive haven filled with creative, exciting interior spaces that they love. If that sounds like you, then you’ve landed in the right place.

However, an inevitable question soon follows: How big can you build? How far can you extend? Well, I have some good news for you. Under the ‘prior approval larger home extension mechanism’ and thanks to permitted development rights, you can build a significantly large house extension.

In today’s discussion, we’ll delve into the nitty-gritty of this process. We’ll explore the prior approval procedure in detail, provide insights into how to extend your terraced, semi-detached, or detached house, and guide you through the specific conditions you need to comply with for a prior approval house extension. I’ll also share tips on how to sail smoothly through the neighbour consultation scheme and get your consent with ease. So let’s get started.

What is the Prior Approval Mechanism for Larger Home Extensions?

First, let’s understand what the prior approval mechanism is. According to Part 1 Class A of the permitted development rights, you can construct a large single-storey rear extension as long as you meet the requirements of the Town and Country Planning (General Permitted Development) (England) Order 2015, without seeking explicit planning permission. This is often referred to as the prior approval larger home extension mechanism, or the neighbour consultation scheme.

So how large can your extension be if you use a prior approval application? In a terraced or semi-detached property, permitted development rights allow you to extend the rear of your house by up to six metres. In a detached property, the allowance extends to a whopping eight metres. Quite a spacious addition.

However, you must remember to take these measurements from the original rear wall of your property and adhere to certain conditions, which we’ll explain shortly.

Which Properties are Excluded from the Neighbour Consultation Scheme?

The prior approval legislation for larger house extensions does exclude some properties from the scheme. These include flats or maisonettes, statutorily listed buildings, properties within a conservation area, National Park, area of outstanding natural beauty, World Heritage Site or a site of special scientific interest, and properties that have had permitted development rights removed due to a planning condition or through an Article 4 direction.

If your property falls into one of these categories, you won’t benefit from the prior approval for a larger home extension scheme. But don’t worry – I can assure you there’s still a solution. A very large house extension is still possible by submitting a householder planning permission with the aid of professional extension architects. The end results are often the same or even better.

What are the Conditions I Need to Comply with to Build My Large House Extension?

Building your dream extension will require you to meet certain conditions as per Part 1 Class A of The Town and Country Planning (General Permitted Development) (England) Order 2015. I’ve summarised these for you below:

  • Your proposed extension should be a single story.
  • If the extension goes beyond the line of the side of your house, it can’t be wider than half the width of the existing house.
  • The proposed extension should not exceed 4 meters in height, as measured from the highest point of natural surface ground.
  • If your extension is within two meters of the boundary of the house, the eaves of your proposed extension should not exceed three meters in height.
  • The proposed extension should cover no more than half the area of land around the original house (as it was on 1 July 1948 or if it was built later, as it stood when built).
  • The materials used should match the existing appearance of your house.

Adherence to these conditions is crucial. Failure to comply may result in your application being rejected.

How to Apply for Prior Approval to Build a Larger Home Extension

Submitting your prior approval application for a larger home extension allows you to build an extension between 4 and 8m in length beyond the original rear wall for a detached house and between 3 and 6m for all other houses. However, to build under the prior approval neighbour consultation scheme, you need to apply to your council for prior approval – a process distinct from a typical planning application.

This application allows your council to consider whether your proposed extension meets the conditions outlined in the prior approval legislation and the likely impact of your extension on your neighbours’ homes. When submitting your application, be sure to provide the following information:

  • A detailed description of your proposed extension.
  • Planning drawings with existing and proposed floor plans and elevations, along with measurements.
  • The addresses of any adjoining premises.
  • Your contact details.

Remember, construction should not commence until the notification and prior approval process is complete. If the extension is already built, you’ll need to submit a retrospective full planning application, which I would advise against.

What Happens When You Submit a Prior Approval Application?

After receiving your prior approval application, your council will consult your adjoining neighbours by letter, initiating a minimum consultation period of 21 days. If your council doesn’t receive any comments within this period and decides that your proposal meets all the necessary conditions, your extension will be considered permitted development, meaning further planning consent is not required.

If your council doesn’t decide within 42 days from the date the application is valid, you have the right to submit an appeal to the Planning Inspectorate for non-determination.

What Happens if My Neighbours Object to My Prior Approval Application?

If your neighbours object to your proposed development, your council must assess the impact of your extension on all adjoining premises’ “amenity”. If further information is required at this stage, your extension architects and planning consultants can submit factual evidence to prove that your extension won’t detrimentally impact neighbouring properties. After assessing your application and any objections received, your council will issue a decision.

Can My Council Refuse My Large Home Extension Application?

Achieving approval for a planning application, including a prior approval application, requires a fair amount of skill and experience. If your application gets refused, you have the right to submit an appeal to the Planning Inspectorate against the refusal. The local planning authority cannot consider any other planning matters when determining a prior approval application.

Can I Start Building My Extension Straightaway?

You should not commence construction of your large house extension without receiving a written notice from your council. Following approval, the next stage is seeking building control approval before commencing construction work. Be sure to notify your council as soon as reasonably practicable after the completion of works.

How Can RISE Design Studio Help You?

RISE Design Studio is a London-based RIBA Chartered Architecture practice. With a special focus on design and planning strategies and expertise in residential extensions, conversions, and new build homes, we help homeowners create spaces they love living in.

If you would like to talk through your project with the team, please do get in touch at mail@risedesignstudio.co.uk or give us a call on 020 3290 1003.

RISE Design Studio Architects company reg no: 08129708 VAT no: GB158316403 © RISE Design Studio. Trading since 2011.

Overheating and How to Cool Buildings through Architectural Design

Did you spend the summer of 2022 feeling hot, restless, and uncomfortable in your home or office? Given that it was the UK’s joint hottest summer on record, it was likely that you did experience all or some of these feelings.

Europe and North Africa also suffered from periods of unusually hot weather leading to forest fires, drought, and like the UK national emergencies in places.

When it comes to our buildings particularly new builds, offices, and south facing single aspect high rise blocks, we are not prepared in the UK for such extreme weathers or the subsequent overheating.

Uncomfortable and stifling working and living circumstances coupled with an over-reliance on air-conditioning which is detrimental to energy efficiency targets, and the predicted rise in global temperatures mean something needs to be done.

With new UK building regulations in force to address overheating, we examine the issue from an architectural perspective and answer how do we create a naturally cool building?

The Avenue Brick House, Pinner, North London

What is overheating in a building?

There is no agreed definition but in general terms when related to a commercial or domestic building it means the build-up of heat within that building, coupled with lack of airflow, and the resultant negative health consequences.

In 2006, The Chartered Institute of Building Services Engineers (CIBSE) defined overheating as ‘conditions when the comfortable internal temperature threshold of 28°C is surpassed for more than 1% of occupied hours or where 25°C is surpassed for 5% of occupied (working) hours.’

Overheating tends to occur more in apartment buildings with data from the English Housing Survey 2019 showing that 30% of living rooms overheated compared to 12% of houses. The prevalence of overheating in these rooms as well as bedrooms was higher in London than elsewhere.

In non-residential buildings such as hospitals and schools, there is evidence of overheating with 90% of hospital wards in England at risk according to an NHS data report 2019/20, and 90% of teachers surveyed by the Environmental Audit Committee in 2020, saying they take additional measures to reduce classroom heat.

Dynamic Stimulation Modelling software measures overheating, analysing the performance of the space against CIBSE criteria.

The analysis looks at the number of hours in a summers day where the expected temperature exceeds a comfortable level, the number of hours a building experiences elevated temperatures, and that no occupied room reaches a maximum temperature. If two of these three are reached, then the building has failed.

What causes a building to overheat?

There are a variety of reasons why buildings are susceptible to overheating:

  • Urban Heat Island (UHI) effect – caused by poor city planning resulting in hard smooth dark surfaces such as roads, paved areas, roofs which absorb heat and release it at night, coupled with a lack of green space and waste heat produced by transport.
  • Solar gain – when light from the sun enters the building (solar radiation) and objects absorb this and emit heat within the living space increasing the temperature.
  • Prevalence of glazing – excessive use of double-glazed windows and floor to ceiling windows, traps warm air in buildings.
  • Climate change – increasingly hot summers and extreme heatwaves especially in the southern areas of the UK such as London means properties in those areas are at risk of overheating.
  • Internal heat gains – overuse of technology, lighting, boilers, beams, pipes, and human activity all generate heat.
  • Modern building fabric standards – increased levels of air tightness to retain winter heat and windows which do not open, or which remain closed due to urban pollution and noise means a lack of air flow.
  • Old housing stock – the UK has the oldest housing stock in Europe, these tend to be poorly insulated and not built to cope with hot temperatures.
  • Modern and rapid construction methods – thermally lightweight construction materials such as thin metal, plasterboard, and wood, used in modular homes are quicker to respond to temperature changes making them more susceptible to overheating.
  • Size of property – flats are more prone to overheating due to smaller size, denser occupation, and proximity to other homes.
  • Property additions – extensions, and conservatories can reduce ventilation and increase overheating.

The human consequences of overheating in the built environment

On average we spend 142 hours a week indoors. Any extreme change in the ambient temperature within those surroundings therefore presents an immediate threat to wellbeing, health, and productivity.

Overheating can reduce work rates, lower concentration levels, increase feelings of discomfort, and at worse cause fatalities. The CIBSE predicts 4500 UK premature deaths by 2050 if this issue is ignored.

Those at significant risk are the elderly, immobile, children, and pregnant women.

When it comes to productivity, heat stress and discomfort can lead to increased breaks, reduced activity, and a lack of alertness.

It can also lead to a reduction in the quantity and quality of sleep which can affect cognitive performance, mental health, and overall feelings of wellbeing.

Architectural design to prevent overheating

In the UK design has tended to focus on keeping houses warm in the winter, building properties to retain heat as opposed to worrying about releasing that heat in the summer. The prevention of illness and fatalities has focused on those that arise in the winter as opposed to when the weather heats up.

However, as the climate continues to warm in both frequency and intensity, and bodies such as the International Energy Agency warn that ‘if left unchecked energy demand from air conditioners will more than triple by 2050’ architectural design techniques which design out overheating, cool a building and leave behind little carbon footprint are in demand.

These focus on what are known as passive design and unlike mechanical active methods such as air conditioning they do not increase home energy costs, contribute to the urban island heat effect, or add waste heat to the environment.

The most well-known approach in this vein for new buildings is the fabric first Passivhaus (passive house) movement which originated in 1990s Germany. It works to strict criteria creating buildings which are comfortable to live in whilst using little energy for heating and cooling.

At RISE Design Studio we are in the process of offering a comprehensive Passivhaus design process for our clients. Currently we use a variety of the techniques to create comfortable, healthy, efficient, and beautiful buildings.

So how do you design a building to keep it cool in hot weather?

There are several effective passive and natural techniques to balance the temperature of a building, minimise heat gain and maximise heat loss:

  • External/Internal shading – reduces heat gains through windows by externally looking at awnings, overhangs, balconies, deep porches, and shutters. Internally blinds and curtains can help but are not the main source of effective shading
  • Exposed thermal mass – thermal mass is the ability of heavy and mid weight construction materials to store, absorb and release heat.

Buildings with a high exposed thermal mass such as concrete, rammed earth, stone, or brick, when used correctly help to maintain the internal temperature.

They absorb heat during the day and release it in the evening allowing for night time warmth as well as cooler buildings the next day.

  • Natural ventilation techniques – large and openable windows on both sides of a room encourage cross ventilation and blow heat out.
  • Enhanced insulation – insulation in roof and walls is the key to keeping heat in during the winter but reducing heat gains in the summer as it slows the movement of heat.

Recent innovations have led to the creation of highly insulating material such as hempcrete (marketed under names like Hempcrete, Canobiote, Canosmose, Isochanvre and IsoHemp) which combines hemp shiv and lime binder to provide natural vapour-permeable thermal mass without the carbon emissions.

  • High performance windows – triple glazing can be up to two times more efficient than double glazing for keeping the heat outside when it is excessively warm. The two air or gas-filled gaps between the panes reduces the amount of heat transfer between the exterior and interior.
  • Solar control glass – this prevents heat build-up thanks to a microscopic thin coating on one side of the pane to reflect the infrared rays of the sun. It is of particular use in large, glazed areas such as conservatories or on rooflights. It also helps to reduce excessive glare.
  • Constructing low level buildings – low lying buildings stay cooler as the ground maintains an even temperature.
  • Orientation of the building – newly designed buildings should face south as in the summer the greatest risk from the sun is low lying sun in the east and west.
  • Designing green environments – if the building sits within a cool environment with less tarmac, paving etc and more in the way of green roofs and walls, then the urban heat island effect is negated.
  • Reflective surfaces – incorporating paler walls, roofs and paving into the design increases reflectivity and prevents light absorption.

Our recent Light House project in London saw us incorporate a number of these techniques. These included the use of additional insulation to the external skin of the building; incorporating solar control on the glazing and encouraging passive cooling with kitchen doors and openable rooflights to ensure cross ventilation.

Building overheating in London and the UK

In line with the rest of the UK, London faces considerable threat from climate change, with overheating sitting alongside flooding as the greatest challenge for the capital. This summer the Met Office put in place a red weather warning with temperatures across the city soaring to 40degrees.

Due to the urban heat island effect experienced in the city and the ageing inner city housing stock, which is harder to retrofit with better insulation, it can be 10degrees hotter in the capital than other areas.

Climate experts predict that the likelihood of temperatures in the UK reaching this level is now ten times more likely than in the pre-industrial era with consequences for London including 59-76% of flats and up to 29% of detached properties overheating by 2030.

The Mayor’s office has made a number of long-term commitments and policy changes to tackle these including the latest update to the London Plan which requires planning applications to demonstrate the thermal performance and energy efficiency of new developments.

It looks at limiting solar and internal heat gain, as well as providing adequate passive ventilation. Mechanical cooling such as air conditioning is seen as the last step.

In June, the Government introduced new legislation stating that on new homes, ‘reasonable provision’ must be made to limit heating in summer and ‘provide adequate provision’ to cool them.

The built environment is responsible for 44% of global carbon emissions, with air conditioning systems alone representing up to 40% of their energy output. Architects stand at the front-line in addressing this and the environmental impact of overheating as temperatures rise.

Through planning and design of both new buildings, and in retrofit projects, a careful well-considered approach can help to alleviate the risk of overheating in a sustainable sense, and create buildings that are healthy, beautiful and comfortable.

As design-led architects here at RISE Design Studio we are very much committed to this ethos. For more information and to discuss your project please contact mail@risedesignstudio.co.uk or give us a call on 020 3290 1003

RISE Design Studio Architects company reg no: 08129708 VAT no: GB158316403 © RISE Design Studio. Trading since 2011.

Virtual Reality in Architecture

The 21st Century has seen innovations in technology like never before. From self-driving cars to Bluetooth and 3D printing to fibre optics, these rapid advances are impacting people’s lives and workplaces in a way that was not thought possible only a decade ago.

Virtual Reality (VR) joins that list, a fast-growing immersive technology pushing the boundaries of human experience.

Emerging in the 1970s and establishing itself through the entertainment and gaming industry in the late 1980s, its use is being adopted across education, healthcare, business, manufacturing, architecture, and design.

With the global market expected to grow to 12.19 billion USD by 2024, we examine virtual reality in architecture, the benefits it brings to architects and those in the design and construction cycle including clients and builders, and its future potential.

Showing our Clients their project in VR is a game-changer, as it allows them to walkthrough the proposals prior to being built.

Emergence of VR in architecture

We can trace the early adoption of VR applications for architecture back to the mid- 1980s as this was in line with early advancements in VR research and hardware.

It wasn’t until 2014 with the launch of Occulus Rift alongside improvements in accessibility and affordability such as Building Information Modelling (BIM) software advances like BIMx and cost-effective VR head-mounted displays like Google cardboard both of which we use here at RISE Design Studio, that it entered the architectural mainstream.

Up until this point the traditional methods of floor plans, 3D models and renderings were the ‘go to’ for communicating design ideas and concepts with clients. However, these presented pitfalls in conveying the true vision of the architect to the client, resulting in a lack of technical understanding, delayed feedback, frustration, and sometimes miscommunication.

VR’s ability to transport the user into an interactive 3D environment where they could explore a virtual representation of every room and floor of a building meant that architects could now immerse the client into the design at every stage, offering a true experience and deeper understanding from the beginning.

Arches House in West Hampstead, NW London

Why VR is the architectural client game-changer

Think about walking into a room of a newly designed building, experiencing the space, the natural flow of the interior, the scale of the rooms, opening doors and windows, now imagine doing that before building starts. This is what VR brings to the client journey, the ability to experience and understand a building before construction even begins.
From initial design mock-up to finalising finishing touches, the use of VR can occur at every stage of a project to help a client visualise the complete design. Thanks to its powerful immersive yet user-friendly capabilities it helps to build confidence in the scope and feel of the project, achieving buy-in and engagement early on.

It is this which offers real benefits to all involved throughout the process. The ability to convey what a building will feel and look like from the beginning allows everyone to understand the capabilities of a project.

This is invaluable when clients and sometimes contractors struggle to visualise the result and see how a design will work when viewing it through traditional design approaches.

Together this to-scale detailed representation helps to convince stakeholders of the integrity and value of the design, makes them more confident, allows for accurate and effective feedback and better use of time, and makes the entire process more efficient in cost terms and man hours.

Arches House in West Hampstead, NW London

VR the key to architectural collaboration

Many industries now use VR to collaborate when team members and clients are spread over remote locations.

In the field of architecture which involves a wide range of moving parts and individuals across many industries including the client, engineers, technical consultants, construction managers and specialist contractors, it is proving to be as effective.

VR collaborative tools such as Arkio and Trezi allow each individual with different perspectives and skills to experience the design seamlessly in a 3D environment, bringing the building to life no matter the location and losing nothing in translation.

They can engage in co-ordinated and in-depth discussion; mark-up designs or leave voice notes with feedback; meet within the virtual building to go through materials, designs for different floor spaces, or make real time changes such as the position of fire sprinklers and exits, the wall colour, lighting, and furniture.

BIMx is incredibly useful at RIBA Work Stage 4, of the planning, design and build process, the technical design stage prior to the project going out to tender for construction. It allows the architect to develop and refine the detail design more efficiently as all the components can be reviewed digitally in 3D and any troublesome areas, risks, or clashes with the mechanical and electrical services (supply pipes, waste, and ducting) as well as structure are identified and minimised.

Queries are addressed and resolved quickly with all relevant parties, either through the use of 3D stills or a video walkthrough, and the tender process is therefore much smoother.

Such effective collaboration and sense of presence between stakeholders from design through to build, negates wastage, costly design changes or planning issues, which can sometimes occur throughout a project.

It helps to identify, assess, and solve problems before construction begins saving all parties money as well as valuable time, and ensuring that the entire process is efficient, and everyone is satisfied.

Herbert Paradise in Kensal Rise, North West London

Incorporating VR at RISE Design Studio

Early adopters of VR, here at RISE Design Studio we used ArchiCAD and VR via the BIMx app on smartphones on our recent Light House project in South London.

We are committed to a rigorous approach on all our projects and as discussed previously, the technology allowed us to work out fundamental technical and design elements in comprehensive detail prior to work starting on site, this included:

– the positioning of the Mechanical Ventilation Heat Recovery ducting routes
– the best position for the Solar PV and battery, and the cabling
– the positioning of drainage pipes from the bathrooms and the utility
– the Sun Shadow path for window openings

All of which meant we were able to design and deliver the result the clients envisioned as well as work collaboratively and with enhanced clarity with each of the specialist contractors.

As with all fast-moving technology, VR continues at pace opening opportunities for those working in architecture and design, as well as everyone involved in the life cycle of a building.

Its capabilities to transport not only the client but consultants, contractors, and engineers, into an immersive real-time environment means that it offers endless possibilities for how projects are created, communicated, managed, and delivered.
In an industry in which innovation and evolution are fundamental to creative growth, embracing such technology would appear now to be essential as opposed to a ‘nice to have.’

At RISE Design Studio, we have considerable experience utilising the most advanced software including BIMX Hyper Model to deliver high quality projects with improved visualisation, productivity, increased delivery speed and reduced costs.

Herbert Paradise in Kensal Rise, NW London. Showing the full width garden studio at the end of the rear garden

Frequently Asked Questions

1. What is Virtual Reality (VR) in architecture?

Virtual Reality in architecture is the use of immersive technology to create a lifelike, three-dimensional representation of architectural designs. This allows architects, clients, and builders to explore and interact with a virtual building at every stage of the design and construction process.

2. How did VR become a tool in architecture?

VR began to be utilized in architecture around the mid-1980s, alongside advancements in VR research and hardware. It wasn’t until 2014, with the advent of more affordable VR technologies such as Occulus Rift, BIMx software, and Google cardboard, that VR entered the architectural mainstream.

3. What benefits does VR bring to architecture?

VR offers numerous benefits in architecture, such as improved communication of design ideas, enhanced client understanding, and early stakeholder engagement. It allows clients to experience a building even before construction begins, offering a deeper understanding of the project and fostering confidence in the design. VR also optimizes collaboration, time efficiency, and cost management throughout the design and construction process.

4. How does VR facilitate architectural collaboration?

VR serves as an effective tool for architectural collaboration, especially in projects where team members and clients are in different locations. Collaborative tools like Arkio and Trezi allow stakeholders to experience the design in a 3D environment, discuss designs in-depth, leave feedback, and make real-time changes, enhancing the overall efficiency of the project.

5. What’s the role of VR in the client journey within architectural projects?

VR significantly enhances the client journey in architectural projects. It allows clients to walk through a newly designed building, experiencing the space, scale, and layout even before construction begins. This immersive experience helps clients visualize the complete design, fosters early engagement, and builds confidence in the project.

6. How does VR improve communication in architecture?

VR allows for a more realistic and interactive representation of architectural designs, which can be a game-changer in terms of communication. Traditional methods such as floor plans and 3D models can sometimes fail to convey the architect’s vision completely. VR helps overcome this issue by providing a to-scale, detailed 3D environment that can be explored and interacted with, ensuring a more accurate understanding of the design.

7. What are the cost and time benefits of using VR in architecture?

Using VR in architecture can lead to significant cost and time savings. By allowing stakeholders to identify and resolve potential issues before construction begins, VR reduces the risk of costly design changes, planning issues, or wastage. It also helps to streamline the design and review process, making it more time-efficient.

8. How is VR used at RISE Design Studio?

At RISE Design Studio, VR is incorporated through ArchiCAD and the BIMx app on smartphones. This technology has been used on recent projects to work out fundamental technical and design elements in comprehensive detail prior to work starting on site.

9. Does VR have a future in architecture?

Absolutely. VR is an innovative technology that offers limitless possibilities for architectural creation, communication, management, and delivery. As it continues to evolve, it is expected to play an increasingly important role in architecture and construction.

10. How does VR contribute to the life cycle of a building?

VR plays a significant role throughout the life cycle of a building. From the initial design stages to the final construction, VR allows for immersive visualization, interactive collaboration, and effective problem-solving. By offering a realistic, 3D representation of the building at every stage, VR ensures that all involved have a clear understanding of the project, leading to a more efficient and successful construction process.

If you would like to talk through your project with the team, please do get in touch at mail@risedesignstudio.co.uk or give us a call on 020 3290 1003

RISE Design Studio Architects company reg no: 08129708 VAT no: GB158316403 © RISE Design Studio. Trading since 2011.

Traditional Procurement vs. Design & Build: Making the Right Choice for Your Project

As an architect with over 20 years of experience, working in a small contemporary design-led architecture studio focused on low energy and low embodied carbon designs, I am frequently asked about the best approach to construction procurement: traditional procurement or design & build. This is not a question with a single answer, as it truly depends on your building project, and your specific goals and objectives.

In this blog post, we will explore the pros and cons of traditional procurement and design & build, explaining the concepts in plain English. By the end of this article, you will have a clearer understanding of these procurement methods and be able to determine which one is better suited for your project. Let’s dive in!

Architects Sude, Sean and Imran at RISE Design Studio office in Queen's Park, NW London
Architects Sude, Sean and Imran at RISE Design Studio office in Queen’s Park, NW London

Understanding Traditional Procurement and Design & Build

Traditional Procurement: When you opt for traditional procurement, you follow a tried and tested approach that has been in use since the Victorian era. Here’s how it works: You appoint a fully qualified architect to design your project, whether it’s a new housing estate, an apartment block, home extension, or loft conversion (we strongly recommend working with a chartered architect for the best results). Once you obtain planning permission, you or your project manager (which could be your architect) invite building contractors to submit bids for the project. These bids outline the contractors’ prices, qualifications, and sometimes their capacity for your specific project. Based on these bids, you choose a contractor, and they commence the construction work according to your architect’s drawings and specifications.

Design & Build: In recent years, design & build has emerged as the main alternative to traditional procurement for developers and individuals commissioning construction projects. With design & build, you hire a building contractor at the project’s outset, often through an invitation to tender. Once hired, the contractor assumes full responsibility for making everything happen, from the initial stages to the final handover. This approach may sound appealing, as it relieves you of many responsibilities. However, as we know, things are rarely as simple as they seem. Let’s take a closer look at the decision you need to make.

Matching Priorities with Procurement Routes

Before making a decision, it’s essential to determine your priorities for the project. What matters most to you? Take a moment to reflect on your key considerations and write them down in order of importance. Throughout this article, refer back to this list as we discuss the merits and drawbacks of traditional procurement and design & build.

Traditional Procurement: When Does It Shine?

If design is near the top of your priority list and you have a strong sense of how your project should look and feel, traditional procurement may be the best choice for you. Traditional procurement allows for collaboration with an architect who can capture your vision and bring your ideas to life. If maintaining control over the design and construction process is important to you, traditional procurement offers distinct advantages. Additionally, if you value attention to detail and want the flexibility to select different professional consultants and specialists, this method also provides the freedom to do so.

A typical Concept Design Report showing 3D perspectives and 3D sections

Advantages of Traditional Procurement:

  • One-to-one relationship with the design team: Working directly with the architects fosters a close collaboration and ensures your vision is accurately translated into the design.
  • Retention of control: You have a greater level of control over the project’s direction, allowing you to make decisions aligned with your vision and objectives.
  • Flexibility in selecting consultants and specialists: Traditional procurement enables you to choose the best professionals for each aspect of the project, ensuring expertise and specialisation in specific areas.
  • Transparency in selecting builders: The tender process allows you to choose builders based on criteria such as price, quality, time to complete the works or a combination of all, tailored to your needs.
  • Specific brief for building contractors: With a well-defined brief, the pricing from contractors should be closely aligned with the work required. This is particularly advantageous for complex projects.

Disadvantages of Traditional Procurement:

  • Dealing with multiple individuals: Unless you appoint your architect as the project manager, you may need to communicate with various people involved in the process, potentially increasing complexity.
  • Uncertainty about costs: Traditional procurement involves separate billing for each project stage, which may lead to less cost predictability compared to a single initial quote. It is possible to have more control over costs with traditional procurement by appointing a Quantity Surveyor (Cost Consultant).
  • Time delays in the tender process: Waiting until you obtain planning permission before initiating the tender process can extend the overall project timeline. Although it is possible to work at risk and complete the technical package of information (used to tender your project) in parallel to the planning determination period (which is normally 8 weeks).

Design & Build: When Is It Ideal?

Design & build has gained popularity as an alternative to traditional procurement, particularly for projects with cost and timing as the top priorities. If your project is fairly straightforward without hidden surprises and you aim for greater cost certainty, design & build might be the right approach. This method streamlines the responsibility by placing it entirely on the contractor, allowing for potentially quicker project completion.

Advantages of Design & Build:

  • Single entity responsible for project delivery: With design & build, one company takes full responsibility for delivering your project, simplifying communication and coordination.
  • Greater cost certainty: While it’s important to note that unexpected events can impact the budget, design & build offers a clearer understanding of project costs compared to traditional procurement.
  • Simultaneous planning and construction: The design and construction processes can run concurrently, allowing the contractor to start on-site as soon as planning permission and building regulations approval are granted, potentially accelerating project initiation.
  • Improved buildability: Advocates of design & build argue that involving building contractors in the design process enhances “buildability.” Contractors often prioritise practicality, requesting designs that utilise standard, easy-to-assemble elements.

Disadvantages of Design & Build:

  • Reduced control over project outcome: While design & build relieves you of many responsibilities, it also means relinquishing control over decision-making. It’s essential to trust that the contractor will execute the project in alignment with your vision.
  • Potential compromises in quality: Contractors may attempt to stick to their original quote, but they also need to make a profit. If faced with delays or unexpected costs, the contractor may be incentivised to compromise on quality, either in material selection or attention to detail and with no oversight this is difficult to control.
  • Lack of flexibility and adaptability: Design & build contracts typically lock in the project’s nature from the start, leaving less room for evolution or adjustments. Significant changes requested by the planning authority can disrupt the advantages of design & build.
  • Limited contractor options: The number of building contractors experienced in full design & build services may be limited, reducing your range of choices and potentially leading to compromises in contractor selection.
Aerial View of Progress on Site at Herbert Paradise, Kensal Rise, NW London

Introducing Develop & Construct: A Hybrid Solution

You may be wondering if there’s a way to combine the advantages of traditional procurement and design & build while mitigating their disadvantages. Hybrid systems, such as “develop & construct,” offer that promise. With develop & construct, you appoint an architect to provide a design concept. Before submitting the planning application, you commission a contractor to design and build based on that design. However, it’s important to consider whether you trust the contractor’s designers to faithfully execute your architect’s vision. Collaboration between the contractors and the original architects can help develop the design, but the contractors ultimately make the decisions.

Which Procurement Method Should You Choose?

It’s important to acknowledge that most of the time, trade-offs are necessary when choosing a procurement route. For example, if you desire bespoke craftsmanship, it will naturally extend the project timeline compared to using mass-produced elements. You must weigh your priorities carefully, as the fastest build and the most meticulously crafted project are seldom synonymous.

At our studio, we generally lean towards recommending the traditional procurement route. However, we recognise that design & build can be suitable for projects that are fairly straightforward, cost-sensitive, and under £100,000 in total. For all other projects, where achieving a high level of design excellence, intrinsic beauty, or contributing to the prestige and reputation of your business is important, the traditional procurement method is likely the better bet.

Sean, Sude and Imran discussing Arches House at RISE Design Studio in Queen's Park, NW London
Sean, Sude and Imran discussing Arches House at RISE Design Studio in Queen’s Park, NW London

How RISE Design Studio Can Help You

At RISE Design Studio, a London-based RIBA chartered architecture and planning practice, we understand the complexities of construction procurement. With our focus on low energy and low embodied carbon designs, we are committed to delivering sustainable and environmentally conscious architecture. Our expertise lies in residential extensions, conversions, restaurants, cinemas, schools and new build homes. We work closely with homeowners, landowners, end users and developers, helping them achieve ROI-focused results.

If you’re seeking a dedicated team that embraces a transparent and collaborative approach, ensuring that you have all the information necessary to make informed decisions about your construction project, contact us today to discuss your project requirements and discover how we can contribute to your vision.

In conclusion, the choice between traditional procurement and design & build depends on your specific goals and priorities. By understanding the pros and cons of each approach and aligning them with your project requirements, you can make an informed decision. At RISE Design Studio, we are here to guide you through the process, delivering sustainable and aesthetically pleasing results that align with your vision and values.

If you would like to talk through your project with the team, please do get in touch at mail@risedesignstudio.co.uk or give us a call on 020 3290 1003

RISE Design Studio Architects company reg no: 08129708 VAT no: GB158316403 © RISE Design Studio. Trading since 2011.