Unifying Spaces: Transforming Flats into a Single Home (Amalgamation and Deconversion)

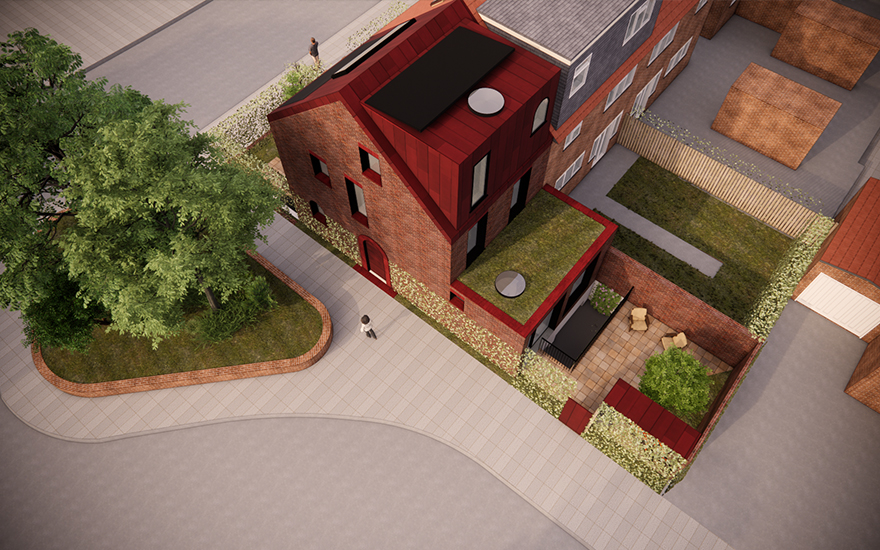
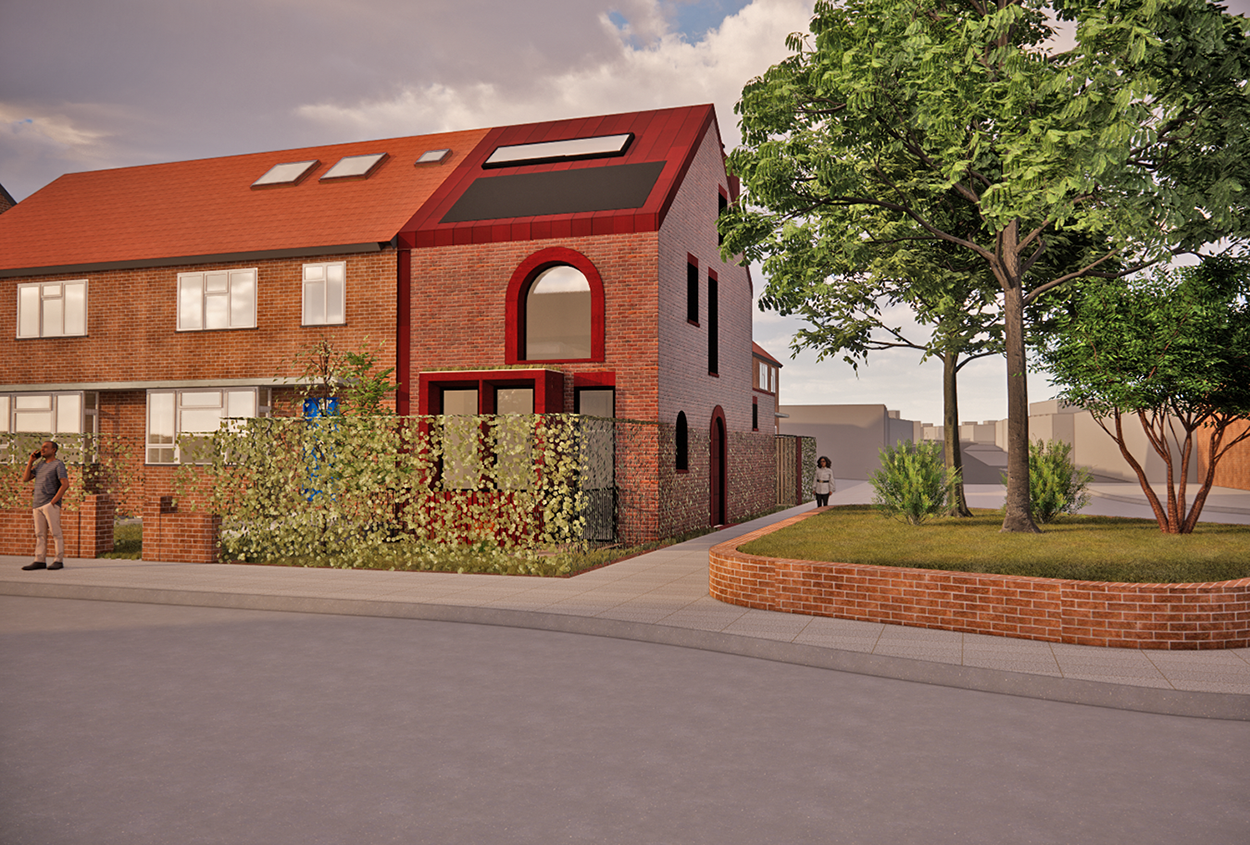
The intricate tapestry of urban landscapes tells the tale of human adaptation over centuries. Historical townhouses, particularly those opulent Victorian homes, are rich chapters in this narrative. Erected during an era where spacious, multi-room dwellings were a symbol of prosperity, they exuded an allure of magnificence. Yet, as urban demands intensified and housing needs shifted, these grand edifices were often dissected into individual flats – a pragmatic solution for an increasingly crowded and transient population.

View of Living of Kempe Road in NW London converting two flats to one house by RISE Design Studio
Kempe Road in NW London converting two flats to one house by RISE Design Studio

Fast forward to the present day, and the ethos is shifting once again. With a resurgence of interest in sustainable living and the need for spaces that evoke a sense of connection and continuity, there’s a renewed appetite for homes that echo the grandeur of yesteryears while incorporating the energy efficiencies of tomorrow.

For the contemporary homeowner, the allure of a deconverted space goes beyond mere nostalgia or the romanticism of living in a restored Victorian abode. It’s about reclaiming and repurposing space in a manner that resonates with today’s ethos. We’re seeing a growing tribe of homeowners who are not just looking for size or scale, but spaces that breathe, connect, and are in harmony with nature. They want homes that are both a nod to the past and a leap into the future.

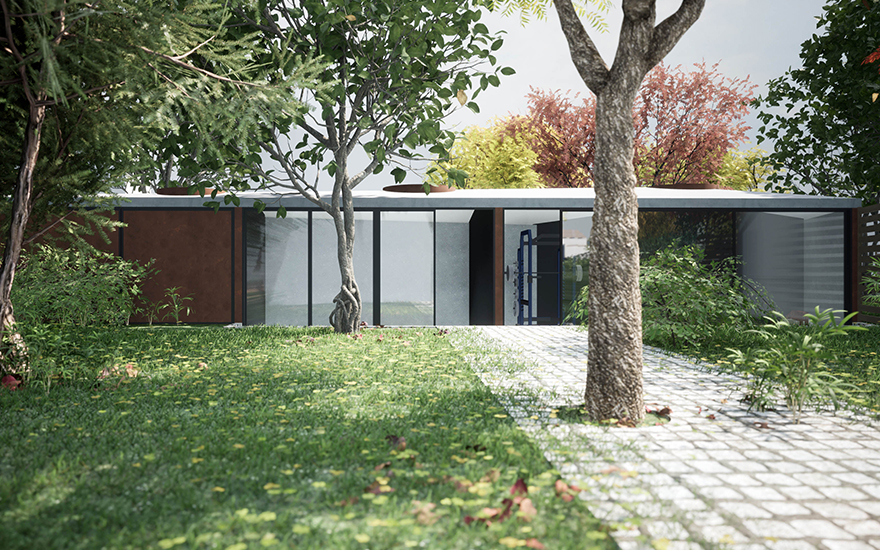
This trend is not just an architectural fad. It’s rooted in deeper shifts in societal values and priorities. The modern-day homeowner is increasingly environmentally conscious. There’s an understanding that the choices we make in our homes today will have repercussions for generations to come. Thus, the deconversion process isn’t just about merging walls or restoring old fireplaces; it’s about integrating state-of-the-art sustainable technologies, ensuring energy efficiency, and reducing the carbon footprint of the dwelling. It’s about creating a home that’s warm in winter without being reliant on fossil fuels, a home that’s cool in summer without the need for power-hungry air conditioning.

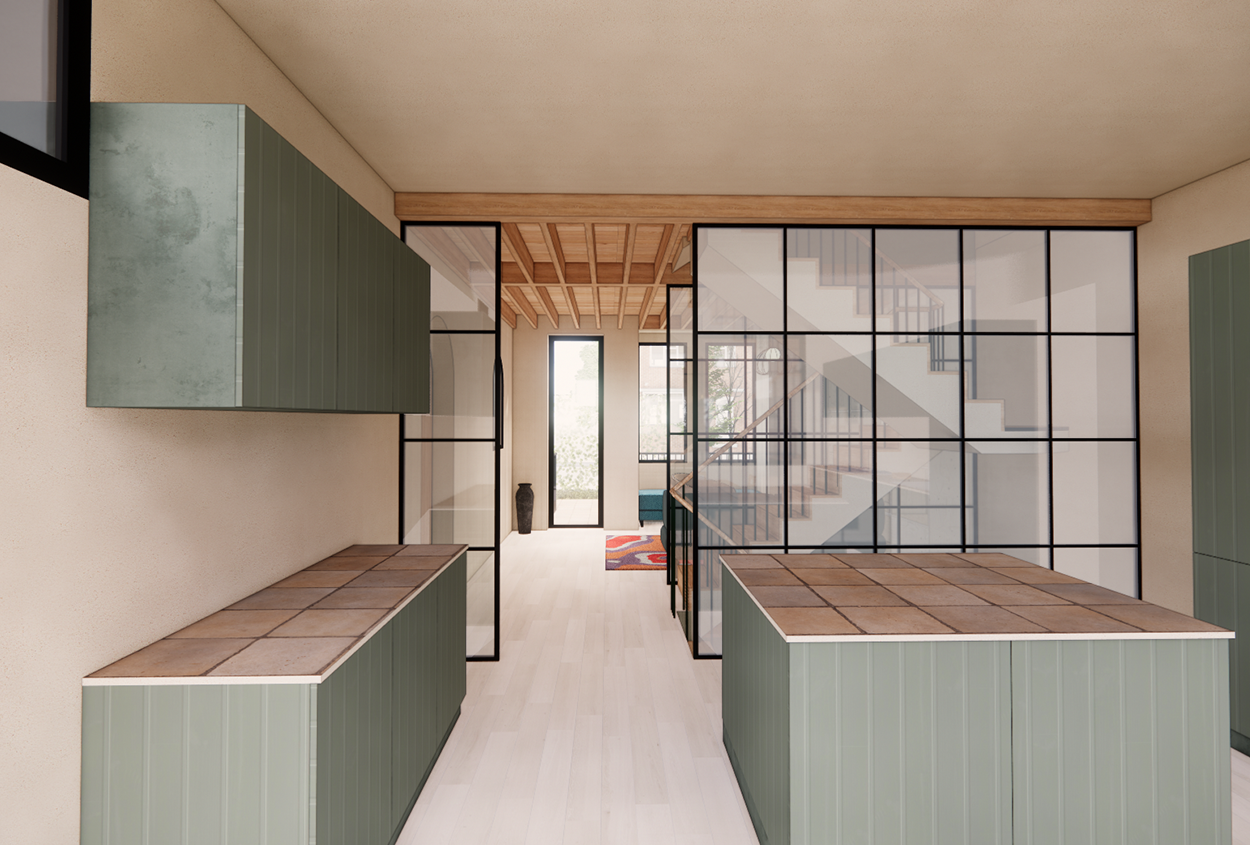
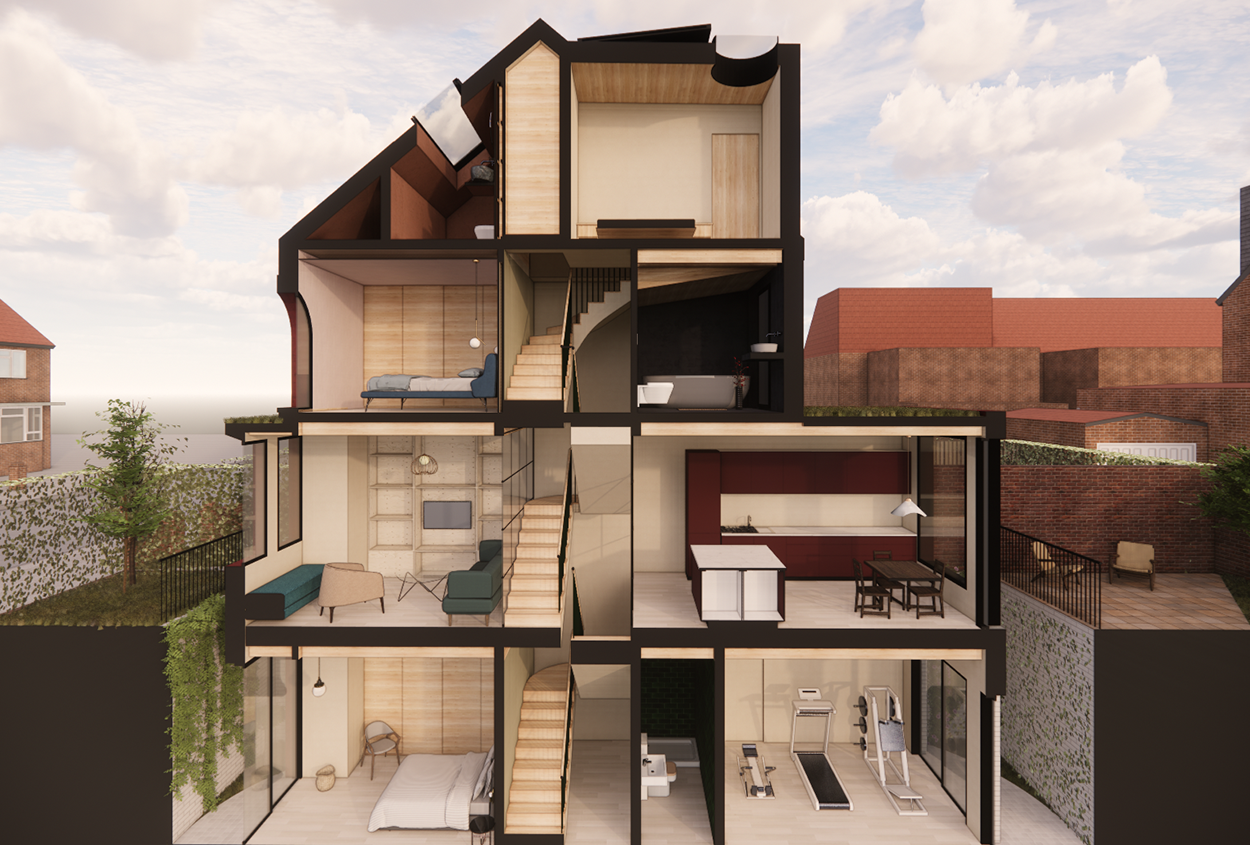
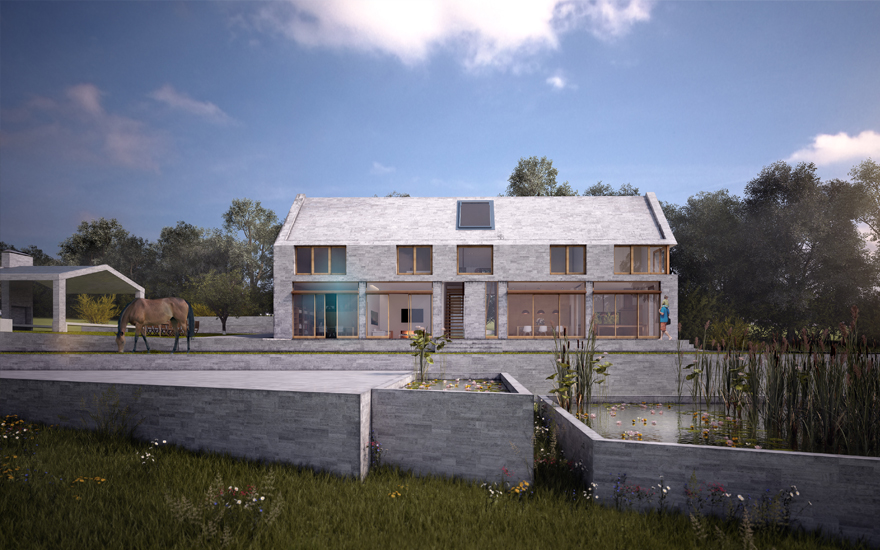
In my tenure at our small contemporary design-led architecture studio, I’ve had the privilege of guiding numerous homeowners on this transformative journey of deconversion. Each project is a delicate dance of honouring the historical integrity of the space while weaving in modern, sustainable design elements. It’s an intricate process, replete with challenges, but the end result – a harmonious blend of the old and the new, the timeless and the innovative – is invariably worth the effort.

1. The First Step: Evaluating the Current State

Commencing a deconversion journey without a clear understanding of the current state of the property is much like setting sail on tumultuous seas without a compass. This primary step is vital not only from a design perspective but also from a legal and regulatory standpoint.

Historical Context and Alterations

Victorian homes, with their intricate detailing and grand designs, were often subjected to multiple alterations over the decades. The economic ebbs and flows, combined with the changing dynamics of urban living, meant that these dwellings often morphed to fit the needs of their inhabitants. A building that started as a singular grand family home might have been subdivided into multiple flats or bedsits to cater to the housing demand of different eras.

Interestingly, not all these modifications were done with the requisite permissions. In many cases, homeowners or landlords might have made these changes informally, without seeking the appropriate approvals from local authorities. While this might seem like a minor oversight, it bears significant implications for the present homeowner. If the property is still officially registered as a singular dwelling, despite its physical fragmentation, it can indeed simplify the deconversion process.

Navigating the Maze of Permissions and Regulations

Regardless of the historical context, it’s paramount to engage with your local council early on. This is not merely a box-ticking exercise. Engaging with the local council can offer clarity on several fronts:

  • Legal Status: Determine the official status of your property. Is it listed as a singular home or multiple dwellings? This information will serve as the foundation for your deconversion journey.
  • Architectural Integrity: A dialogue with the local council can help you glean insights into the architectural significance of the building, its history, and any heritage restrictions that might be in place. Victorian homes, given their age and cultural significance, might be subject to certain conservation regulations.
  • Planning Permissions: Based on the current state and official status of the building, you’ll need to understand what permissions are required for deconversion. This might range from simple internal modifications to more extensive structural changes.
  • Utilities and Services: Over time, divided homes often have utilities (like water, gas, and electricity) that are split among the units. It’s essential to assess these divisions and understand the implications of reverting them back to serve a singular residence.
  • Safety and Compliance: Older homes can sometimes harbour hidden issues – be it in the form of outdated wiring, plumbing anomalies, or structural wear and tear. Ensuring the safety and compliance of the home with modern standards is of utmost importance.

Seeking Professional Guidance

While it’s feasible to embark on the initial evaluation yourself, seeking the guidance of professionals – architects, surveyors, or heritage consultants – can be invaluable. They bring a wealth of experience and can preempt potential roadblocks, making the deconversion journey smoother and more efficient.

In conclusion, as the adage goes, ‘Well begun is half done.’ A thorough evaluation of the current state sets the tone for the subsequent stages of deconversion. It ensures that the journey back to grandeur is not just a romantic endeavour but one rooted in clarity, legality, and practicality.

2. Do You Need Planning Permission?

The allure of restoring a grand old home to its original state often comes with the assumption that, since you’re simply reverting to its initial design, there’s no need to get embroiled in the maze of permissions. Unfortunately, the reality isn’t always so straightforward. The act of deconversion, while it may sound simple, involves a slew of considerations, both architectural and regulatory.

Historical Overview: The 1990 Act and Beyond

The 1990 Town and Country Planning Act, which you may be familiar with, outlines the general permissions required for building and development works in the UK. Under this act, many internal and external alterations and extensions, often don’t require formal planning permission. This is termed as “permitted development rights”.

However, the landscape of urban planning and housing has evolved since then. In the year 2000 and beyond, with rising housing demands and urban densification, local councils became increasingly cautious of developments that led to a loss of housing units. The deconversion of a property from multiple flats to a singular residence, naturally, falls under this bracket.

Deconversion: A Balancing Act

While the idea of bringing a property back to its former glory is romantic, one has to navigate the fine balance between personal desires and community needs. Here are a few pivotal points to consider:

  • Loss of Housing: Local councils, especially in densely populated areas, are keen to ensure that there’s no significant loss of housing stock. If a building is currently home to multiple families and its deconversion would displace them, this can be a crucial factor in the decision-making process.
  • External Modifications: If your deconversion involves changes to the external façade, roofing, or any extensions, it will most likely require planning permission. Victorian homes, particularly those in conservation areas or listed buildings, have strict guidelines to preserve their historical and architectural integrity.
  • Infrastructure and Utilities: Combining utilities which had been separated – such as gas, water, and electricity – might need permissions, especially if they involve significant ground or structural work.
  • Local Housing Needs: This is a nuanced aspect that can vary from one council to another. If your area is facing a housing shortage or has specific goals for housing density, the council might be less inclined to approve a deconversion. It’s crucial to understand the local housing strategy and policies.

Professional Consultation and Pre-Application Advice

One way to navigate this complex terrain is to opt for a pre-application consultation with your local council. This process involves discussing your plans with the planning department before officially submitting your application. It offers a chance to understand any potential issues or concerns the council might have and provides an opportunity to make modifications before the formal submission.

Furthermore, enlisting the services of a seasoned architect can be invaluable. Their experience with the local regulations, coupled with a deep understanding of architectural possibilities, can guide you through the process with greater clarity and confidence.

In conclusion, while the path of deconversion is laden with multiple regulatory considerations, it’s not an insurmountable challenge. With the right guidance and a clear understanding of the local landscape, restoring a property to its singular grandeur can be both a feasible and deeply rewarding endeavour.

3. Housing Needs and Local Policies: Navigating Varied Terrains

While the broader strokes of housing and planning laws in the UK have a national framework, the detailed application of these laws is often left to local councils. This means that each council, driven by its own unique socio-economic realities, housing needs, and historical contexts, might have different policies regarding deconversion. Let’s delve into the varying terrains of housing policies across different boroughs, using London as a prime example.

Understanding London’s Mosaic of Housing Policies

London, with its rich tapestry of history, architecture, and socio-economic diversity, is a prime example of how varied local housing policies can be. Here’s a brief snapshot:

  • Kensington and Chelsea (RBKC): A borough with a rich history and some of the country’s most prestigious architectural gems, Kensington and Chelsea have always been protective of their residential stock. The council is often wary of any developments or alterations that might decrease the number of available housing units. This caution is borne out of a combination of preserving the borough’s character and ensuring a diverse mix of residents. Therefore, planning permission might be necessary for even minor deconversions, especially if it involves external modifications or loss of housing.
  • Westminster: Like RBKC, for even the slightest deconversions in Westminster, securing planning permission could be advisable, particularly if it involves changes to the exterior or impacts housing availability.
  • Camden: While still rooted in history, Camden has a more eclectic mix of architectural styles and a diverse population. As such, the council’s approach towards deconversions, especially for combining just two flats, might be more lenient. However, it’s still essential to be wary of localised regulations, especially if the property falls within a conservation area or if the proposed changes might have a broader impact on the local community.
  • Brent: Similar to Camden, the borough of Brent is generally more permissive when it comes to amalgamation.

Researching and Engaging: A Two-Pronged Approach

Given these varied terrains, adopting a dual strategy is imperative:

  • Research: Begin by diving deep into the specific housing policies of your borough. Most councils have their housing strategies, conservation area policies, and planning guidance available online. Look for any specific mentions of deconversions or the amalgamation of flats.
  • Engage: No amount of online research can replace direct engagement. Reach out to the planning department of your borough for a pre-application consultation. This not only helps in understanding their stance but also builds a rapport, which can be beneficial during the formal application process.

Other Variables to Consider

While the borough’s policy stance is crucial, it’s also essential to consider:

  • Local Housing Demand: A borough facing acute housing shortages might be less inclined to approve deconversions, even if their policies seem lenient.
  • Community Feedback: Neighbours and local community groups can influence the council’s decision. Engage with them early on to understand their concerns and, if possible, integrate their feedback into your plans.
  • Historical and Architectural Value: Properties with significant historical or architectural importance might have added layers of restrictions, regardless of the borough’s general stance.

In conclusion, the labyrinth of local housing policies might seem daunting at first, but with meticulous research and proactive engagement, it’s possible to navigate this terrain successfully. Understanding the unique pulse of each borough and aligning your project with local needs and sentiments is key to a smooth deconversion process.

4. Making a Case with a Lawful Development Certificate

Navigating the intricacies of housing policy and local planning regulations is often a complex dance, especially when you’re dealing with historical properties that might have seen a range of alterations and uses over their lifetime. In situations where a property has been functioning differently from its official status, the Lawful Development Certificate (LDC) emerges as a powerful tool. It’s designed to provide a legally binding determination of a property’s lawful use or development status. Let’s delve deeper into the LDC and understand how it can be utilised in the process of deconversion.

What is a Lawful Development Certificate?

A Lawful Development Certificate is a formal statement issued by the local planning authority, confirming the lawfulness of a property’s existing use, operational development, or failure to comply with a condition or limitation. In the context of deconversion, it serves to legitimise a singular use that has existed continuously for a particular period, even if it’s at odds with the property’s official designation.

When Should One Consider an LDC?

  • Existing Use for Over Four Years: If a property has been functioning as a single unit without the necessary permissions for over four continuous years, then this uninterrupted use can be legalised through an LDC.
  • Failure to Adhere to Conditions: If certain conditions or limitations were attached to previous planning permission and they’ve been breached for over ten continuous years, an LDC can be pursued.

Building a Strong Case: Steps to Obtain an LDC

  • Gathering Solid Evidence: One of the key factors in securing an LDC is proving the continuous use or the breach. Evidence might include utility bills, rental agreements, postal records, electoral register entries, affidavits from neighbours, and photographic evidence.
  • Application Process: Begin by filling out the necessary forms available from your local council’s planning department. Alongside the form, submit all the evidence that corroborates the use you’re claiming.
  • Council Review: Once submitted, the council will review the application and evidence. They might also conduct site visits and interview neighbours or local community members to verify the claims.
  • Decision: If the evidence is found to be compelling and aligns with the council’s criteria, an LDC will be granted, certifying the existing use or development as lawful.

The Benefits of Securing an LDC

  • Legal Clarity: An LDC provides a clear, definitive statement on the lawfulness of the property’s use, shielding homeowners from potential enforcement actions in the future.
  • Ease in Property Transactions: If you decide to sell the property, having an LDC can simplify the transaction process, as it eliminates any ambiguity regarding the property’s lawful use.
  • Peace of Mind: By ensuring that the property’s use aligns with the legal framework, homeowners can have peace of mind and focus on enjoying their restored space.

In summary, the Lawful Development Certificate serves as an essential instrument in the deconversion process, particularly for properties with a complex usage history. By meticulously gathering evidence and liaising with the local planning authorities, homeowners can legitimise their property’s use, ensuring a smooth and hassle-free deconversion journey.

5. Evaluating The Odds: Chances of Successful Deconversion

Undertaking a deconversion (amalgamation) can be a formidable endeavour, layered with multifaceted considerations and potential roadblocks. While the idea of restoring a property to its original splendour is an enticing one, the path to realisation is seldom linear. To grasp the prospects of a successful deconversion, it’s vital to evaluate several intertwined factors, each contributing to the larger picture of viability.

1. Restoration of Original Use

Importance: Reverting a property to its original state can be easier than significantly altering its structure. A building with a history of singular use, subsequently converted into multiple units, might find fewer obstacles when deconverted.

Challenges: Historical modifications might have drastically altered the property’s layout and structural integrity. Unearthing the original plans or accessing historic data can prove instrumental.

Impact on Success: If the property’s original design and structure are largely intact, this bodes well for the deconversion process.

2. Adherence to Space Standards for Family Homes

Importance: Ensuring a comfortable living environment is paramount. Deconverting should not compromise the space standards set for family homes, particularly in terms of room sizes, natural light, and ventilation.

Challenges: Some properties, when divided into flats, may have been modified to optimise smaller living spaces. Such alterations can make it challenging to restore rooms to their original, spacious configurations.

Impact on Success: A successful deconversion should align with contemporary expectations of living standards. Homes that can naturally adhere to or be adapted to meet these standards have higher success rates.

3. Consideration of Market Demands in the Area

Importance: Understanding the housing market in the vicinity is crucial. Are larger, singular homes in demand, or is there a predominant preference for individual flats?

Challenges: In areas where flats are in higher demand due to urbanisation or increased rental needs, deconversion might face market resistance.

Impact on Success: Ensuring that the deconverted property aligns with market demands can significantly increase its value and appeal, thereby enhancing the chances of a fruitful endeavour.

4. Ensuring the Non-Loss of Affordable Rental Units

Importance: With urban areas facing housing shortages, especially affordable rental units, it’s vital to weigh the societal implications of deconverting a property.

Challenges: Local councils might be resistant to deconversions that result in a decrease in affordable housing stock, particularly in areas with pronounced housing pressures.

Impact on Success: If a property’s deconversion leads to the loss of affordable units, obtaining permissions might be more challenging. Ensuring a balance or proposing alternate solutions can tip the scales in favour of a successful deconversion.

In Conclusion: Evaluating the odds of successful deconversion requires a holistic view, considering not just the architectural and logistical challenges, but also societal needs and market dynamics. While each property is unique, understanding these core factors can equip homeowners with the knowledge needed to navigate the deconversion process strategically, maximising their chances of success.

6. Precautions Before the Build

Launching a deconversion project is a significant undertaking, with the allure of crafting a unique, spacious residence from the patchwork of previously separated flats. Yet, beyond the sheer architectural and aesthetic considerations lies a web of regulatory intricacies that mandate careful planning. Ignoring these can lead to costly repercussions, both legally and financially. Here’s a comprehensive guide to the precautions one must consider before embarking on the actual construction phase.

1. Understand the Status of Your Building

Is it Listed? For buildings of historical or architectural significance, obtaining Listed Building Consent is non-negotiable. Altering such a structure without appropriate permissions can lead to severe legal consequences.

Conservation Areas: If your property resides within a conservation area, there might be additional restrictions on development to preserve the character and appearance of the area.

2. Building Regulations Approval

Beyond planning permissions, it’s essential to ensure that your deconversion project aligns with current building regulations. These regulations ensure that any building work is safe, energy-efficient, and accessible.

Why it matters: Even if your project doesn’t necessitate planning permission, building regulations approval is often still required. It covers aspects like fire safety, insulation, ventilation, and structural integrity.

3. Environmental Considerations

If your property is located near a watercourse or in an area of natural significance, there might be additional environmental permits and assessments to consider.

Flood Risk: Is the property in a flood-prone area? If so, assessments and precautions will be necessary to ensure the safety and sustainability of the build.

Ecological Impact: Before commencing work, ascertain if the construction might affect local wildlife or habitats. Mitigation strategies might be necessary to minimise any negative impacts.

4. Opting for Planning Permission

Even if the initial assessment suggests that planning permission isn’t strictly necessary, it might be prudent to opt for it regardless.

Benefits:

  • Flexibility: This provides a broader canvas and might allow for more extensive alterations than initially anticipated.
  • Security: It reduces the risk of future legal challenges or disputes with the local council.
  • Resale Value: Having all necessary permissions in place can enhance the property’s market appeal and value.

5. Engage with Neighbours and the Community

Although not strictly a legal requirement, it’s a considerate gesture to inform neighbours of impending construction. This can mitigate potential disputes or concerns and foster a sense of community understanding.

Feedback Loop: Engaging early can provide valuable insights or feedback, which might shape the trajectory of the project in a more community-friendly direction.

In Conclusion: The thrill of initiating a deconversion project is undeniable, but the foundation of any successful build lies in its meticulous planning. By heeding the above precautions, homeowners can ensure that their dream project doesn’t become mired in legal complications or unforeseen challenges, paving the way for a smoother construction phase and a delightful end result.

7. The Architect’s Perspective: Seeking Professional Guidance

Embarking on the journey of deconversion can feel akin to navigating a labyrinth, with its myriad twists and turns. However, this complexity, while daunting, is not insurmountable, especially with the guiding hand of professional expertise. Architect practices, such as RISE Design Studio, play a pivotal role in transforming what could be a formidable challenge into a manageable and even enjoyable process. Here’s why seeking professional guidance is indispensable:

1. Creative Problem-Solving

Innovative Solutions: A good architect doesn’t just follow guidelines; they think creatively. They can find innovative solutions to design challenges, ensuring your vision is realised without compromising on regulatory compliance.

Maximising Potential: An architect can help you make the most of your space, suggesting alterations that you might not have considered, which can significantly enhance the functionality and aesthetic appeal of your home.

2. Expertise in Local Building Regulations

Local Insights: Architects bring a wealth of knowledge about local building regulations. They can advise on the specifics of what’s permissible in your area, ensuring that your project adheres to all necessary legal standards.

Navigating Complexities: Given the complexity of building regulations, having a professional who can interpret these rules and how they apply to your specific project is invaluable.

3. Tailored Advice

Individual Circumstances: Every deconversion project is unique. A professional architect can provide advice that is specifically tailored to your individual circumstances and needs.

Personal Touch: Beyond the technical aspects, architects can align the design with your personal style and preferences, ensuring the end result feels like a true reflection of you.

4. Liaising with Local Authorities

Smooth Process: Architects can act as intermediaries between you and the local authorities. They understand the language and requirements of planning applications and can often expedite the process.

Avoiding Pitfalls: Their experience means they are adept at foreseeing potential objections or issues, allowing for preemptive solutions that avoid delays or rejections.

5. Quality Assurance

Attention to Detail: From the initial sketches to the final touches, architects are focused on quality. Their oversight can ensure that the construction process adheres to the highest standards.

Future-proofing: Good architectural guidance not only meets your current needs but also considers the longevity and adaptability of the space for future requirements.

6. Stress Reduction

Project Management: With an architect overseeing the project, the burden of managing various contractors and ensuring timelines are met is significantly reduced.

Peace of Mind: Knowing that your project is in the hands of professionals can provide immense peace of mind, allowing you to focus on the excitement of seeing your vision come to life.

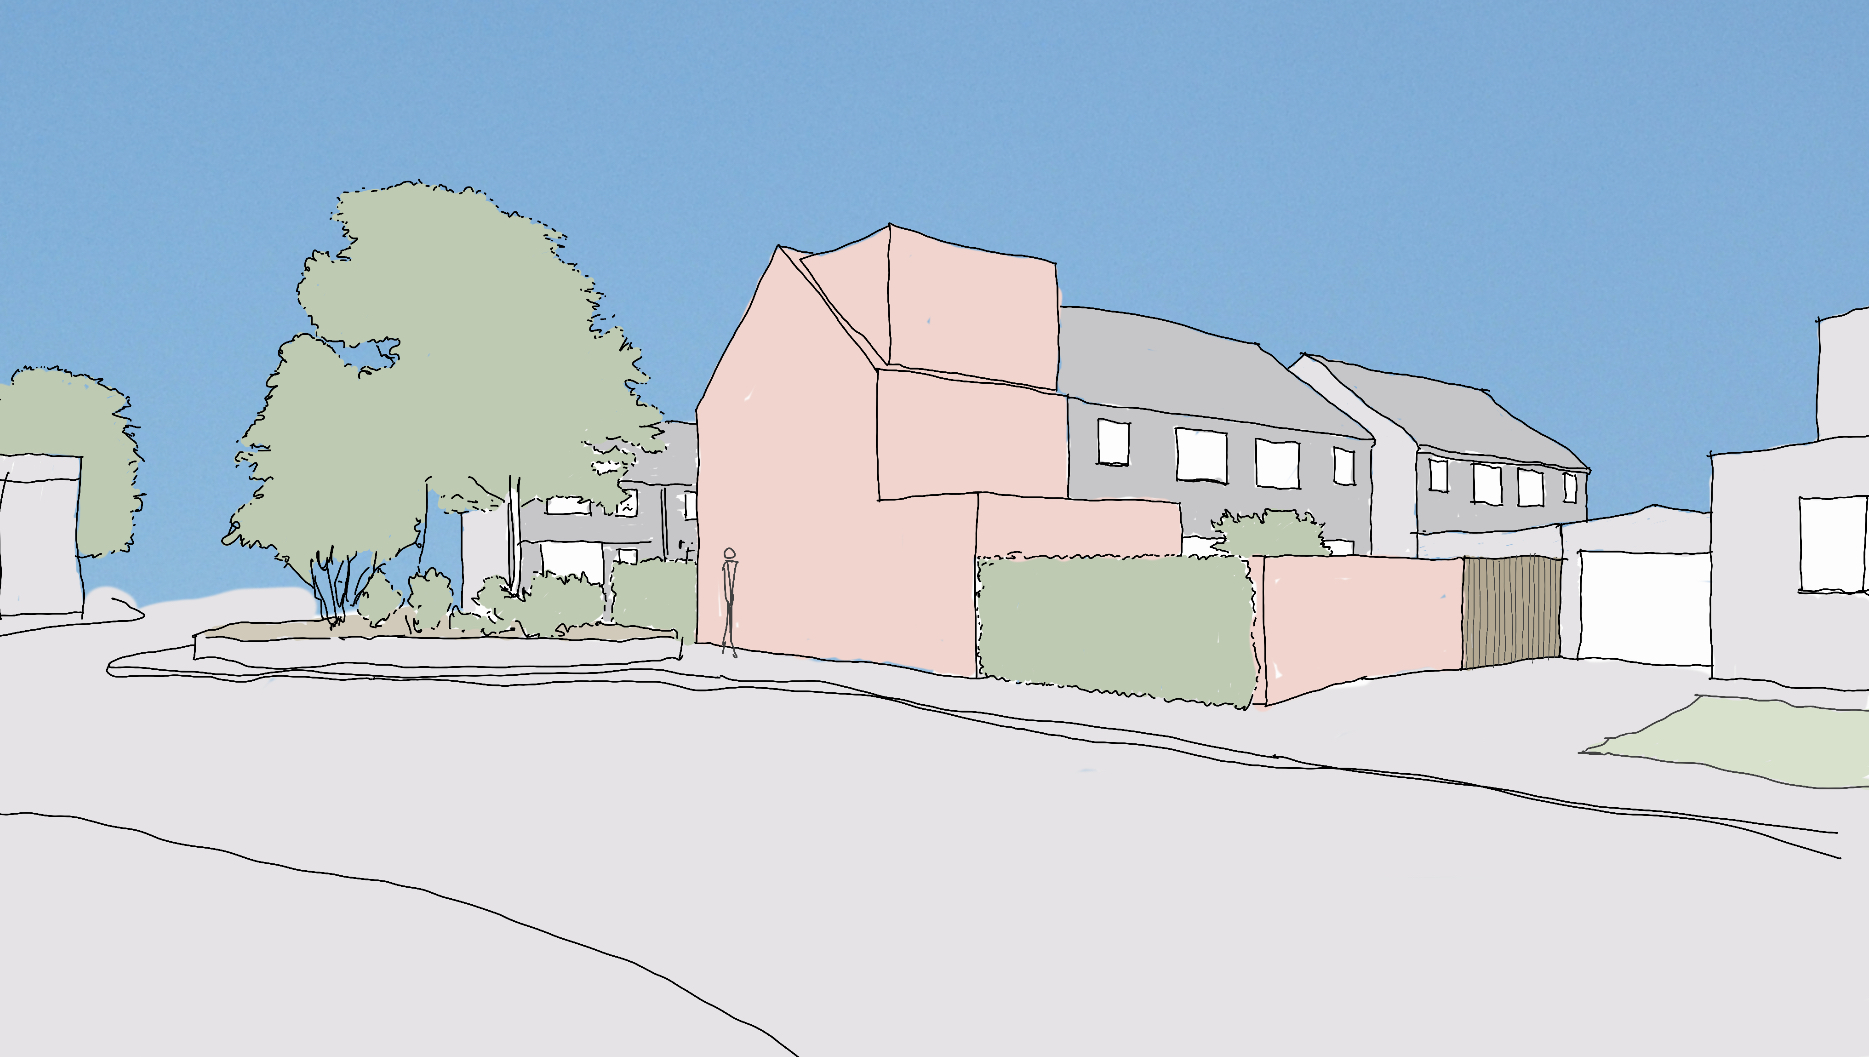
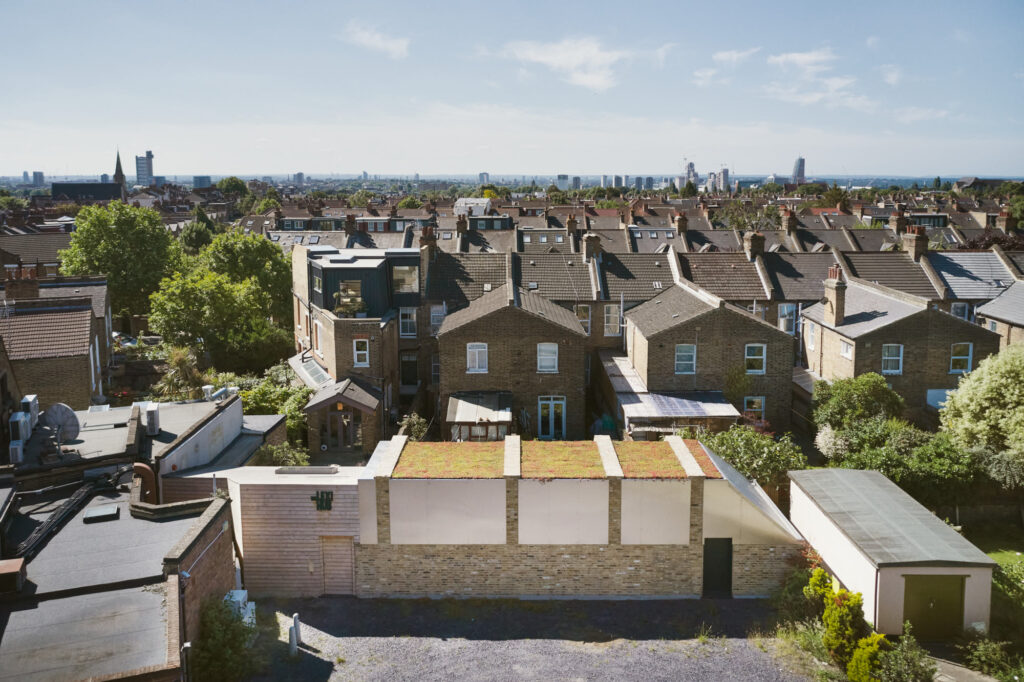
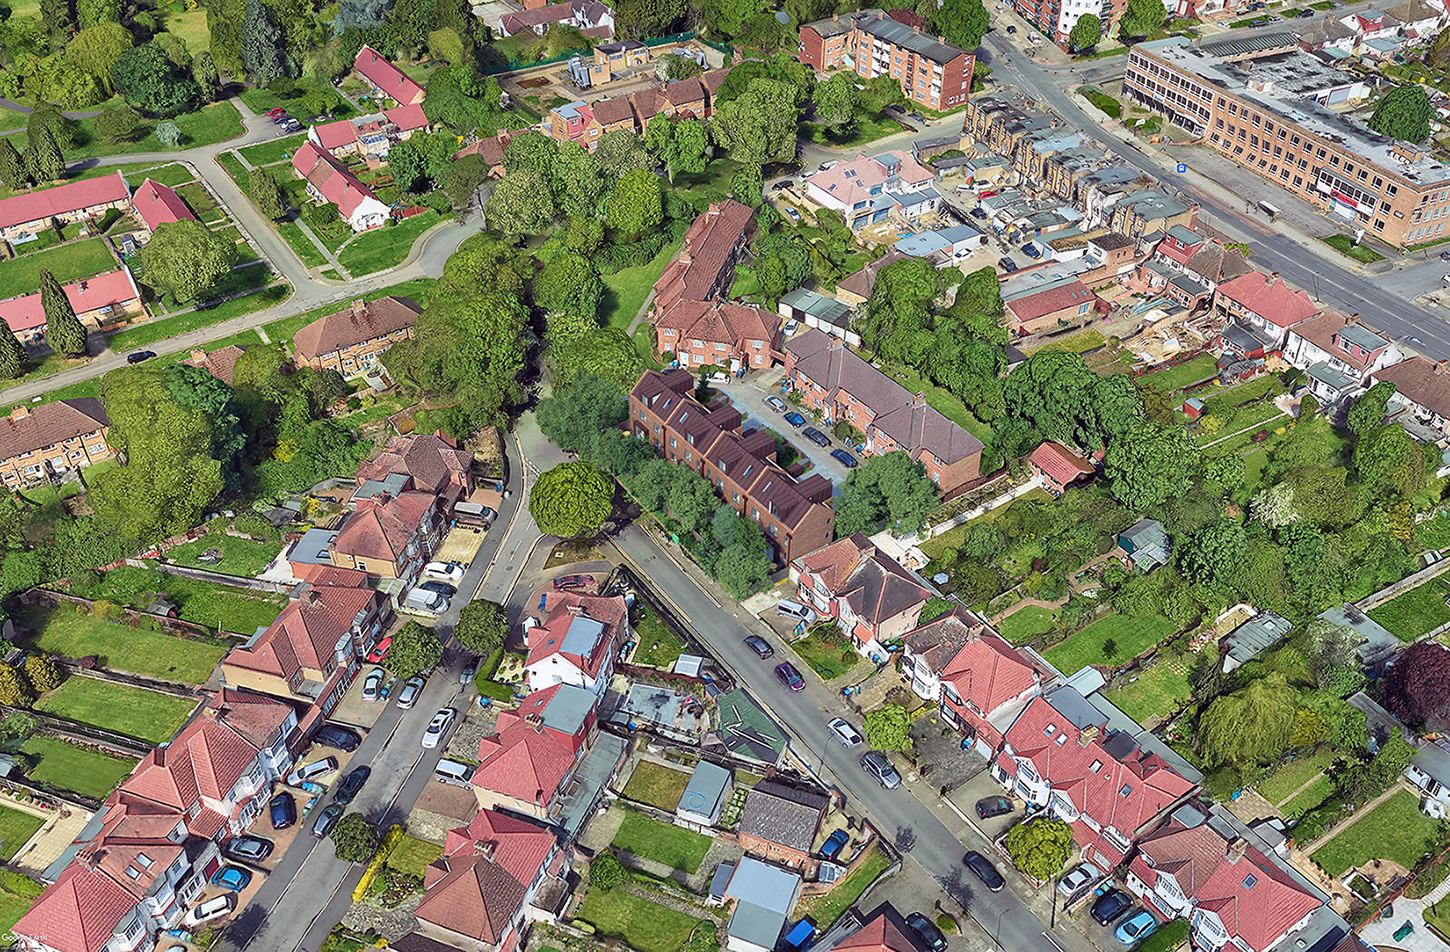
In Summary: The role of an architectural firm in the process of deconverting flats into a singular, energy-efficient home cannot be overstated. It’s about much more than just blueprints and building codes; it’s about crafting a living space that resonates with its inhabitants, respects its surroundings, and stands the test of time. By leveraging the expertise of professionals like those at RISE Design Studio, homeowners can embark on this transformative journey with confidence, creativity, and clarity.

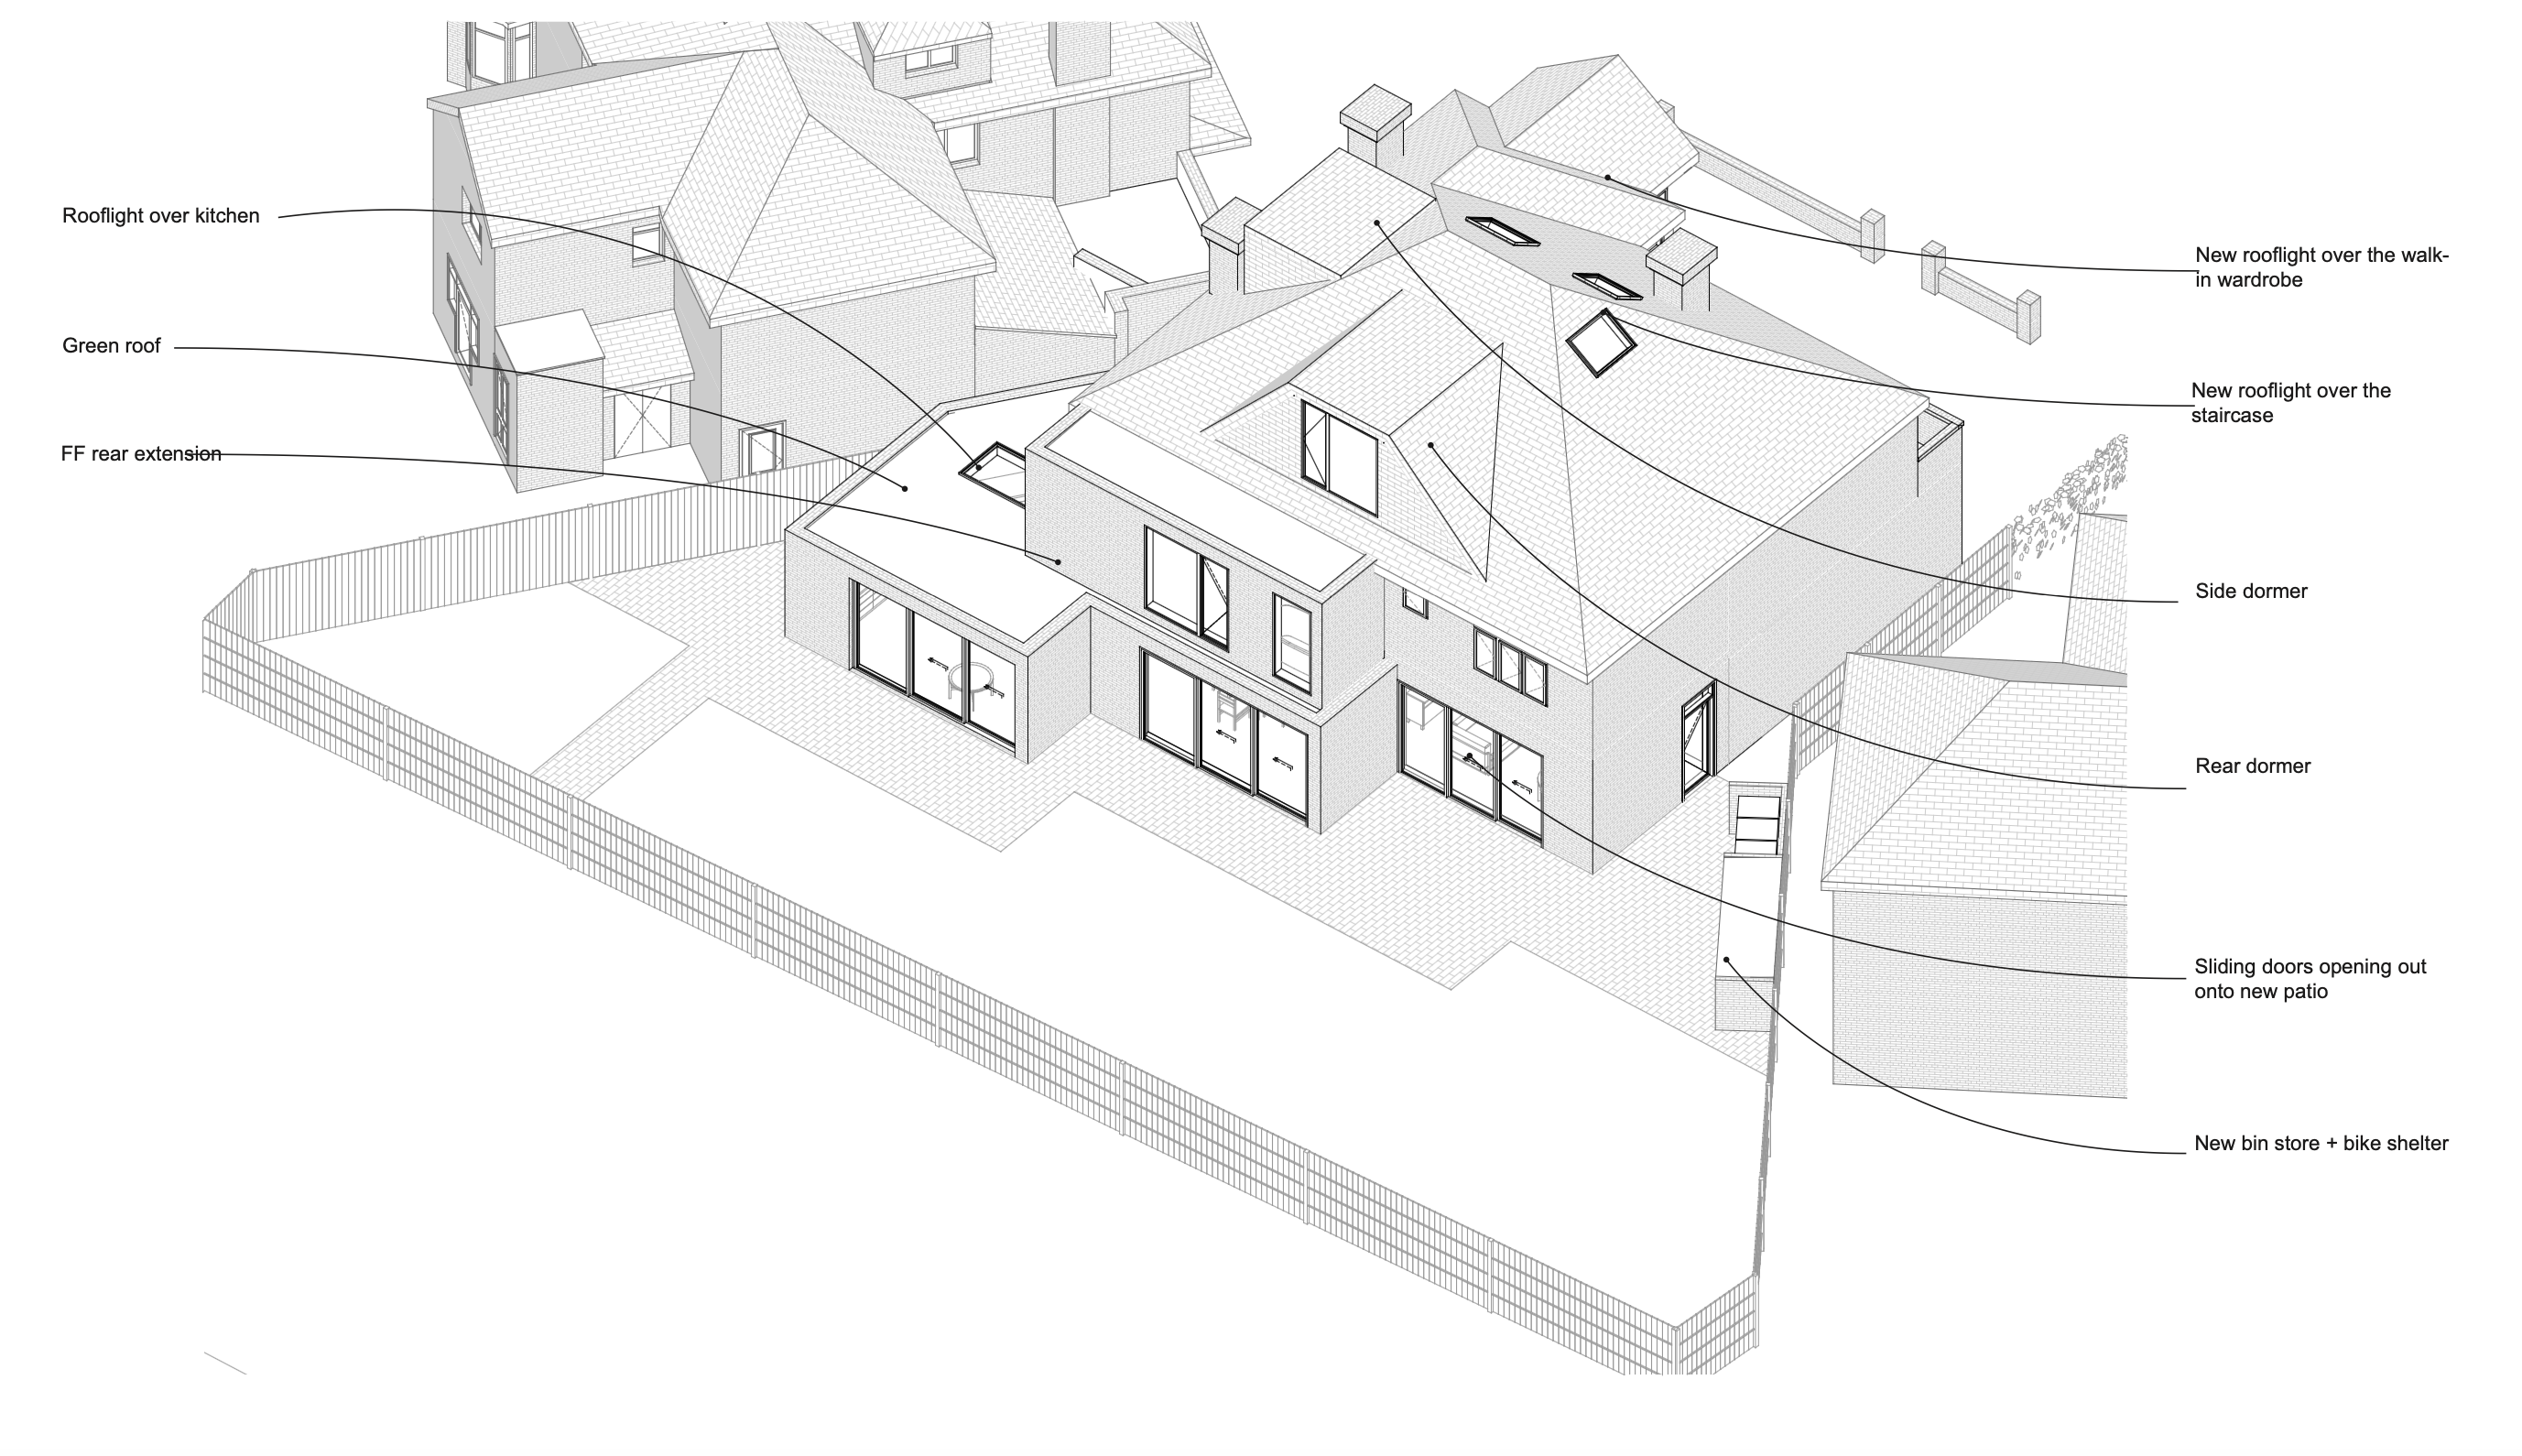
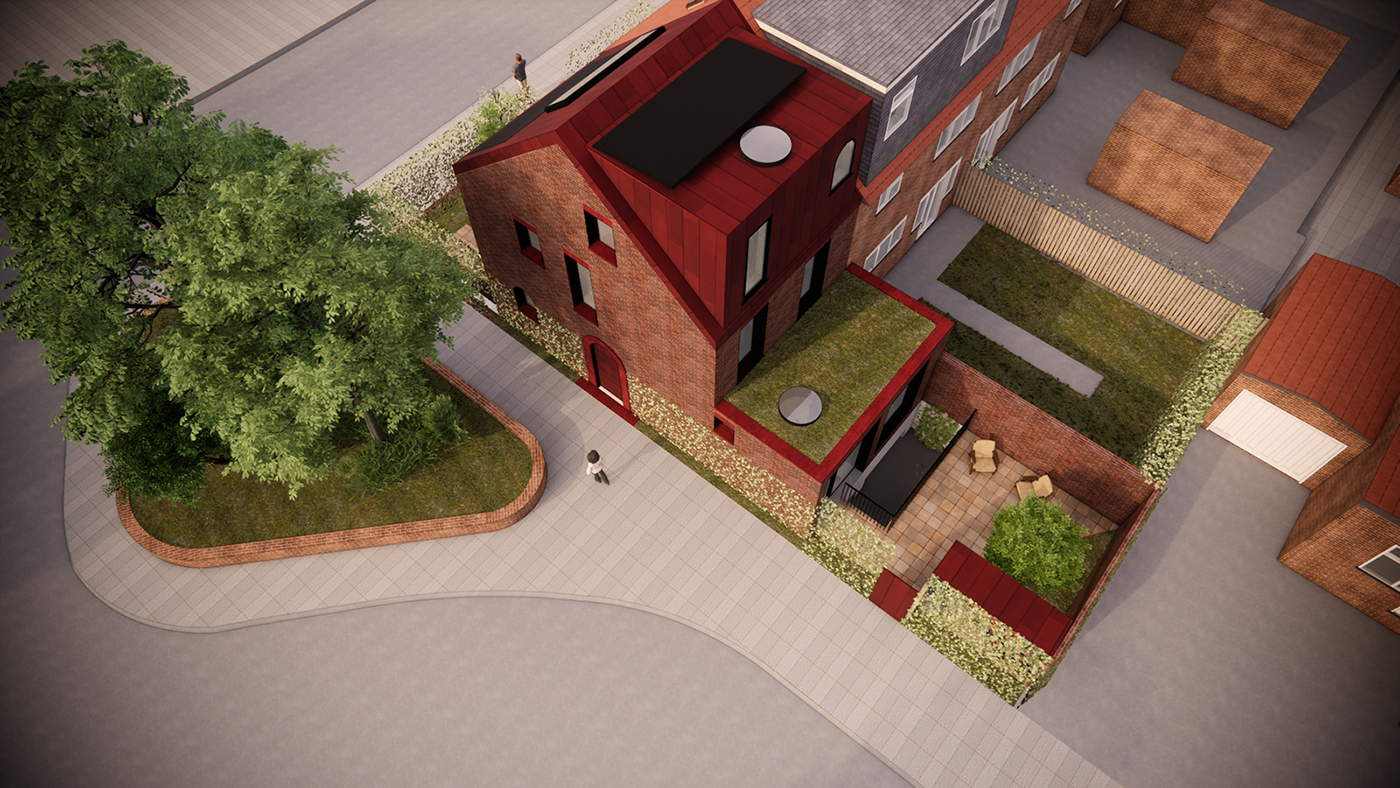
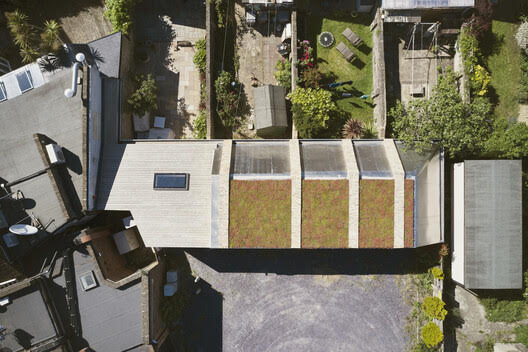
8. The Green Blueprint: Incorporating Low Energy and Reduced Carbon Design

Deconversion, or the process of converting multiple flats back into a singular residence, offers a golden opportunity to amalgamate the best of the old with the new, specifically in terms of energy efficiency and sustainable living. Being an advocate of sustainable architecture, I firmly believe that incorporating low energy designs into deconversion projects not only preserves the historical integrity of a building but also paves the way for a future-proof home. Here’s a deeper dive into the aspects linked to this sustainable approach in the context of deconversion:

1. Reusing and Recycling Materials

Conserving Heritage: Reusing materials from the original structure can maintain the authentic look and feel of the building while reducing the carbon footprint associated with manufacturing new materials.

Reduced Waste: By prioritising the recycling of old materials during the deconversion process, there’s a direct reduction in construction waste that might otherwise end up in landfills.

2. Thermal Efficiency

Insulation: Older buildings often lack proper insulation. As walls are reconfigured during deconversion, there’s an opportunity to integrate modern insulating materials that significantly improve thermal efficiency.

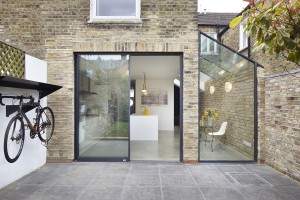
Windows and Doors: Retrofitting with double or triple-glazed windows and well-sealed doors can prevent heat loss, reducing the energy required for heating.

3. Renewable Energy Integration

Solar Panels: The expansive roofs of these buildings, once flats, provide ample space for solar panels, allowing homeowners to generate their own electricity.

Ground Source Heat Pumps: Deconversion often involves substantial groundwork. This presents a chance to integrate ground source heat pumps, an efficient way to heat homes using the earth’s consistent temperatures.

4. Sustainable Water Management

Rainwater Harvesting: Systems can be incorporated into the design, enabling homeowners to collect, store, and use rainwater, reducing the demand on local water supplies.

Greywater Recycling: Water from sinks, showers, and baths can be treated and reused for non-potable purposes like flushing toilets or irrigation.

5. Improved Ventilation

Natural Ventilation: Older buildings, while majestic, often suffer from poor ventilation. Design modifications during deconversion can introduce natural ventilation pathways, improving air quality and reducing reliance on mechanical systems.

Heat Recovery Systems: Modern ventilation units with heat recovery can extract warmth from outgoing stale air and use it to pre-heat incoming fresh air, ensuring an energy-efficient home.

6. Emphasis on Sustainable Interiors

Eco-friendly Materials: The choice of paints, finishes, and flooring can all be aligned with eco-friendly principles, ensuring that the home’s interiors are as green as its structural elements.

Energy-efficient Appliances: As part of the modernisation during deconversion, there’s the option to choose appliances that adhere to the latest energy efficiency standards.

7. Sustainable Landscaping

Native Plants: Once the deconversion is complete, consider landscaping with native plants, which typically require less water and care than exotic species.

Permeable Surfaces: Opt for permeable paving to reduce rainwater runoff and replenish groundwater.

In Conclusion: The process of deconversion offers a fresh canvas on which to paint a sustainable future. By considering low energy and reduced carbon designs, not only can we preserve the legacy of our architectural past, but we can also ensure that these majestic structures are resilient, efficient, and in harmony with our ever-evolving understanding of sustainable living.

How RISE Design Studio can help you?

Located in London with offices in Maida Vale and Fitzrovia, RISE Design Studio is a RIBA chartered architectural practice. We specialise in crafting innovative design and planning solutions, particularly in the realms of residential extensions, conversions, and brand-new home designs. Our mission is to assist homeowners in shaping spaces they truly love.

Should you wish for our expertise on your deconversion journey, please feel free to reach out.

If you would like to talk through your project with the team, please do get in touch at mail@risedesignstudio.co.uk or give us a call at 020 3290 1003

RISE Design Studio Architects company reg no: 08129708 VAT no: GB158316403 © RISE Design Studio. Trading since 2011.

Crafting an Oasis within the Urban Jungle: The Art and Intricacies of Backlands Planning

Nestled within the confines of our contemporary urban sprawl lies an opportunity, often overlooked – the realm of the backlands plot. As an architect with two decades of experience leading a boutique, design-focused architecture studio, my journey has led me to deeply appreciate the charm and potential of backlands development. Our studio, passionate about pioneering sustainable and low embodied carbon designs, has been navigating the intricacies of backlands planning with a discerning and innovative eye, and I’m eager to share our insights and experiences with you.

Red Arches House - a new build house on a side garden of a house in Kensal Rise, North West London
Red Arches House – a new build house on a side garden of a house in Kensal Rise, North West London

Decoding the Backlands Puzzle

The backlands plot, a parcel of land situated at the rear or side of an existing property, can be an architectural gem in the making. Frequently a sizeable portion of a sprawling garden, these plots are often secluded from the bustling roads encapsulating them. The charm lies in their potential, large enough to cradle a new dwelling yet intrinsically private due to their positioning.

Historically, the practice of exploiting these plots was pejoratively referred to as ‘garden grabbing’, meeting opposition from local authorities. However, the lens through which we view these plots has transformed significantly in recent years. In our quest to fulfil housing needs in increasingly saturated environments, backlands development has emerged as a sensible and innovative strategy, enabling an escalation in housing density without expanding the urban footprint.

Such plots are a canvas for self-builders eager to create their dream abode on land they already own. However, treading the path of backlands planning isn’t without its hurdles. That said, a comprehensive application that anticipates and addresses pertinent concerns significantly heightens the odds of success.

A small house in Kensal Rise, North West London

Navigating the Labyrinth of Backlands Development

Embarking on a backlands project is akin to setting foot on a thrilling architectural expedition, punctuated by challenges to be surmounted. These hurdles revolve primarily around accessibility and the dynamics with neighbouring properties, though other considerations involving space, privacy, and design are of substantial significance.

A cardinal rule for a backlands plot to be planning-compliant is the availability of direct access to the road. This could be via a boundary fence, a discreet alleyway, or an access road. Ownership of the access pathway considerably simplifies matters when submitting the planning application.

Neighbourly relations can be a double-edged sword in backlands developments. Neighbours might view a new construction within their surroundings as intrusive, leading to potential opposition. However, objections can be mitigated if it can be convincingly demonstrated that the planning policies have been scrupulously followed, and that the development will not significantly impinge on the views or light entitlements of the neighbours.

Space and privacy are intertwined in the considerations that govern the success of backlands development. The proposed home must have sufficient space to breathe, avoiding a congested feel and aligning with the spacing pattern of the surrounding homes. Privacy is an integral part of this equation, with the plot location and proximity to neighbouring properties being critical elements.

Design, the backbone of our architectural vision, holds the key to successfully unlocking backlands plots. The constraints notwithstanding, creating a design that harmoniously balances your aspirations and the stipulations of the planning authorities can be a thrilling architectural challenge. The form and materials of the proposed structure may be dictated by the location, whether it involves adhering to a single-storey restriction to preserve view corridors or incorporating vernacular materials to harmonise with the local aesthetic.

Four new mews house in Kenton on a green open space, North West London

Unlocking Success in Backlands Planning: A Guided Approach

Each planning authority has its own unique regulations and policies, making the expertise of an architect well-versed in backlands planning applications invaluable. Coupled with the insights of a planning consultant, their collective wisdom can pave the way for a successful application. While local area experience is beneficial, the core understanding needed is of backlands plots and their inherent constraints.

Here are some nuggets of wisdom for navigating backlands development:

  • Engage an experienced designer to guide your journey.
  • Keep your neighbours informed and involved from the outset to anticipate potential issues and defuse any brewing confrontations.
  • Undertake a planning pre-application to obtain expert advice and insights on potential challenges.
  • Strive to create a sustainable, future-proof home. The environmental advantages carry significant weight.
  • Demonstrate how the development will enhance the utilisation of the land.

Backlands Planning: A Case Study from North West London

One of our recent backlands planning applications and approvals involved an underused side garden situated close to a Conservation Area. Owing to the contentious nature of backlands plot applications, we embarked on a pre-application process to identify potential hurdles from the perspective of the local authority.

The pre-application advice is a fundamental part of the process, particularly for projects involving virgin sites or those seeking to establish key principles for site development before delving deep into the design process. This stage can be time-intensive but yields invaluable feedback from the local planning authority, providing clarity on the project’s viability and the likelihood of their support for your proposal.

This particular site already enjoyed road access, thanks to it being located at the side of a semi-detached plot enclosed by two roads. Additionally, the trees populating the pavement immediately adjacent to the site provided a natural screen, minimising visibility from neighbouring properties and ensuring no adverse impact on their views or light entitlements.

Contemplating a Backlands Adventure?

Are you intrigued by the prospect of transforming a backlands plot into a dream dwelling? Our experienced team at the studio would be delighted to guide you on this rewarding journey.

Red Arches House – a new build house on a side garden of a house in Kensal Rise, North West London

Frequently Asked Questions

  1. What is backlands planning permission?
    • Backlands planning permission refers to the process of obtaining approval to build a new home on a piece of land located at the back or side of an existing property, often within a large garden. It involves submitting a well-rounded planning application that addresses various considerations and potential barriers.
  2. Why has backlands development become more acceptable in recent years?
    • Backlands development, previously known as “garden grabbing,” is now viewed as a more acceptable way to address housing needs by increasing the density of houses in built-up areas. Local authorities have shifted their stance, considering it a viable option for self-builders to create new homes on land they already own.
  3. What are the main challenges of a backlands project?
    • The main challenges of a backlands project are access and neighbours. Other factors to consider include space, privacy, and design. Access to the road is crucial, either through a boundary fence, an alleyway, or an access road. Neighbours often oppose such developments, but objections can be overcome by demonstrating compliance with planning policies and minimal impact on views and rights to light.
  4. How can I ensure my backlands plot is planning friendly?
    • To make your backlands plot planning friendly, it should have direct access to the road, either through a boundary fence or an alleyway/access road. If you own the access, it simplifies the planning application process. Additionally, the proposed home should have adequate space around it to avoid a cramped feel and maintain the pattern of surrounding homes.
  5. What role does design play in backlands plots?
    • Design is crucial for backlands plots, as a well-thought-out and sensitive scheme can help overcome many of the challenges mentioned earlier. Design considerations may involve adhering to specific constraints, such as maintaining certain views or using materials that blend with the area’s character.
  6. Should I hire professionals for backlands planning applications?
    • Yes, it is recommended to hire an architect with experience in backlands planning applications and consider using a planning consultant. Their expertise will ensure you are better prepared for success, considering the unique regulations and policies of each planning authority.
  7. How can I address concerns from neighbours in a backlands project?
    • Keeping neighbours informed from the start and addressing their concerns can help avoid potential contests during the planning process. Maintaining open communication and considering their perspectives can help foster understanding and minimise conflicts.
  8. What is a planning pre-application, and why is it important for backlands projects?
    • A planning pre-application is a stage in the planning process where you seek advice and insights from the local planning authority before fully developing your design. It helps establish fundamental principles and gather feedback on the viability and support for your project. Pre-applications are particularly important for projects in new spots or areas where there hasn’t been a home before.
  9. How can I demonstrate the benefits of my backlands development?
    • To prove that your backlands development will improve the use of the land, you can focus on creating a sustainable and future-proof home. Highlighting the environmental benefits and showcasing how the development aligns with land use objectives can strengthen your case.
  10. Can you provide an example of a successful backlands planning application?
    • In a recent backlands planning application in North West London, a new dwelling was proposed on an underused side garden close to a Conservation Area. The site already had access from the road, and the new home was strategically concealed by neighbouring council trees, ensuring minimal impact on neighbours’ views and rights to light. See here for more details.

If you would like to talk through your project with the team, please do get in touch at mail@risedesignstudio.co.uk or give us a call on 020 3290 1003

RISE Design Studio Architects company reg no: 08129708 VAT no: GB158316403 © RISE Design Studio. Trading since 2011.

Planning permission granted in North West London – Red Arch House

We are thrilled to announce that our latest planning application for a new home in North West London has been granted permission by the local planning authority. Red Arch House has been a labour of love for our team, and we’re excited to share the details with you.

Short video showing Red Arches House – a low energy home in Kensal Rise

Chapter 1: From Conception to Approval

The journey of this project began several months ago when we embarked on the initial design process. Our aim was to transform an underused side garden of a semi-detached Post War House into a contemporary, energy-efficient home. The site presented numerous challenges, including tree constraints and a previously undeveloped space. However, our experience and expertise in working with difficult conditions allowed us to propose a beautiful and sustainable solution.

To ensure a smooth planning process, we conducted a detailed pre-application consultation before submitting the full planning application. This involved working closely with design and planning officers from the outset to develop a design that would comply with all regulations and requirements. We strongly believe in collaborating with the authorities from the early stages to achieve the best outcome for both our clients and the community.

Planning permission granted for Red Arches House in Kensal Rise, North West London

Chapter 2: Overcoming Design Challenges

One of the key factors in obtaining planning permission was addressing any potential design concerns. We consulted extensively with the Council’s Design Officer, who thoroughly reviewed our proposals. Their evaluation concluded that there were design concerns as the site was visible public view. The Officer commended the project for its sympathetic size, proportioned house design, which seamlessly blended contemporary aesthetics with materials suitable for the dense urban setting.

In our studio, we have a talented team of designers who crafted realistic renders that showcase the true potential of this project. The precast concrete bay windows, reclaimed brick front, rear, and side walls, and the striking red zinc roof create a visually stunning composition. We are genuinely thrilled with the outcome and believe that this design will be a remarkable addition to the architectural fabric of North West London.

Visual of the interior of Red Arches House in Kensal Rise, North West London

Chapter 3: Looking Ahead

With planning permission secured, we are excited to embark on the next phase of this project: the technical design, SIPs (Structural Insulated Panels) panels manufacturing, and construction. Our meticulous attention to detail and commitment to energy efficiency will be integral to the successful execution of this unique 160m2 family home. We anticipate breaking ground later this year and cannot wait to witness the transformation of this previously under-utilised space into a vibrant and sustainable residence, which has been designed to Passivhaus standards.

Visual of the Kitchen of Red Arches House in Kensal Rise, North West London

Frequently Asked Questions

  1. How did you address the tree constraints on the site?
    • Our design team worked closely with an arboriculturist and the council’s Tree Officer to assess the impact of the proposed development on the existing trees. We carefully planned the positioning of the new home to ensure minimal disturbance to the trees, thereby preserving the natural environment.
  2. What construction methodology do you employ to achieve energy-efficient and sustainable designs?
    • Our studio specialises in employing sustainable construction methods, such as using low carbon concrete, using timber structure in lieu of steel where possible and potentially using modern construction methods like SIPs panels. These panels are prefabricated off-site, minimising waste and ensuring superior insulation for reduced energy consumption in the final structure.
  3. Can you provide more details about the design features that contribute to energy efficiency?
    • In addition to the SIPs panels, our design incorporates passive design strategies, such as strategic window placement to maximise natural light and ventilation. We also prioritise the use of energy-efficient appliances, renewable energy systems, and rainwater harvesting to minimise the carbon footprint of the home.
  4. How long does the construction process typically take for a project of this scale?
    • While each project is unique, and the duration can vary based on several factors, we estimate that the construction of this 160m2 family home will take approximately 7 to 10 months. We strive to adhere to strict timelines without compromising on quality. By utilising a SIPs approach, as mentioned above, for construction the time to build could be significantly reduced, see here for an article on SIPs.
  5. Do you offer services for obtaining planning permission for self-build projects?
    • Absolutely! We understand the complexities of the planning process and offer comprehensive services to guide self-builders through every stage, from initial concept development to the submission of planning applications. Our expertise in working closely with planning authorities ensures a higher probability of success.
Perspective section in 3D of the Kitchen of Red Arches House in Kensal Rise, North West London

Conclusion:

Obtaining planning permission for our new home project in North West London marks a significant milestone for our architecture studio. The approval signifies not only our ability to navigate challenging conditions and deliver sustainable designs but also our commitment to creating exceptional spaces that enrich local communities. We are grateful for the opportunity to embark on the next phase of this project and look forward to updating you on its progress. Stay tuned for more exciting developments.

Learn more about the planning permission process and how we can assist you in achieving your self-build dreams in our comprehensive article here.

If you would like to talk through your project with the team, please do get in touch at mail@risedesignstudio.co.uk or give us a call on 020 3290 1003

RISE Design Studio Architects company reg no: 08129708 VAT no: GB158316403 © RISE Design Studio. Trading since 2011.

Decoding the Maze of Pre-Application Advice

An inherent part of our journey with every project is the necessary rite of passage that is the planning permission process. Seen by many as a labyrinthine process, we are often asked about the concept of pre-application advice – an often overlooked, yet sometimes crucial element of the planning permission process.

A pre-app for this home in a Area of Outstanding Natural Beauty (AONB) helped us establish some basic design principles

Pre-Application Advice: The Unsung Hero of the Planning Permission Process

Picture this: you’re poised to submit your planning application for your new home to the local authority. It’s a momentous step, laden with anticipation and a smattering of anxiety. But what if there were a way to receive insights from the local authority before submitting the application? That’s where pre-application advice, often referred to as a ‘pre-app,’ comes into play.

A pre-app is essentially a request for specific advice from the planning officers in the local authority (commonly known as the council). It unveils essential information about the project and the relevant planning policies, equipping you with the knowledge you need to align your proposal with the rules and increase the chances of a successful planning application. However, keep in mind that a pre-app is not a guarantee of approval.

Although there’s a national framework governing wider rules, each local planning authority wields its own planning policies that applications should comply with. The nuances can be subtle, and interpretations may vary. That’s why having a planning consultant by your side is invaluable – but more on that later.

Rather than providing a definitive ‘yes’ or ‘no,’ a pre-app furnishes the applicant with outline advice that could include suggestions for modifications to the proposal. It’s an alarm bell or a source of comfort for applicants before they dive into the time-consuming and expensive full planning submission.

A pre-app allows you to probe deeper into the fundamentals and uncover any concerns about the site and project. For example, you might wonder, ‘Can I build a house here?’ It enlightens you about the policy requirements of the local council and any site constraints. Identifying potential obstacles early offers you the chance to investigate alternative solutions with your designer before the final planning application is sent off. Ultimately, it can save time and money in the planning process by preventing costly errors that could culminate in a failed planning application.

A ‘successful’ pre-app is one that offers a clear opinion of your scheme, whether positive or negative.

A Site Analysis Diagram
A Site Analysis Diagram is helpful to understand the context of the site

Testing the Waters: When to Consider a Pre-App

The need for a pre-app isn’t always clear-cut. Sometimes, it can be beneficial to test the waters if you’re uncertain. While a planning consultant is usually the best person to ask, your architect and designer can also provide insights about the pre-app process.

A pre-app can provide early insights into the council’s likely response to the planning application, particularly in certain scenarios. For instance:

  • Is your site located in a conservation area?
  • Does your project herald a significant change in the area?
  • Has the site had a previous application refused?
  • Is it a brand new dwelling, as opposed to a replacement?
  • Does it alter the ‘use’ of the land?

If any of these conditions apply to your project, a pre-app could be worth considering.

A conservation area, for example, grants the council’s planning officers the authority to comment on design and size. It might be crucial to initiate discussions about the design early, highlighting the intended style of the build and providing reference material.

We used a pre-app for The Avenues House in Pinner because it was a contemporary design for a significant extension to the rear on three levels.
We used a pre-app for The Avenues House in Pinner because it was a contemporary design for a significant extension to the rear on three levels in a Conservation Area.

A Journey of Variance: Understanding the Pre-App Process

In theory, each local planning authority establishes its own process, so the information necessary for your pre-app may differ. The specifics of the service, such as the level of detail required, the cost of consultation, and the time it takes to receive a response, can vary.

However, in practice, the process is reasonably straightforward. Despite slight differences in the costs and information requested, councils typically adopt a similar approach. The process invariably includes a conversation with a planning officer, which could be an in-person consultation or an online form. This consultation entails the submission of a project proposal, incorporating some essential details like the size and plot location.

Each council may offer varying levels of pre-app services. For instance, you may be expected to meet the planning officer in person at your site or discuss the project via email. This variance can also impact the value of the advice given. RBKC in London splits the pre-app advice into five levels depending on how much detail and support you require.

Many authorities offer guidance on how to use the pre-app advice service. This procedural advice from an authority representative ensures that the pre-application is completed correctly and might even include an in-person appointment.

We used a Pre App for our Mill Hill House project to understand the limitations of the site according to planning policy

Packaging the Pre-App: What to Include

Your pre-app typically encompasses a cover letter and pre-app submission document.

In terms of advice, we recommend focusing only on the critical questions and including the information that forms the basis of these questions. If you provide detailed drawings of the intended design, you might inadvertently trigger a complicated and prolonged design discussion, even though your pre-app might only be aimed at assessing the outline details like volume or location.

The cover letter, usually written by your planning consultant, may include some of the following:

  • Project proposal description
  • Site location plan, indicating site ownership and boundaries
  • Area description and any relevant history
  • Any planning history, if relevant
  • The policies relevant to the proposal
  • Planning assessment for the layout, scale, design, accessibility, trees etc.

The pre-app document, put together by your architect or designer, comprises relevant documents mentioned in the cover letter, as well as additional explanations. 

This might include:

  • Photos of the site and the surrounding architecture
  • Surveys
  • Drawings, such as site analysis and a proposed site layout
  • Environmental information
  • Basic or vague designs of the property outline, if required

It’s not uncommon for people to use the pre-app process to discuss site issues such as roads, footpaths, and boundaries. They may also inquire about potential problems and whether the council might impose conditions to overcome them rather than refuse planning permission outright.

A pre-app was used for McKelvery Farm House, County Down, Northern Ireland

The Aftermath of a Pre-App: What Can You Expect?

Following your pre-app, you will receive feedback on the proposal from the planning officer. This feedback usually arrives in the form of a written response, though it could also be notes from an in-person meeting. The feedback will provide advice on the issues identified in relation to the relevant policies. The planning officer may not comment on other parts of the proposal unless specifically asked to.

The feedback, regardless of its content, is always beneficial. It might be non-committal, but it should address your fundamental question. Positive feedback can bolster your confidence in the success of your application. Negative feedback, while disheartening, can be constructive and help you avoid a failed planning application. An outright rejection could save you the time and money involved in a full planning application.

A simple sketch used to show the planners the massing of the proposals within the context of the site

Time and Cost: The Twin Aspects of Pre-App Process

Once you have worked with your architect or designer, and planning consultant, to assemble the necessary information and make a submission, a response generally takes between 2-8 weeks. This time frame could extend if an in-person meeting with the council is required.

It’s essential to remember that the pre-app duration does not include the eight or so weeks required for the actual planning application. So, if you’re on a tight schedule and confident about your application, this may not be the best path to go down.

As far as costs are concerned, pre-apps can be free for extensions and other minor works. For new builds, you might be looking at anything from £50 to £3,000 for a meeting and response letter. This cost is determined by each council and sometimes depends on the size of the build.

One downside of pre-applications is the absence of statutory frameworks. While planning applications have to be determined within 8 weeks, pre-apps don’t have a set time limit or standard cost. But remember, a higher pre-app cost is not necessarily a detriment. Some councils charge a nominal fee and provide subpar service. Charging more can mean that they dedicate more time to the process and provide better advice.

Due to the challenging site we submitted 3 Pre-Applications for The Lexi Cinema, Kensal Rise, NW London

Important Considerations: Points to Ponder

Successful planning applications cater to all relevant planning policies and convince the local authority planners that the proposed build satisfies all pertinent criteria. As such, the following points are crucial to consider:

  • Be Prepared: Preparation is integral to a positive pre-app and successful planning application. At RISE Design Studio, we often adopt a formulaic approach that anticipates all responses from the local authority. Plan ahead and be as prepared as possible.
  • Inconsistency: Pre-app planning advice can be unreliable and costly. Each local authority follows a slightly different process, and the quality of service can vary.
  • No Guarantees: Any advice provided is often the opinion of the specific planning officer rather than the entire authority. Hence, a positive response from your pre-app does not guarantee approval of your planning application and vice versa.
  • Be Strategic: In some scenarios, revealing detailed designs and seeking feedback risks the planning officer suggesting (and expecting) changes to the scheme that you might not be willing to make.
  • Confidentiality: All pre-apps are private. These discussions are not published on the register for all to see.
  • Cooperation: Collaborating amicably with the council to find mutually acceptable compromises often results in the planning officer being more supportive of your build than they might otherwise have been.
  • Understanding Planning Jargon: Policies can be complex to understand. Each planning authority has its own policies, often written in intricate language. A planning consultant can help you navigate this policy jargon and planning language and can also signal your dedication to the process.
A Pre-App was used for Red Arches House in Kensal Rise, NW London

Pre-Apps with RISE Design Studio

At RISE Design Studio, planning applications form part of our turnkey service. However, more often than not, we don’t seek pre-application advice. We have a robust understanding of planning requirements and avoid completing a pre-app if we are confident that our design and project conform to policies, thereby providing planning officers with every reason to approve the application.

We generally only resort to pre-apps for projects with a unique combination of reasons, such as a new dwelling with a change of ‘use’ for a plot in a conservation area, or a replacement dwelling in a new location on the plot. Our impressive success rate is indicative of our reliable process.

On the rare occasions when we do complete pre-apps, our in-house design team discusses our submission with a planning consultant. This expert provides invaluable advice before we get started and reviews all documentation without visiting the site, offering us the planning officer’s perspective.

We maintain a strategic approach to our pre-apps, always focused on the questions we have about the project and not divulging excessive information. We research all local policies that might be relevant or cause issues to ensure we craft a realistic proposal. The planning consultant then translates the pre-app into planning jargon, referencing any policies and using planning language – a potent strategy to exhibit our expertise and dedication to the planning officer.

The nuances of pre-apps and planning applications might seem daunting, but the success of your project lies in comprehending these subtleties and responding adeptly to the challenges they present. At RISE Design Studio, we simplify this labyrinthine process, enabling you to see your dream project become a reality. We hope this guide has shed some light on the maze of pre-application advice in planning permission, but we’re always here to help further.

If you would like to talk through your project with the team, please do get in touch at mail@risedesignstudio.co.uk or give us a call on 020 3290 1003

RISE Design Studio Architects company reg no: 08129708 VAT no: GB158316403 © RISE Design Studio. Trading since 2011.

Planning Explained: Navigating the Complexities of the UK Planning System

As an architect with over 20 years of experience in a small contemporary design-led architecture studio, I have witnessed firsthand the challenges and uncertainties that come with seeking planning permission. The planning system is a complex web of variables, and predicting the outcome of a planning application is nearly impossible. However, armed with practical experience and a precise planning system, we have developed a unique approach to tackle this challenge.

Aerial axonometric view of four new houses in Kenton, North West London

Our Approach: A Six-Step Model for Success

Drawing from our expertise gained through working on over 200 projects in London and across the UK, we have devised a rigorous six-step model for navigating the planning system. This model incorporates safeguards to help you avoid the common pitfalls and failures often encountered in typical planning applications. With a focus on crafting creative planning application strategies for residential developments with sensitive planning conditions and restrictions, we specialise in securing planning permissions for exceptional and unprecedented projects.

Step 1: Pre-Application – Structuring Success

When embarking on a contentious project, seeking pre-application advice from the council can be instrumental in expediting the decision-making process and increasing your chances of success. Our team works collaboratively with your planning officers, justifying your proposal in a structured manner and negotiating a positive outcome. This early engagement also provides an opportunity to make amendments and improvements to your proposal, ensuring that your officers are more supportive of your vision than they would have otherwise been.

Aerial view of four new houses in Kenton, North West London

Step 2: Outline Planning Application – Establishing the Principle

For larger projects or those where establishing the principle of your vision is crucial, the outline planning option is often the way to go. As the name suggests, this application requires fewer details than a full planning application, allowing us to design your project swiftly and complete the application in less time. Outline planning applications are particularly suitable if you plan to sell the land or raise funds for the subsequent construction stage. Together, we determine which aspects of your scheme need to be decided at the outline stage, although it’s worth noting that an outline application may not be appropriate for projects where the appearance of the buildings is of utmost importance, such as Green Belt developments or those in conservation areas.

Aerial view of Red Brick House in Willesden, North West London - Pre Application
Aerial view of Red Brick House in Willesden, North West London

Step 3: Reserved Matters Applications – Filling in the Details

If you receive permission for an outline planning application, you must follow it up with one or more reserved matters applications within three years of the council’s decision. These applications provide the opportunity to delve into the finer details that were not included in the outline application and must be settled before construction can commence. It is crucial to treat reserved matters applications with the same level of seriousness as any other planning application. Simply because you have outline permission does not guarantee automatic approval of reserved matters. Our team ensures that the details of your scheme are of the highest standard, minimising avoidable delays in securing consent.

Investigating different massing and site layout options during the Pre Application process

Investigating different massing and site layout options during the Pre Application process. 

Step 4: Full Planning Application – Complying with Policies

For many projects, obtaining full planning permission is necessary. This process involves demonstrating to the council that your proposal aligns with national and local policies, taking into account various factors such as transportation, flood risks, air quality, and wildlife preservation. Our role is to guide you through the hurdles of this process, liaising with specialist consultants, if necessary, to provide expert advice. Concurrently, we collaborate with you to design a solution that meets your aspirations while satisfying the council’s requirements. After submitting the application, we work closely with planning officers to address any concerns they may have, ensuring they are confident in granting consent.

CGI of the rear elevation for planning of Ice-Cream House, Hampstead, North London

Step 5: Approval of Details Application – Finalising Key Details

When the council grants planning permission, they may include conditions that require certain key details to be finalised and approved by the planning department before construction can commence. These conditions often involve external materials to be used in the building or specific arrangements for cycle or waste storage. At our architecture studio, we take great care in every application we submit, ensuring a smooth process for the approval of these details. By meticulously addressing these requirements, we minimise unnecessary delays at this crucial stage of the project.

Step 6: Planning Appeal – Overturning Refusals

Regrettably, not every planning application receives approval from the local authority. In some cases, when the council’s decision clashes with their own policies or precedents, or when it deviates from national policy, pursuing a planning appeal may be worthwhile. Drawing upon our successful track record with planning appeals, we assess the potential for overturning the council’s refusal by the Planning Inspectorate. If we believe there is a good chance of success, we construct a thorough and clearly argued case, ensuring that your project ultimately attains the planning permission it deserves.

Aerial view for planning application of Red House, Kensal Rise, North West London

Conclusion

Planning permission is a complex and multifaceted process, and guaranteeing success is impossible. However, armed with a proven planning system and years of experience in the field, our small contemporary design-led architecture studio in London is committed to crafting low-energy and low embodied carbon designs while navigating the intricacies of the planning system.

Our unique six-step model provides a structured approach to planning applications, incorporating safeguards to maximise your chances of success. From pre-application advice to negotiating with planning officers, from outline planning to reserved matters applications, and from full planning permission to the approval of details, our team supports you every step of the way. In cases where refusal occurs, our expertise in planning appeals ensures that we advocate vigorously for your project, striving to secure the planning permission it truly deserves.

With an unwavering commitment to sustainable design, collaborative negotiation, and meticulous attention to detail, we have built a reputation for securing planning permissions for exceptional and unprecedented projects. Whether you are embarking on a residential development with sensitive planning conditions or seeking to minimise embodied carbon in your design, our architecture studio is well-equipped to guide you through the planning maze and realise your vision.

If you would like to talk through your project with the team, please do get in touch at mail@risedesignstudio.co.uk or give us a call on 020 3290 1003

RISE Design Studio Architects company reg no: 08129708 VAT no: GB158316403 © RISE Design Studio. Trading since 2011.

Mansard Roof Extensions


A feeling of lack of space within the home is a common issue nowadays. No matter the size of family or household an often-limited floorplan means there never seems to be room to grow or do the things you want to.

Home working and modern life has brought this issue of lack of space to the fore, but with house moves expensive, disruptive, and stressful, more homeowners are left asking, “How can I stay in my community, create more liveable space and a better family lifestyle?”

With limitations around side and rear extensions particularly in densely populated urban areas such as London, the option which presents itself is to extend upwards. In this article we examine how to achieve this with mansard roof extensions.


These extensions effectively add an extra floor to a property by raising the ceiling height. Throughout the years they have proved to be an affordable and aesthetically pleasing solution for homeowners, particularly those living in Victorian and Georgian terraced properties built for smaller families over a century ago.

What is a mansard roof?
Before we look at mansard roof extensions, we need to examine what a mansard roof is. Sometimes confused with a gambrel roof, a mansard roof often known has a French roof or curb roof, has two slopes on each four sides. It is less steep at the top and very steep at the sides, the top is often flat or very nearly flat.

The lower slope characteristically contains box-shaped dormer windows (a window typically set vertically into a sloping roof).

Built to the front or the rear of a property usually with natural slate, when viewed from the ground, the upper slope is rarely visible.

There are design variations and which one a client chooses will depend upon the environment in which they live and the structure of their home. The variations are:

Straight: slight slope on the upward panel portion
Convex: curved outside on its lower slope portion
Concave: curved inside on its lower slope portion, with a steep angle on the bottom

History of a mansard roof
We can trace the earliest known example of a mansard roof back to French Renaissance architect Pierre Lescot (1515-1578) who designed a double pitched mansard roof for the Lescot wing of the Louvre in 1550.

One of the most influential buildings of the Renaissance, this led to Francois Mansart (1598-1666), an accomplished architect of the French baroque popularising the design and giving the roof profile his name.

Seen as elegant, effective, and fashionable, the adoption of mansard roofs became widespread in Europe and North America following Haussmann’s renovation and rebuilding of Paris in the 1850s as instructed by Napoleon III.

Alongside the transformation of the city’s boulevards and public buildings, this saw modern apartment buildings created, characterised by mansard roofs and cream coloured limestone, such as those found to this day on Boulevard Haussmann.

His work underpinned a wider architectural movement, second empire style marked by an eclectic and decorative style which flourished between 1852 and 1871 and was widely used in large municipal and corporate buildings such as The Palais Garnier.

Mansard roofs in London
It was not until the late 18th Century that mansard roofs appeared in London and grew in popularity during the Georgian and Victorian eras due to a lack of space, replacing the traditional butterfly roof associated with terraced properties.

Named the London roof due to the prevalence within the city, the Victorian butterfly roof or a V roof is characterised by the inversion of a standard roof form, two surfaces which slope down and meet with a valley gutter in the middle. The look is of a butterfly’s wings hence the name.

The slope of this roof at 37.5 degrees allows them to accommodate a mansard roof extension building a mansard roof with a 70-degree slope, which effectively adds an extra floor to a property.

The very reasons why homeowners desired mansard roof extensions in the 18th and 19th Century exist up until this day, particularly in crowded and space-starved London as a front and rear extension allows up to 32.5sq m of generous indoor space compared to a loft conversion which may only add 23sq m.

This typically means an additional double bedroom with en-suite, or multi-functional open plan family living space. They can where practical also offer the opportunity to incorporate a roof terrace.

Compared to adding a rear or side extension this is a cost-effective way for people to maximise their living space and remain in their communities. It also in most cases adds significant value to the property.
Today mansard roof extensions are widespread across London with a desire by homeowners to ‘improve not move.’ They are particularly prevalent areas such as Fulham, Hammersmith, Kensington, Primrose Hill, Paddington, Bayswater, and Notting Hill.

At RISE Design Studio we have worked on a variety of London based projects which have seen the replacement of the traditional butterfly roof into a mansard roof extension such as our Queen’s Gate Sky home project in South Kensington.

Mansard roof extensions and roof terraces
In London as with any densely populated city private outdoor space is at a premium. As well as extra living space a mansard roof extension where feasible can give clients the option to add in an enviable external roof terrace.

They also add considerable value to a property with reports saying this can be between 10% and 30%. As with a mansard roof extension this return in investment is far greater than the outlaying costs.

Mansard roofs and planning
Due to the architectural importance of uniformed British terraces built in the 18th and 19th century, and their historical significance within London, successive Building Acts and Building Regulations governing height, windows, chimneys, and materials have meant that the design and form differs to that in France and other European countries.

In some areas such as Tower Hamlets in Bow, the design was even banned in the 1990s as local heritage officers felt it affected the look of the traditional London ‘butterfly’ roof. It was also in part because many of these historical terraces had survived the Blitz. This decision was reversed in 2017 with a view to have a more ‘permissable approach’.

Today in Bow and across London, it is almost always necessary to apply for full planning permission to construct a mansard roof. As discussed, this is due in part to historical significance as well as the structural alterations and the implication on the current roof profile.

All alterations conducted need to preserve the structure, character and appearance of a building looking at how that property fits into the wider context of the street and surrounds.

In conservation areas it can be difficult to get planning when the property sits alongside others which remain unchanged. However recent developments such as those in Primrose Hill, and across London, have seen neighbours come together so that several adjoining properties or a whole terrace applies at the same time.

This helps achieve uniformity, timeless design, and avoid the strange uneven ‘gap-tooth’ effect where some houses have extended upwards, and others have been refused.

A group application such as this can cost as little as £339 and as long as owners are informed you do not need their permission to proceed with the application. Furthermore, normally once planning is granted you have three years before it lapses so in practice as long as the person who made the application begins work in that time the other households don’t need to.

This kind of group application may be stemmed in the future due to the introduction of Community Infrastructure Levies for those applications adding more than 100 sq m (1076 sq ft) of floor space to a street. Consideration for smaller batches of group applications may need to be the way forward.

It is essential when applying for listed building consent whether individually or as a group, to hold pre-application discussions with the conservation officer within the local authority at an early stage, this helps avoid later problems and establishes a clear line of communication.

Our professional team will consult with the appropriate departments throughout the process from design through to build. We will also assist with Party Wall Agreements which are required if the work impacts on adjoining properties.

In addition, many local authorities have published residential design guides if they are in an area with a high number of mansard roof extensions. These guidance notes such as this one from City of Westminster Council will answer questions including:

– Maximum floor to ceiling height allowed – 2.3m
– Maximum pitch of the front and back walls, usually 72-degree angle – set back from existing elevation
– Which materials to use in line with the appearance of the building

The local authority planning department will inspect the renovations to ensure that all of the regulations are followed.

With considerable experience in historic building renovation, planning applications, and mansard roof extensions we guide clients through the process to put forward the strongest case for their design. Our applications are always supported with photographs and detailed architectural drawings in line with PPG15 ‘Planning and the Historic Environment’.

If you live in an area where there are no listed buildings,’ then it is easier to gain planning permission under permitted developing rights. These allow you to perform certain works without the need for planning permission and the Local Authority will have that information. Again, we can help to guide you through this process.

How much does a mansard roof extension cost?
There is a considerable amount of structural work involved in adding a mansard roof extension to a property. It is for this reason that they are not cheap.

In London for example costs would range dependent on the building and quality of installation, from £40,000 on average to £70,000 and over.

However, what must be considered is the financial value that they bring to a home in adding what is in essence a whole extra floor. A property which costs approx. £1000 per sq ft, can increase roughly by £100,000 when a front and rear mansard roof extension is added.

As well as that, putting in an additional floor and going from three to four floors for example, will still work out to be considerably cheaper than a house moves. Relocating from say a £1.2million home to something further up the scale which may not even be in the same area could set you back £80,000 in Stamp Duty alone.

Advantages and disadvantages of Mansard roofs
As with any significant alteration to a home, it is important to consider upfront the advantages and disadvantages that a mansard roof extension presents.

Here at RISE Design Studio, we always advise our clients thoroughly and present them with the most appropriate and sensible solution for their property, environment, budget, and needs.

As well as being aesthetically pleasing, the primary advantage of constructing a mansard roof extension is that it increases the volume of the interior of a property thereby creating additional space and functionality.

The almost vertical bottom slope achieves this. The use of dormer windows along this slope also ensures that the space benefits from ventilation and plentiful natural light further adding to a sense of space.

Extending upwards means that homeowners retain their garden space. In addition, the space created can often be more significant and cost-effective than a rear or basement extension and offer a more discreet design.

Whilst popular amongst terraced properties, they are also suitable for most homes where the finish can match an existing building style.

The disadvantages are that you are creating an entire new roof, which is a significant and often costly undertaking and, in most cases, full planning permission is required, which can be stringent particularly in conservation areas. However, our team will help advise on local authority regulations.

In today’s congested urban environment with tightly packed housing well-designed mansard roof extensions present numerous benefits.

Not only do they solve immediate problems modern households have by creating contemporary liveable space, adding value, and ensuring families remain in their communities, but in a wider sense as evidenced by Dr Samuel Hughes proposal ‘Living Tradition’, adding to and adapting these historic properties can improve housing supply and regenerate neighbourhoods and local areas.

Furthermore, in environmental terms, they do not encroach on green spaces, have a lower carbon footprint as a new building is not being constructed and if done correctly have little impact on the skyline.

Why employ an architect to design your mansard roof extension?
There are many specialist builders who work on loft conversions and mansard roof extensions, an architect however brings with them an independent design approach to help you achieve your specific and bespoke brief, as opposed to a firm’s in-house designer who may have a more generalistic ‘cookie cutter’ approach based around reducing costings.

They see the bigger picture
Rather than a generic one-size fits all design based around saving money and time, a reputable and experienced architect will work collaboratively with you to understand your vision. They will look at your property holistically to create a well-thought-out design that meets your needs, budget, and your overall aesthetic.

Working alongside you they will give your home much-needed bespoke space, maximising the potential of your property and adding value to it whilst enhancing your lifestyle.

They can also present different spatial options that you may have not considered, suggest new technologies in terms of energy efficient heating and lighting, allowing you to reach your desired outcome and get the most from the space in ways you may not have considered.

They are up to date on planning and legislation
Architects are well-versed in current planning and legislation, and usually have established relationships with local authorities, conservation departments, and planning.

Planning applications, and permissions can seem daunting, and an experienced architect can help to navigate these and any challenges, with professional guidance and advice, ensuring a smoother process which is timely and a lot less stressful.

• They use innovative technology to bring your vision to life
Architects such as ourselves at RISE Design Studio use the latest in technology such as Virtual Reality (VR) to help you to experience and visualise your design in superb detail before construction even begins.

Not only does this ensure that you get the design you want but it helps to avoid any issues with contractors and specialists as the build progresses because every little detail has been taken into account in advance.

• They can act as a contract administrator
If you employ a specialist company to carry out your mansard roof extension there is no-one overseeing the work apart from the company themselves, they are carrying out the work and project managing it.
An architect can act independently with your interests at heart to oversee the work and ensure the quality is as expected in both build and finish, and nothing is rushed through.

At RISE Design Studio we have considerable experience in mansard roof extensions and roof terraces. For more information and to discuss your project contact us at mail@risedesignstudio.co.uk or give us a call on 020 3290 1003.

RISE Design Studio Architects company reg no: 08129708 VAT no: GB158316403 © RISE Design Studio. Trading since 2011.

RIBA Plan of Work 2020

RISE-Design-Studio-Burrows-Road-Glazed-Envelope Architects like most professions welcome industry led guidelines and approaches to inform and improve their work both for their clients, collaborators, and their own progression. The RIBA Plan of Work 2020 is a guidance document set out by the Royal Institute of British Architects (RIBA) and is seen as the definitive design and process management tool for the UK construction industry. First established in 1963 to provide a framework for architects to use on client projects to bring greater clarity to each stage of the process, it has evolved over the years to become an industry wide tool. To reflect the changing approaches to building design, construction and use, and the associated advances in digital technology, increased ethics awareness, and the prioritisation of sustainable outcomes in line with the RIBA 2030 Climate Challenge, it received its biggest overhaul in 2020. In this article we examine the eight stages of the RIBA Plan of Work 2020. We look at how this formal roadmap, whilst not a contractual document provides vital guidance and helps to deliver successful outcomes for stakeholders by informing the briefing, design, construction, handover, and use of a building. Each of the eight key stages has an expected outcome; core tasks; core statutory processes in relation to planning and building processes; and crucial information exchanges, all of which impact the success of the next stage. RIBA-plan-of-work-2020-RISE-Design-Studio Stage Zero – Strategic Definition ‘What do you want to achieve from your building project, and what are your best options?’ This stage is not about design or practical details, but rather a chance for us to get to know the client, developing their requirements and helping shape the business case to achieve them. At this stage all those involved in the client team, alongside ourselves and any other professional advisors must consider that the proposed building project is the appropriate means to meet the client’s stated objectives, and then determine the best way forward. For example, perhaps a new building is not the answer, and the solution could be refurbishment or an extension. To come to a decision, information is gathered for each option. This involves examining previous similar projects, the current building if applicable, analysis of project risk (where appropriate site appraisals and surveys carried out), and consideration of project budgets. We will look at the size, location, scope, and special considerations around the clients’ needs to further refine the vision. From this exercise a recommendation is made on the best option, and a business case is completed. RISE-Design-Studio-Cecilia-Road Stage One – Preparation and Briefing ‘Developing the initial project brief and setting out the timescales – the official start of the project’ Once it has been determined that the chosen project and site is the best way forward, stage one, is the process of preparing a comprehensive project brief and choosing the collaborative project team, allocating specific roles and responsibilities. The project team will include:

Design team – headed up by Lead Designer and overseeing the design programme – Client team – headed up by Project Manager and overseeing the project programme – Construction team – headed up by Project Director and overseeing the construction programme

Feasibility studies and site surveys may be required at this stage to test the brief against the chosen site and budget i.e. are there any access issues? Is it a sloping site? What is the spatial overview and relationships with neighbouring buildings? This is often the time for us to discuss options regarding the site with the local planning authority and make sure there are no constraints. We like to establish clear and positive communication with these departments from the outset. Discussions around building regulations and other legal requirements should happen at this stage including whether the site is within a listed buildings or conservation area It is at this point that objectives are finalised and recorded under:

– Project Outcomes – Sustainability Outcomes – Quality Aspirations – Spatial Requirements

Working with the client, we will at the end of this stage, produce a timescale for the project as well as a project execution plan setting out delivery. RISE-Design-Studio-Casa-Plywood Stage Two – Concept Design ‘The design stages begin and the architectural concept is defined ‘ Stage two begins the core design process which culminates at stage four. We work closely at this stage with the client to produce visualisations, 3D models, and drawings of the architectural concept, ensuring it meets their needs and is aligned to the project brief and cost plan. As well as a visual representation of the building with sections and elevations and how it sits within the surrounding environment, these will often include:

– Interior and exterior renders – Landscaping – Specific requests – Strategic engineering requirements

There is as the RIBA states ‘no right or wrong approach’ at this point, it is our initial design response to the brief and will involve regular meetings, discussions and reviews with the client and specialist stakeholders including planners and those across structural and civil engineering, to shape and define it. The robust architectural concept along with the project brief and cost plan are signed off at the end of this stage. RISE-Design-Studio-Douglas-House Stage Three – Spatial Co-ordination ‘The co-ordinated design takes form.’ Formerly the developed design stage, here our team draw up the client approved design in CAD or ever increasingly with BIM, and develop and test it alongside detailed structural design, outline specifications, building services and cost analysis to ensure its viability. Our design will incorporate the practical elements relating to:

– Window, door, stairway, and fire exit locations – Fixtures, fittings – Proposed materials – Load bearing mechanical information – Mechanical, plumbing, and electrical considerations – Tech and security – Green, eco and solar

During this stage, or certainly at the end the design is finalised into a single model, not prone to change, and planning applications are ready for submission incorporating all our detailed drawings and reports. RIBA Plan of Work RISE Design Studio Stage Four – Technical Design ‘Final design stage before construction begins’ We make further refinements of the existing design at this stage, incorporating where relevant detail from specialist sub-contractors such as lighting specialists, kitchen designers or glazing companies. From this our Lead Architect prepares comprehensive drawings, specifications, and documents for tender. The level of detail will depend on the size and scope of the project but by the end of this stage all elements will be prescriptive rather than descriptive for the project to be manufactured and built, i.e., they set out detailed descriptions around the following:

– Requirements relating to regulations and standards – The specific types of products and materials required – The methods of delivery and installation – The building systems in place i.e., flooring, partitions, mechanical and structural

At the end of this stage all information required to construct the project is completed and we send out the tender to 3-4 contractors we have worked with before. Of course, should the client want to add to the list we will do so. RISE-Design-Studio-Doulgas-House2 (1) Stage Five – Manufacturing and Construction ‘All systems go…construction begins’ The design process is now complete and the appointed contractor takes possession of the site to carry out works as per the schedule of works and building contract. This includes manufacturing off-site and construction on-site. Stage four and stage five can overlap or run concurrently dependent on the size and scope of the project, or when the contractor was appointed. The client can choose to appoint us as the contract administrator at this point should they wish. In this role we act as the middle ground between the client and the contractor to ensure that all works are being done in accordance with finalised drawings and specifications. This can entail:

– Chairing construction progress meetings – Preparing and issuing construction progress reports – Co-ordinating site inspections – Dealing with site queries – Agree reporting procedures for defects – Issuing project documentation to the client – Issuing certificates of completion

If appointed, we like to meet weekly with the client and the relevant parties to ensure that everything is running smoothly. The appointment of Building control by the client should take place, to oversee the project and ensure that all is in order in relation to the necessary construction standards. Health and Safety inspectors will review and observe the site at this stage, so it is worth considering an independent consultant to ensure that all the correct procedures are followed. RISE-Design-Studio-The-Bunker Stage Six – Handover ‘The completed building is finished and handed over’ After practical completion, the building is ready for hand over to the client, and the building contract concludes. Feedback and building aftercare exercises take place during this stage to act as future learnings for ourselves, the client, contractor, and consultants, and to address any issues relating to the integrity of the building. These involve light touch post occupancy evaluation and snagging processes, whereby the client compiles a list of defects or incomplete works, overseen by us as the contracts administrator and presented to the contractor to rectify. They then have an agreed Defect Liability Period, usually six to twelve months to address these, after which if all has been made good, building control will sign off the construction and we will sign off the project as a whole. We then issue a final certificate, and this stage is complete. RISE-Design-Studio-Burrows-Road-Glazed-Envelope2 Stage Seven – Use ‘The vision for the building is realised and it is now in use’ This stage starts concurrently with stage six. The building is now occupied and in use. On most projects, our design team will have no duties to fulfil here. However, the incorporation of this stage into the RIBA Plan of Work 2020 gives the client the opportunity to get in touch with us if they require general advice relating to maintenance, energy consumption or management of the facilities. We welcome this communication as we love to hear how the client is finding their new building, and it also allows for effective aftercare, valuable feedback, and building monitoring especially around energy consumption, and is therefore key to the sustainability strategy. The addition of this feedback stage has made the Plan of Work cyclical as it unites the entire process into one, allowing for proper use of the building and then when demands change, and the building reaches an end of life where refurbishment or a new building may be needed, stage zero starts again. Embarking on a design and build project can often be a complex one for all involved, for a client it can be daunting. The RIBA Plan of Work 2020 offers all stakeholders a clear approach to map out the journey collaboratively from vision, through to design, construction and eventual use. At RISE Design Studios, we find that this straightforward process with realistic and measurable targets, the ability to review progress and a provision for valuable learnings allows for enhanced clarity, greater realisation of vision, and successful outcomes no matter the diversity of projects. For more information on the RIBA Plan of Work 2020 visit RIBA Plan of Work (architecture.com) If you would like to talk through your project with the team, please do get in touch at mail@risedesignstudio.co.uk or give us a call on 020 3290 1003.

RISE Design Studio Architects company reg no: 08129708 VAT no: GB158316403 © RISE Design Studio. Trading since 2011.

What is green infrastructure?


Our green spaces are under increasing pressure as the climate and population change. There is a continued demand for housing and, as a result, there has been a tendency to replace green areas in towns and cities with bricks and tarmac, particularly on driveways and in gardens. When it rains, increasingly heavy rainstorms land on smaller areas of permeable or well-drained ground, making roads and homes more prone to flooding than previously. ‘Green infrastructure’ is a term used to describe all of the green spaces in and around towns and cities. This might include parks, private gardens, agricultural fields, hedges, trees, woodland, rivers and ponds. In this post, we explain the concept in a little more detail and share some examples of green infrastructure projects in London.

green-infrastructure

Development of the term

‘Green infrastructure’ is a description of what the land is, but it also describes what the land does. The term reflects a growth in understanding of the various benefits that are to be gained from providing and maintaining healthy green spaces: reducing flood risk; improving psychological health and well-being; boosting local economic regeneration, and providing a habitat for wildlife. Rather than valuing green spaces for a specific use (e.g. a football field for recreational purposes), green infrastructure recognises that green space can provide a variety of functions, often at the same time.

Green infrastructure in England

The National Planning Policy Framework (NPPF) defines green infrastructure as “a network of multi-functional green space, urban and rural, which is capable of delivering a wide range of environmental and quality of life benefits for local communities”. The NPPF places the responsibility with local authorities to plan strategic green infrastructure networks, particularly to reduce the risks associated with climate change. Places where there is limited access to green space is also prioritised, as is the inclusion of green infrastructure in major development and regeneration schemes.

Green infrastructure in London

The All London Green Grid (ALGG) promotes green infrastructure across London. While London is already a very green city, with an existing park and green space network that functions well for recreational purposes, there is growing recognition of the need to plan, design and manage green spaces to provide additional benefits. Similarly, the London Infrastructure Plan 2050 emphasises that green infrastructure is as important for the city as other infrastructure such as roads and railway lines.

Recent green infrastructure projects in north and west London include the London Wildlife Trust’s new 11 hectare nature reserve, Woodberry Wetlands in Stoke Newington, which opened to the public earlier this year, and a new interactive map that allows you to explore the ‘Wild West End‘ of the capital. The aim of this project is to create a network of green spaces and green roofs between the major parks in the West End of London.

To learn more about green infrastructure and other local and national projects, visit the Green Infrastructure Partnership website.

L-shaped dormer explained


Converting your loft can be good value for money when improving your home and increasing your living space. An L-shaped dormer loft conversion can be a good option for creating more room at the top of your home. Popular on period, terraced properties, this type of loft conversion creates a lot of space, usually adding at least a couple of rooms to your property. In this post, we give you a bit more information about what is involved in this type of conversion.

RISE Design Studio L-shaped Dormer

What does ‘dormer’ mean?

A ‘dormer’ loft conversion is a structural extension that projects vertically from the plane of a sloping roof. An L-shaped dormer typically involves constructing two dormers – one sits on the main body of the house and the other then extends out over the rear addition of the property. The dormers meet to create the ‘L’ shape. This type of conversion is most suited to Victorian and Edwardian properties that tend to have the kitchen and bathroom at the rear. An advantage of the L-shaped conversion is that you are able to replicate your first floor in terms of space and design.

Planning

Under Permitted Development Rights (introduced in 2008 by the Department of Communities and Local Government), you typically do not need to have planning permission to build a loft extension on a house if the extension is adding less than 50 cubic metres of new space to the property (and less than 40 cubic metres if the house is a terrace). However, there are some cases when you will need planning permission and it is wise to double check the requirements with your local authority before starting your project. For example, you will need planning permission if the side of your house with the conversion faces the road or if your house is in a designated area (e.g. conservation area, Area of Outstanding Natural Beauty, etc.). The conversion will still need Building Regulations approval and it is worth having an approved design before you start work.

Design and construction

On first glance, L-shaped dormers appear to have a flat roof. Instead, they tend to be built with a 1:50 fall to the side to ensure that water does not pool on the roof of the loft. To make the extension look less ‘top-heavy’, it is common to step the sides of the dormer slightly and create a small border around the edge of the structure, blending in with the existing slope of the roof. There are several other technical considerations to take into account during design and construction. For example, you will need to consider fire precautions and escape windows, ventilation measures (especially if the extension includes a bathroom or shower room), thermal and sound insulation of the new structure, and how you are going to supply electrics and heat to the new space. Investing in a good design will ensure that your extension adds to the ‘look and feel’ of the original property, rather than detracting from it.